Accessing VPN on a Mobile Device to remote into another computer
Remoting into a server or other campus computer requires the use of a VPN. This tutorial will explain how to get access to the Stony Brook VPN for your mobile devices and then how to remote into a computer from your mobile device. Don't forget to disconnect from both the VPN and remote desktop connection when finished.
Getting Access to the VPN, Duo, and the Server or Machine
- Request access to use the VPN by submitting a service ticket.
- Since the VPN requires 2-step login, you will also be granted access to Duo Security and given special instructions on how to enroll devices.
- New Duo Security users will receive an email explaining how to enroll their devices with a special link to enroll their first device.
- Keep your device handy everytime you want to log into the VPN.
- Be sure to enroll at least 2 devices (for example, mobile and landline or mobile and tablet).
- Enroll subsequent devices or change the default device in the Duo Self-Service Portal.
- Ensure that you have access to the computer or server by contacting the owner or administrator of the system.
- They will need to add you as a user of the system and make sure the firewall allows for remote access.
- Ask for the IP address or full computer name. You will need this information when setting up the remote desktop app.
- Once you have received confirmation that you've been granted access to the VPN and you have enrolled devices into Duo Security, you can download and install the VPN and Remote Desktop apps (instructions below).
- When you sign in to download the VPN app, you'll be prompted each time to approve the login on your default Duo-enrolled device.
Downloading the Stony Brook VPN for Mobile Devices
- Once you have received access to VPN and Duo, on your phone or tablet go to your device's app store and download the Palo Alto Global Protect app:
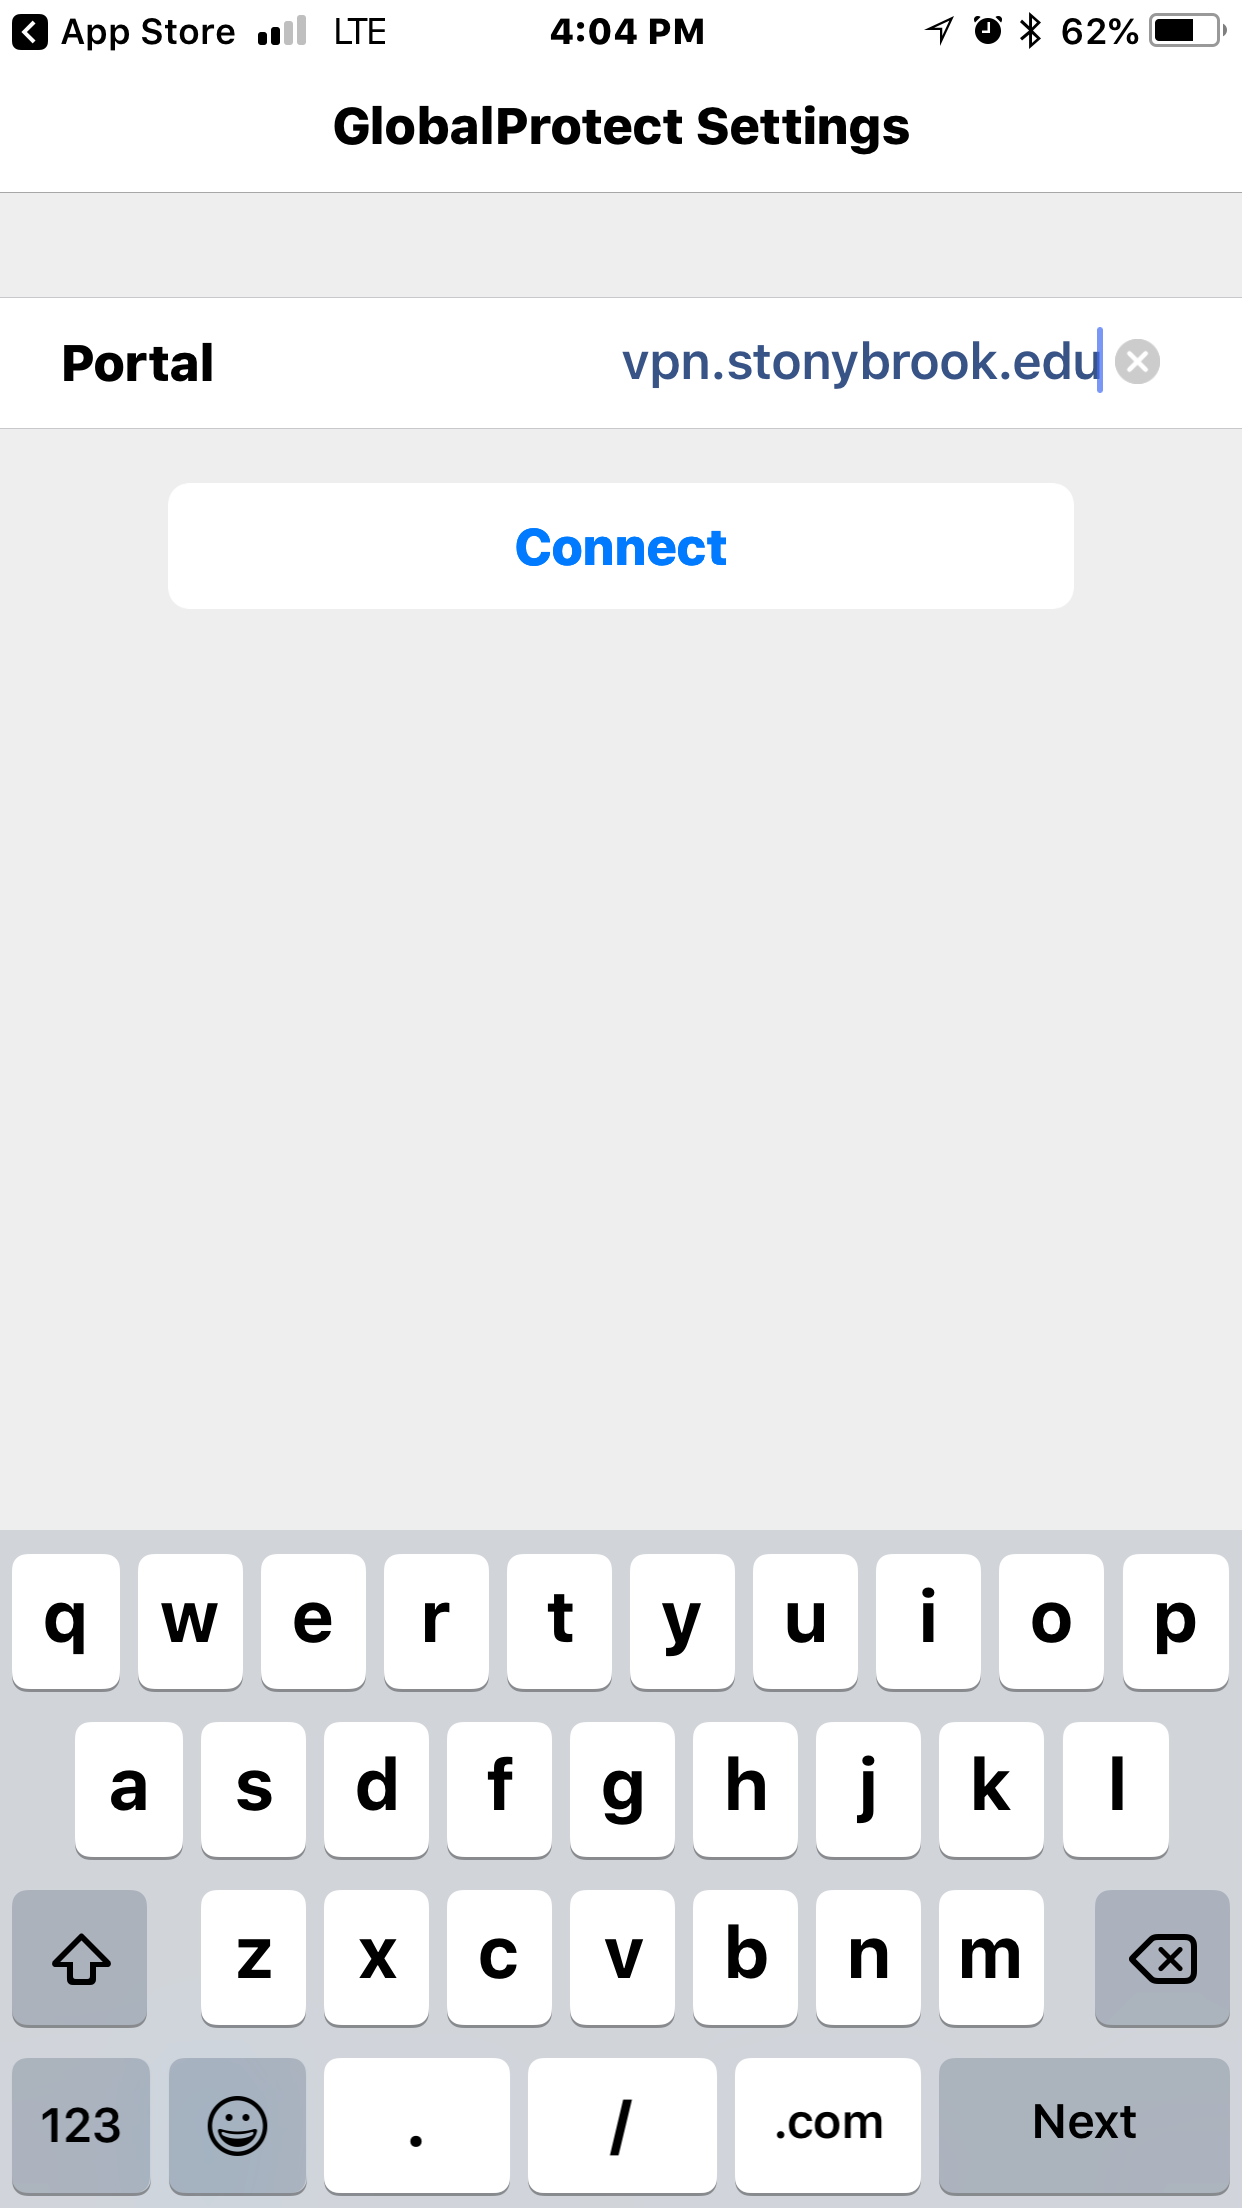
- Once the app is downloaded, tap it to begin. Enter vpn.stonybrook.edu and then tap Connect.
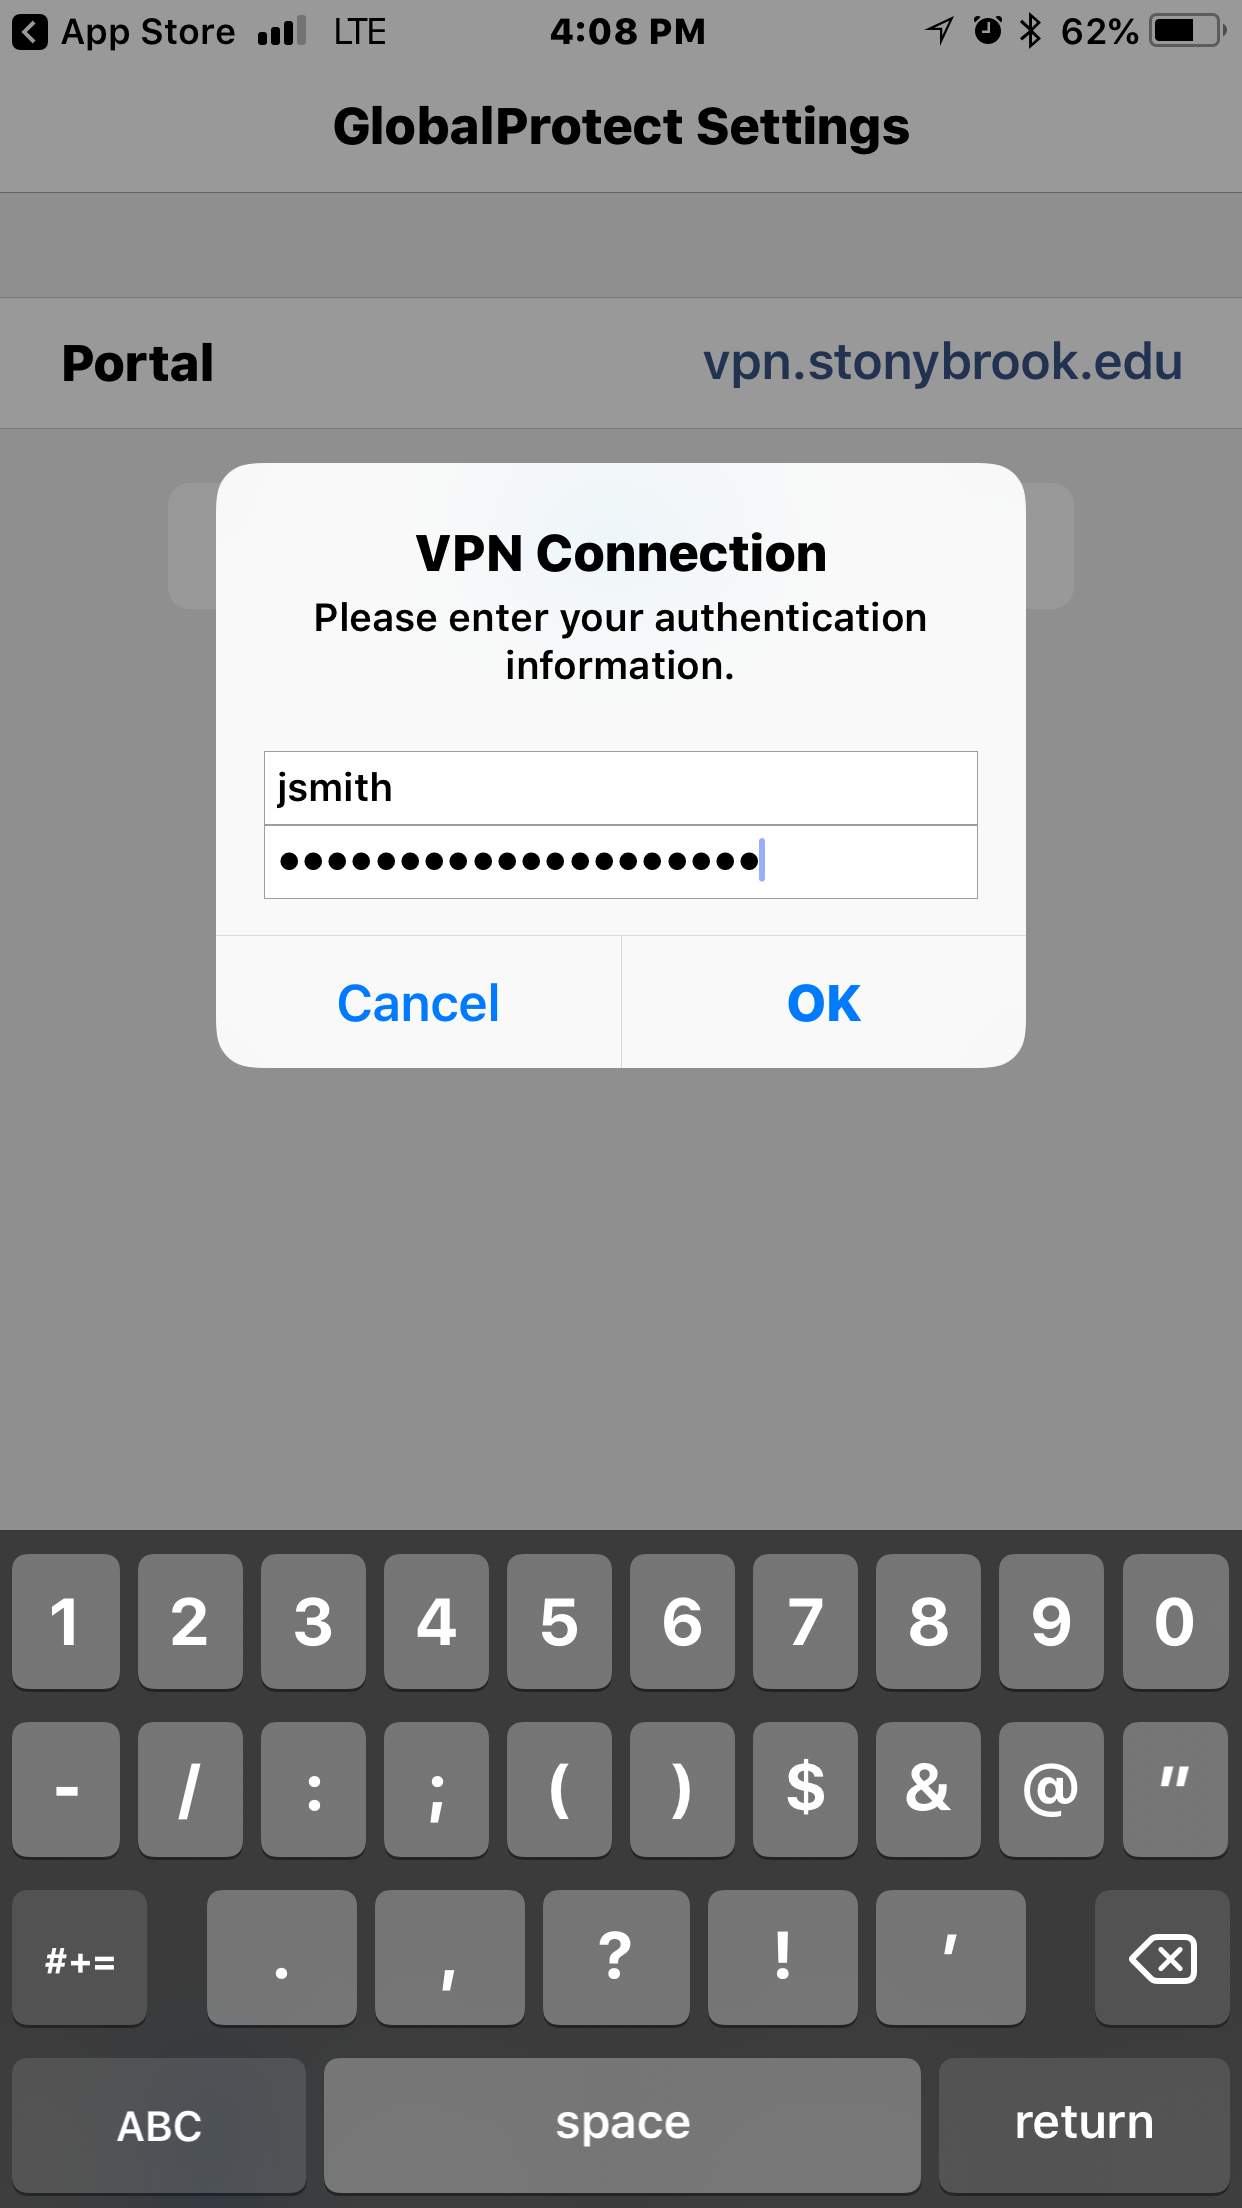
- Next, enter in your NetID and NetID password. Tap OK.
- Since connection to the VPN requires 2-step login, check your default device that is registered with DUO Security to approve authentication into the VPN.
If your default device is, in fact, the device you are setting up the mobile VPN on, you'll see the SMS notification: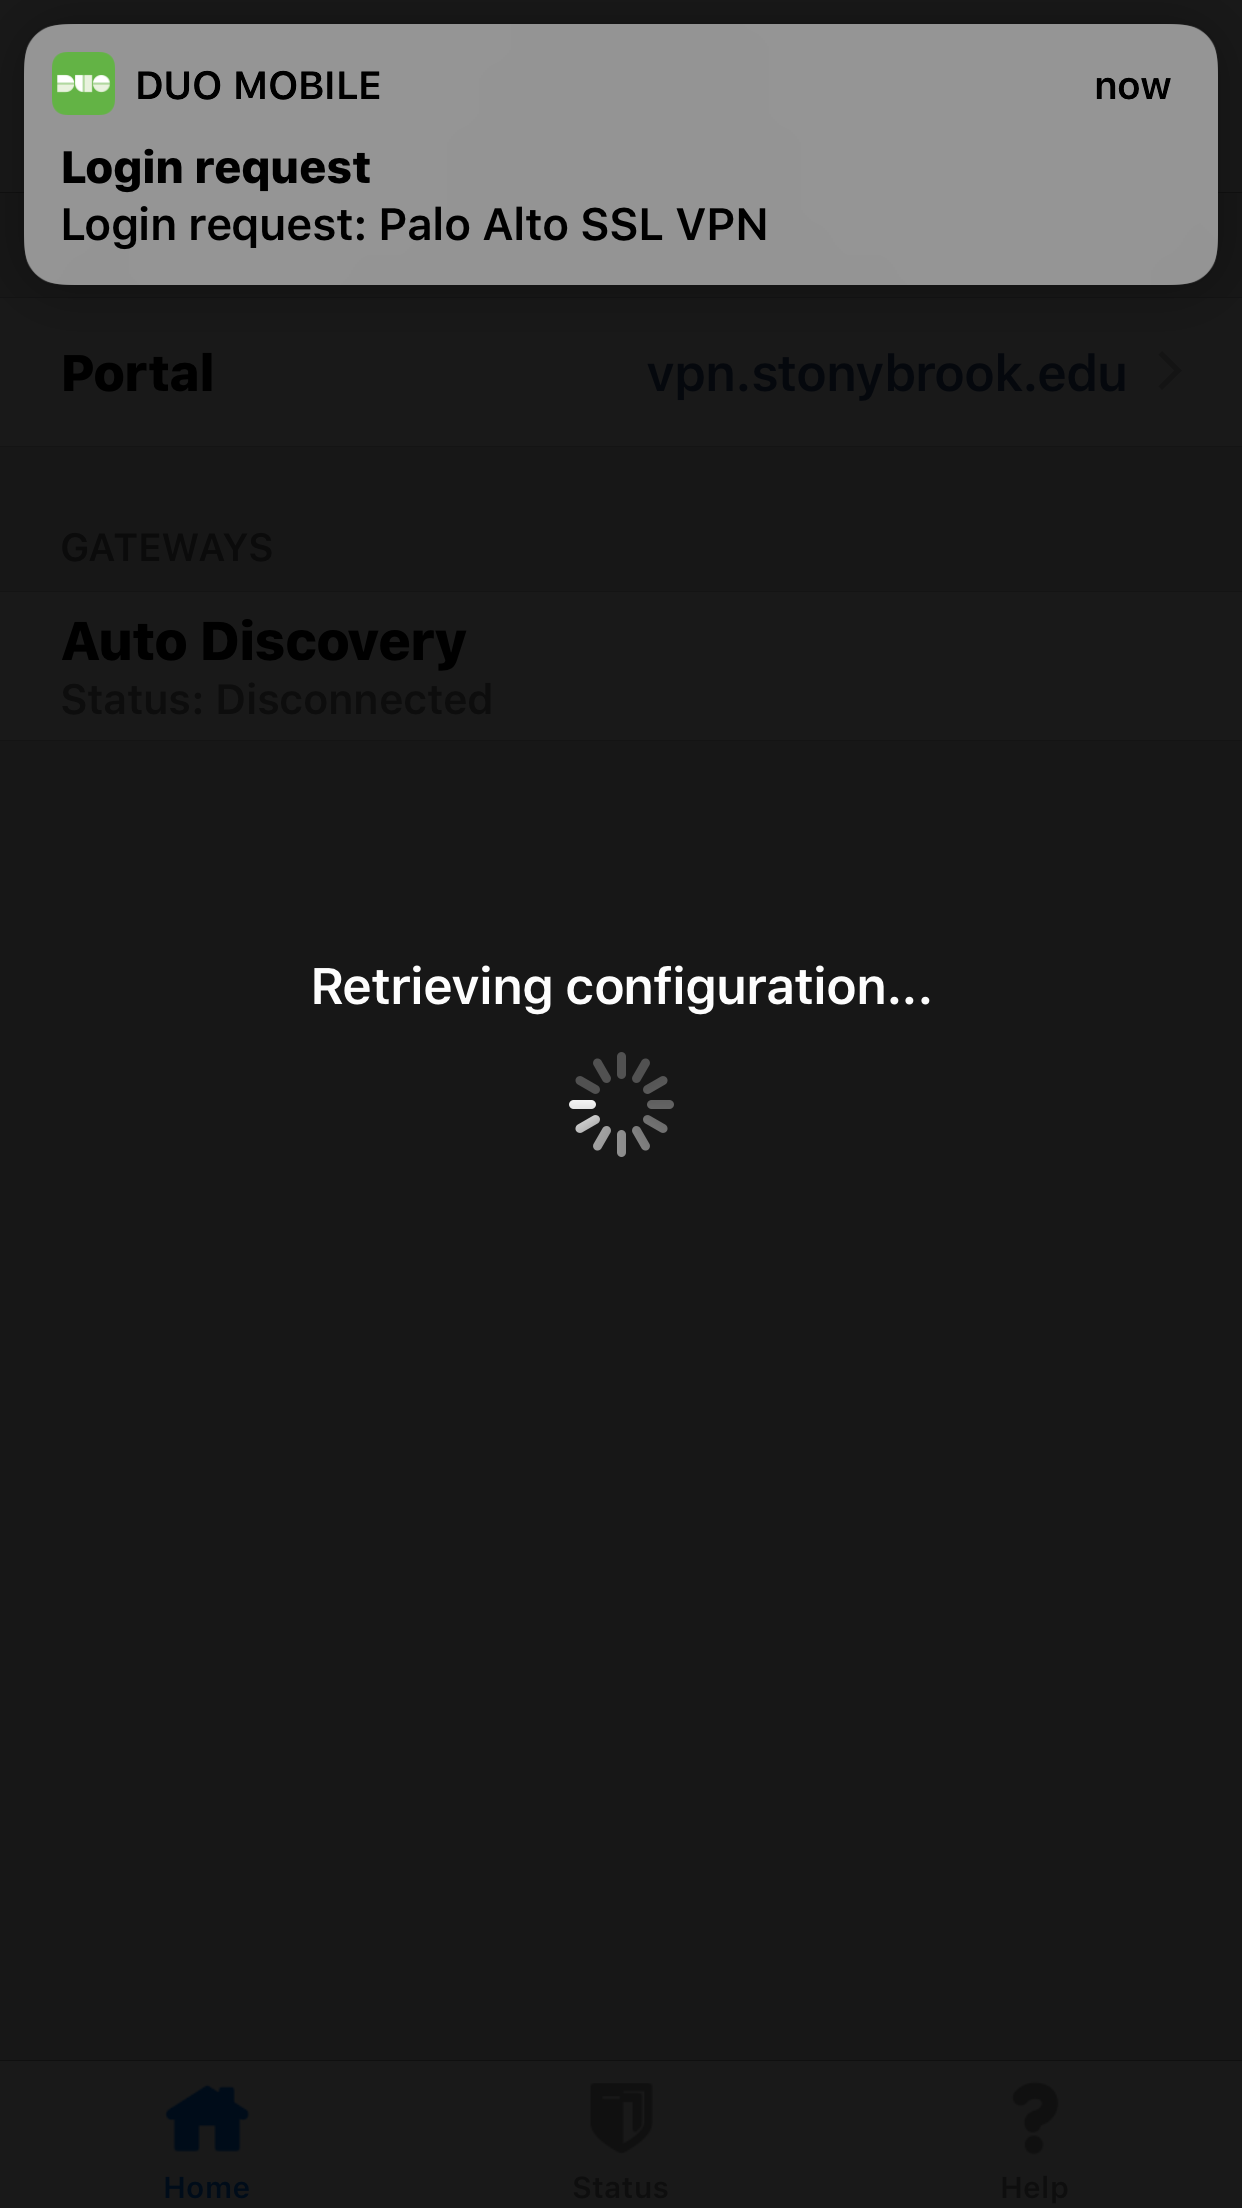
Tap the notification to open the Approve screen and then approve the request by tapping Approve: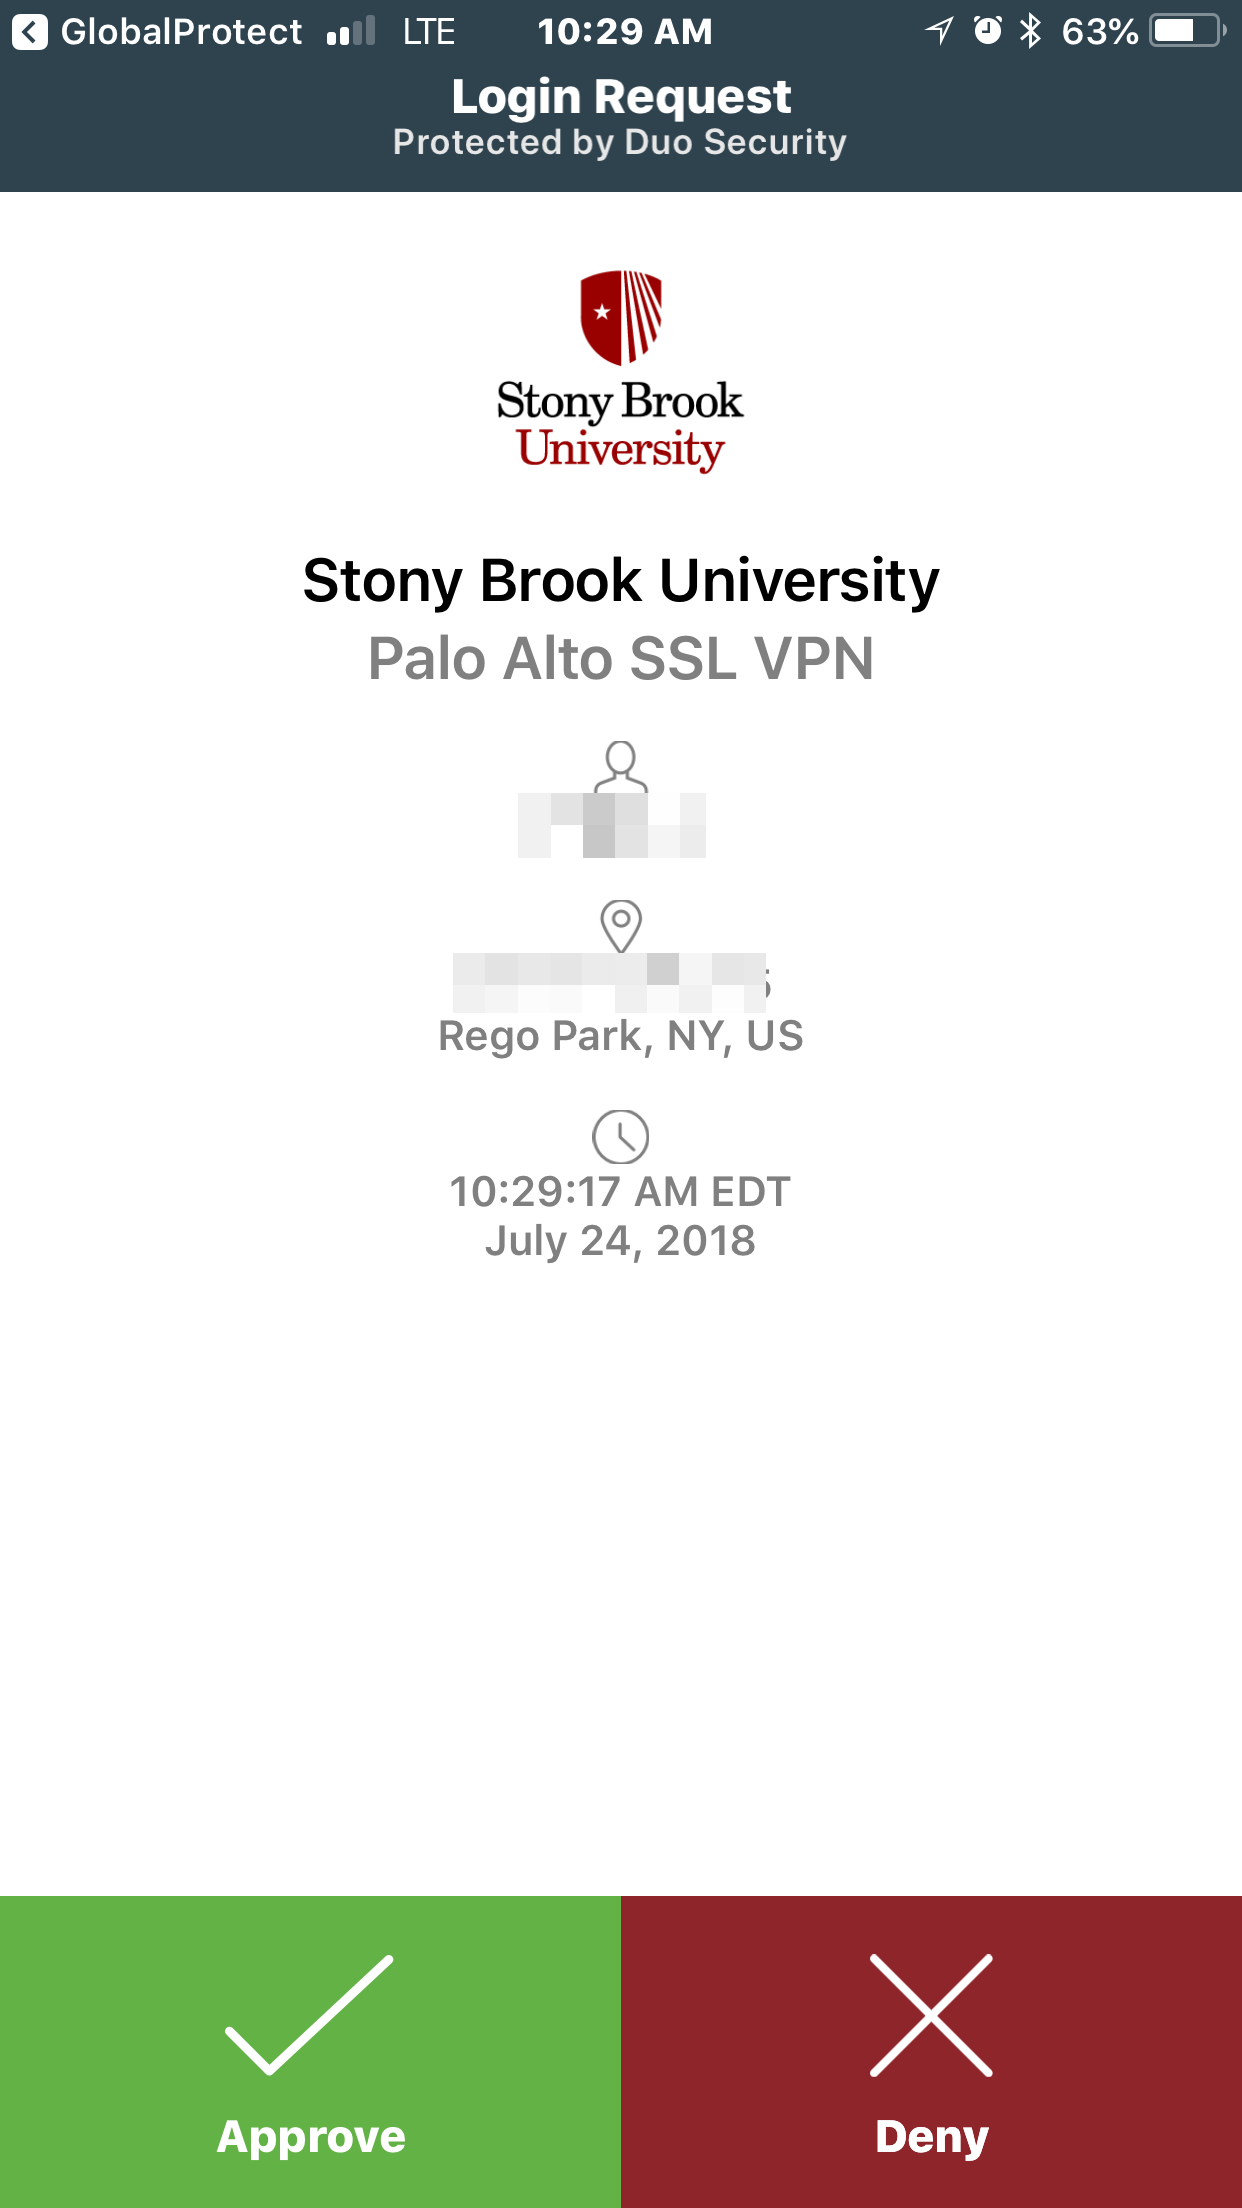
If you've set up to authenticate by receiving a phone call, have that phone handy, pick up when it rings and press any key on the number pad to complete authentication. - You are connected to the VPN if you see "VPN" at the top of your device's screen and if you open the Global Protect app it will say "Connected".

- Now that your mobile device is connected to the VPN, you can access any system that requires VPN access. For subsequent access, as long as the Global Protect app is still installed on the device follow steps 2 to 5.
Remoting into a Computer or Server from your Mobile Device
Once you have successfully logged into the VPN, you may use a mobile remote desktop app to log into a computer or server from your mobile device. The instructions below use Microsoft's Remote Desktop app.
* Please ensure that you are added as a user that may log into the computer or server by whoever owns the machine. Otherwise, you will not be able to get remote access.
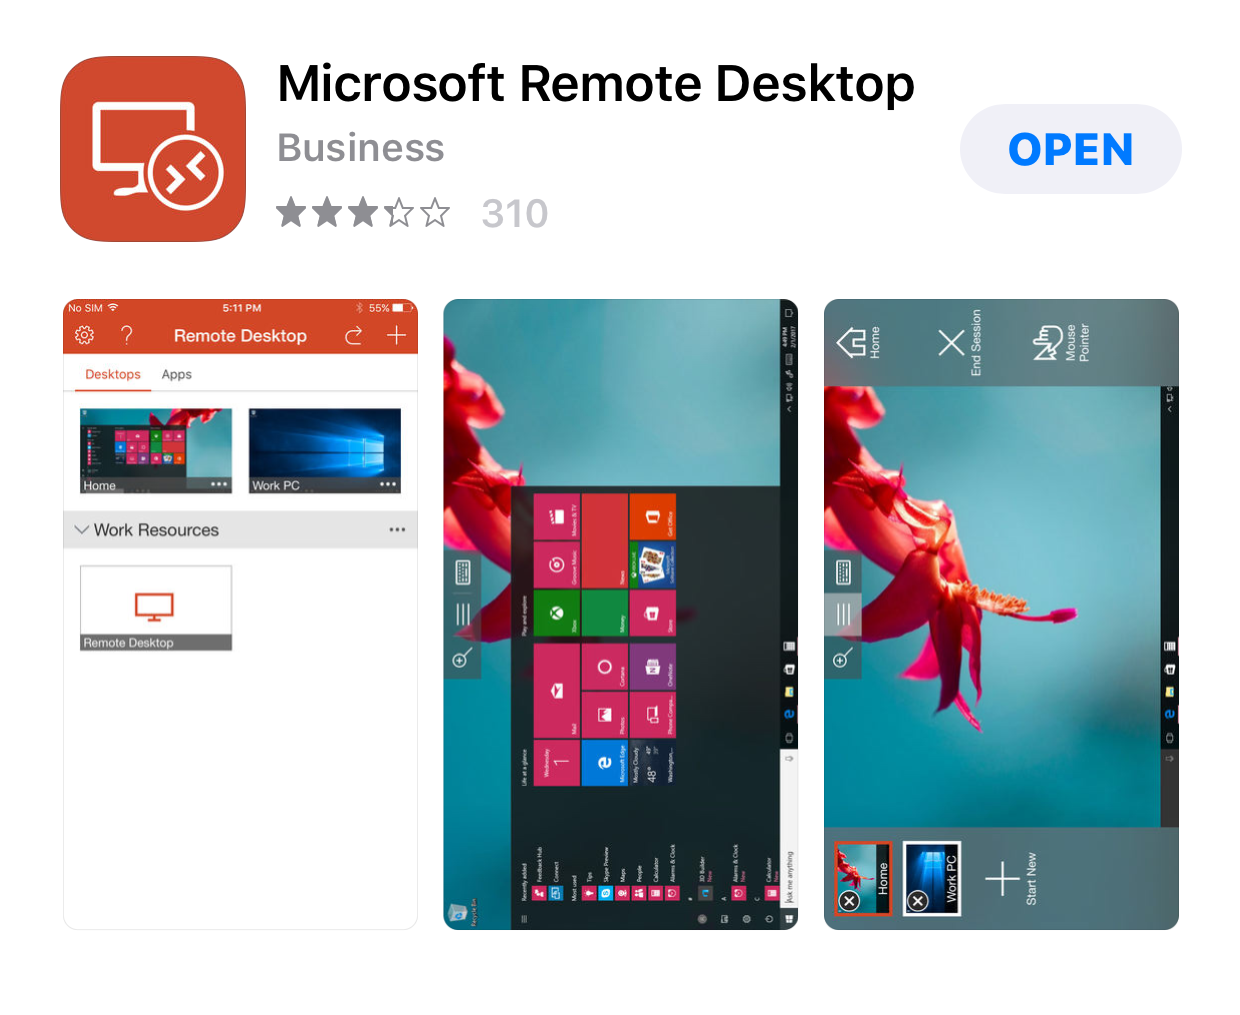
- To get Microsoft's Remote Desktop app on your phone or tablet, go to your device's app store to download it:
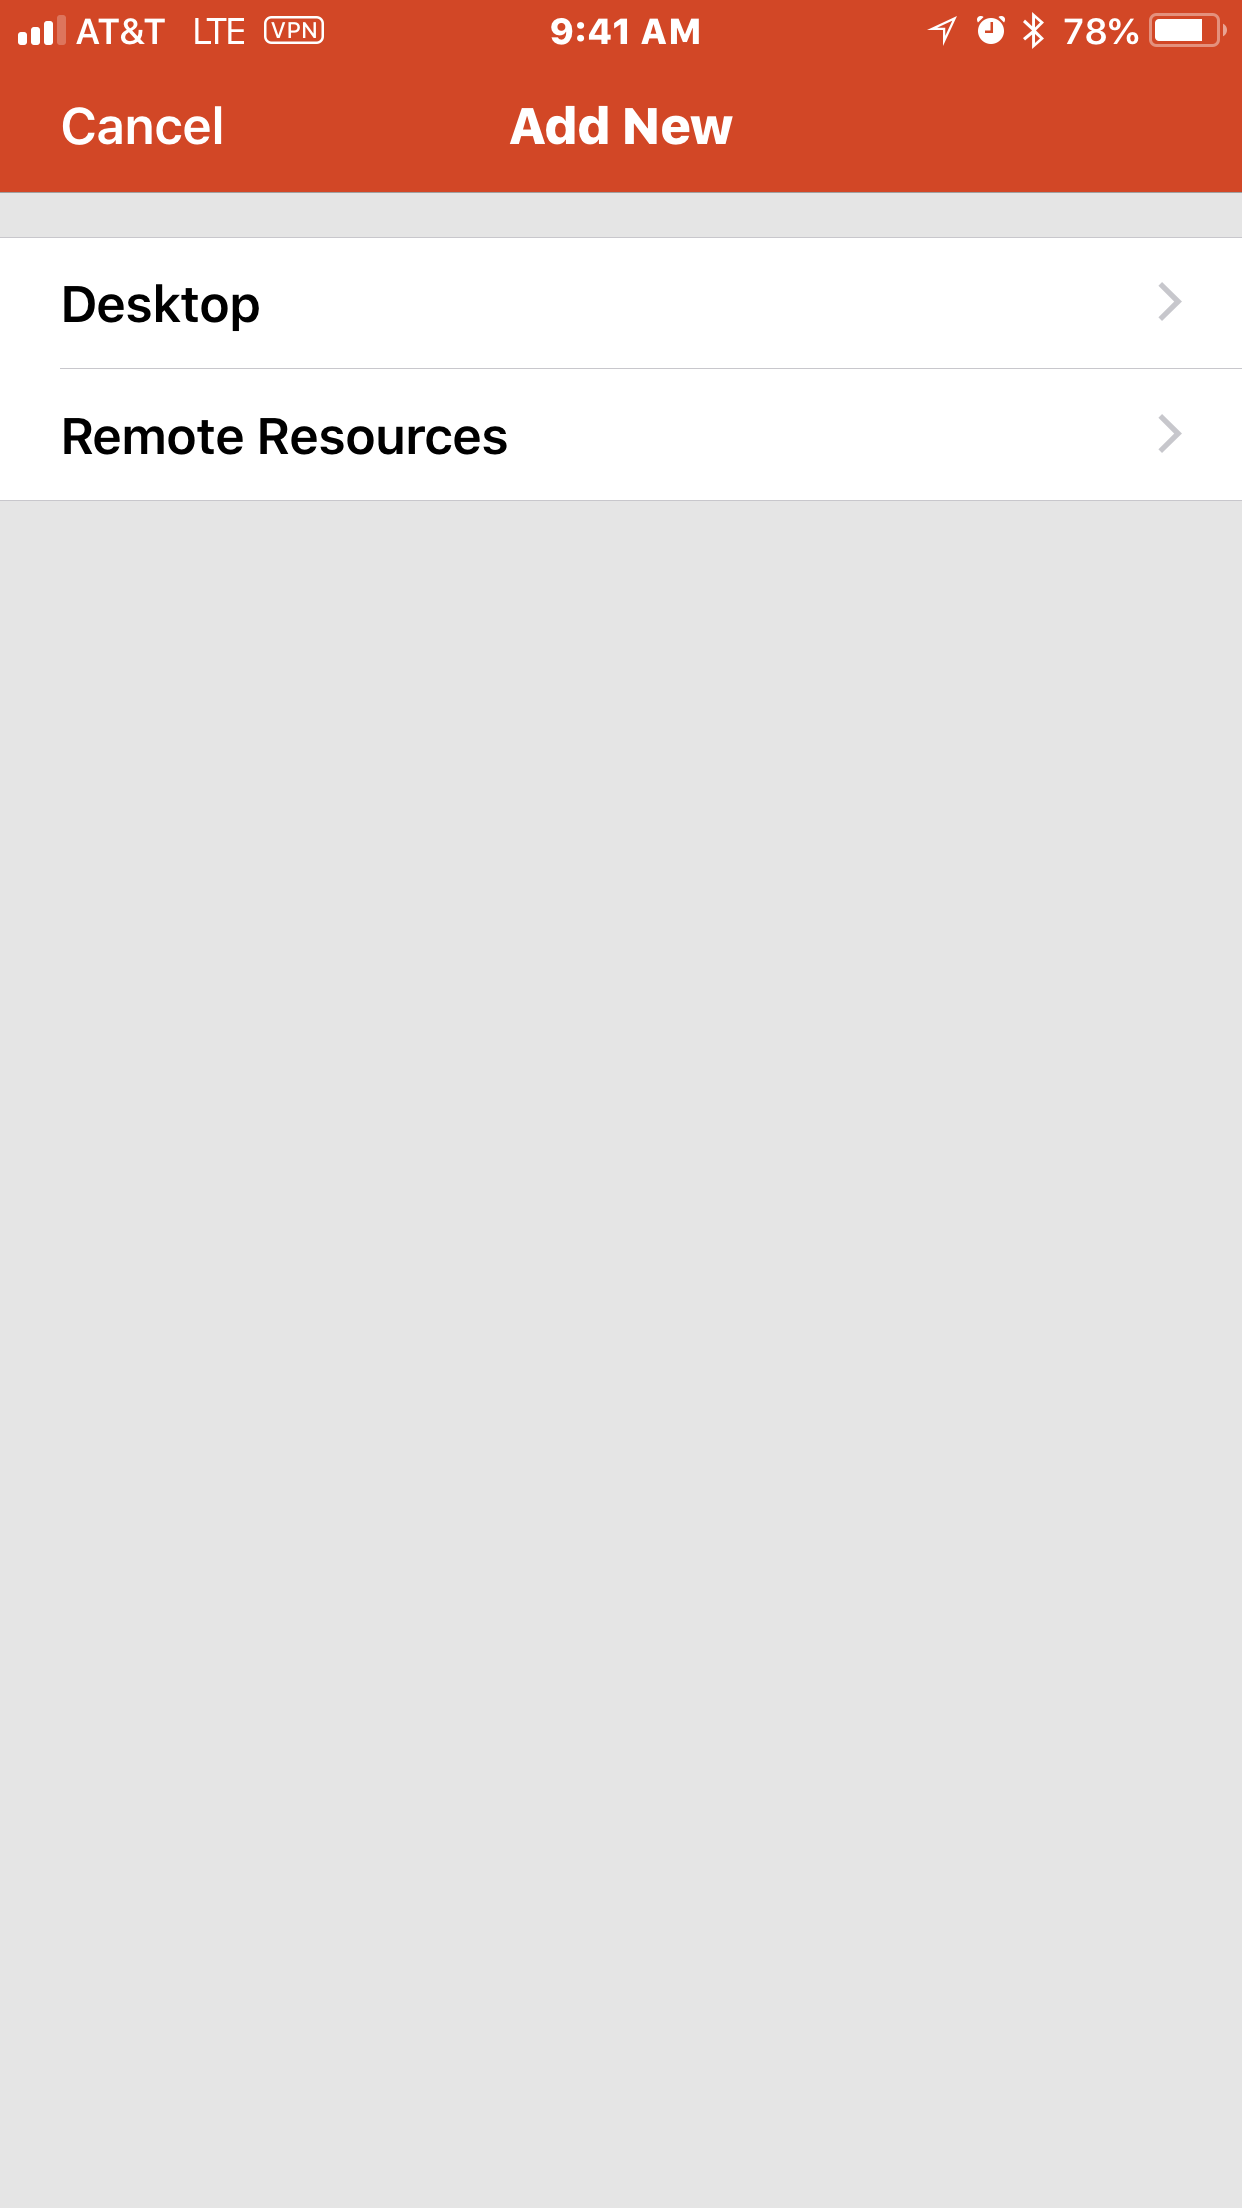
- Once the app is installed, tap the + to specify the machine which you want to connect.

- Tap Desktop:
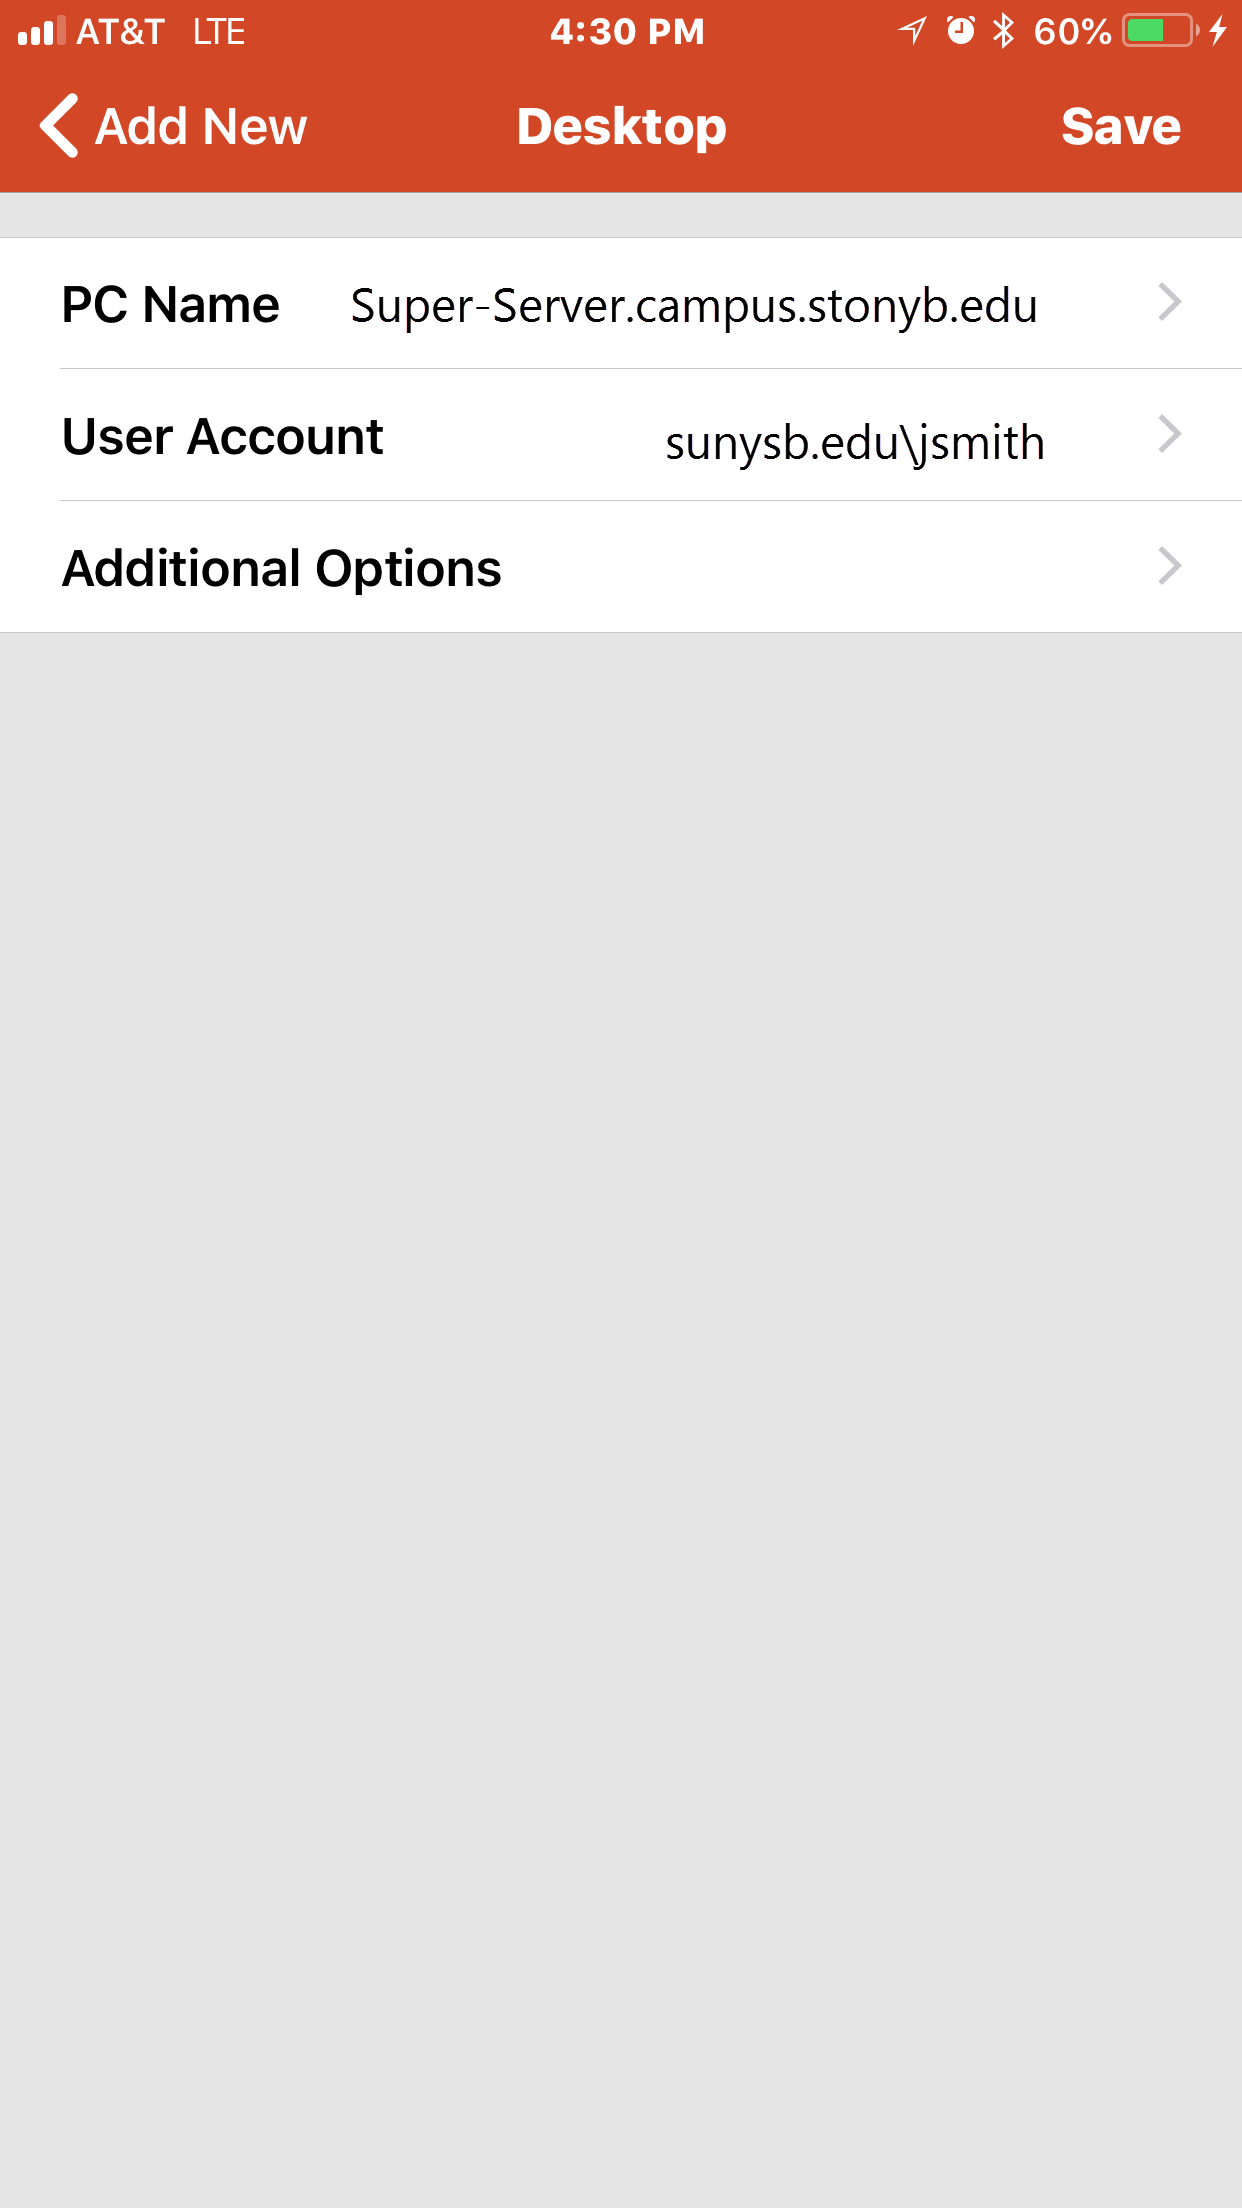
- Enter the following information in the fields below
- Tap PC Name to Enter the IP address
- Tap User Account and then Add User Account to Enter your domain\username (ex. sunysb.edu\jsmith) and password.
- Tap Save
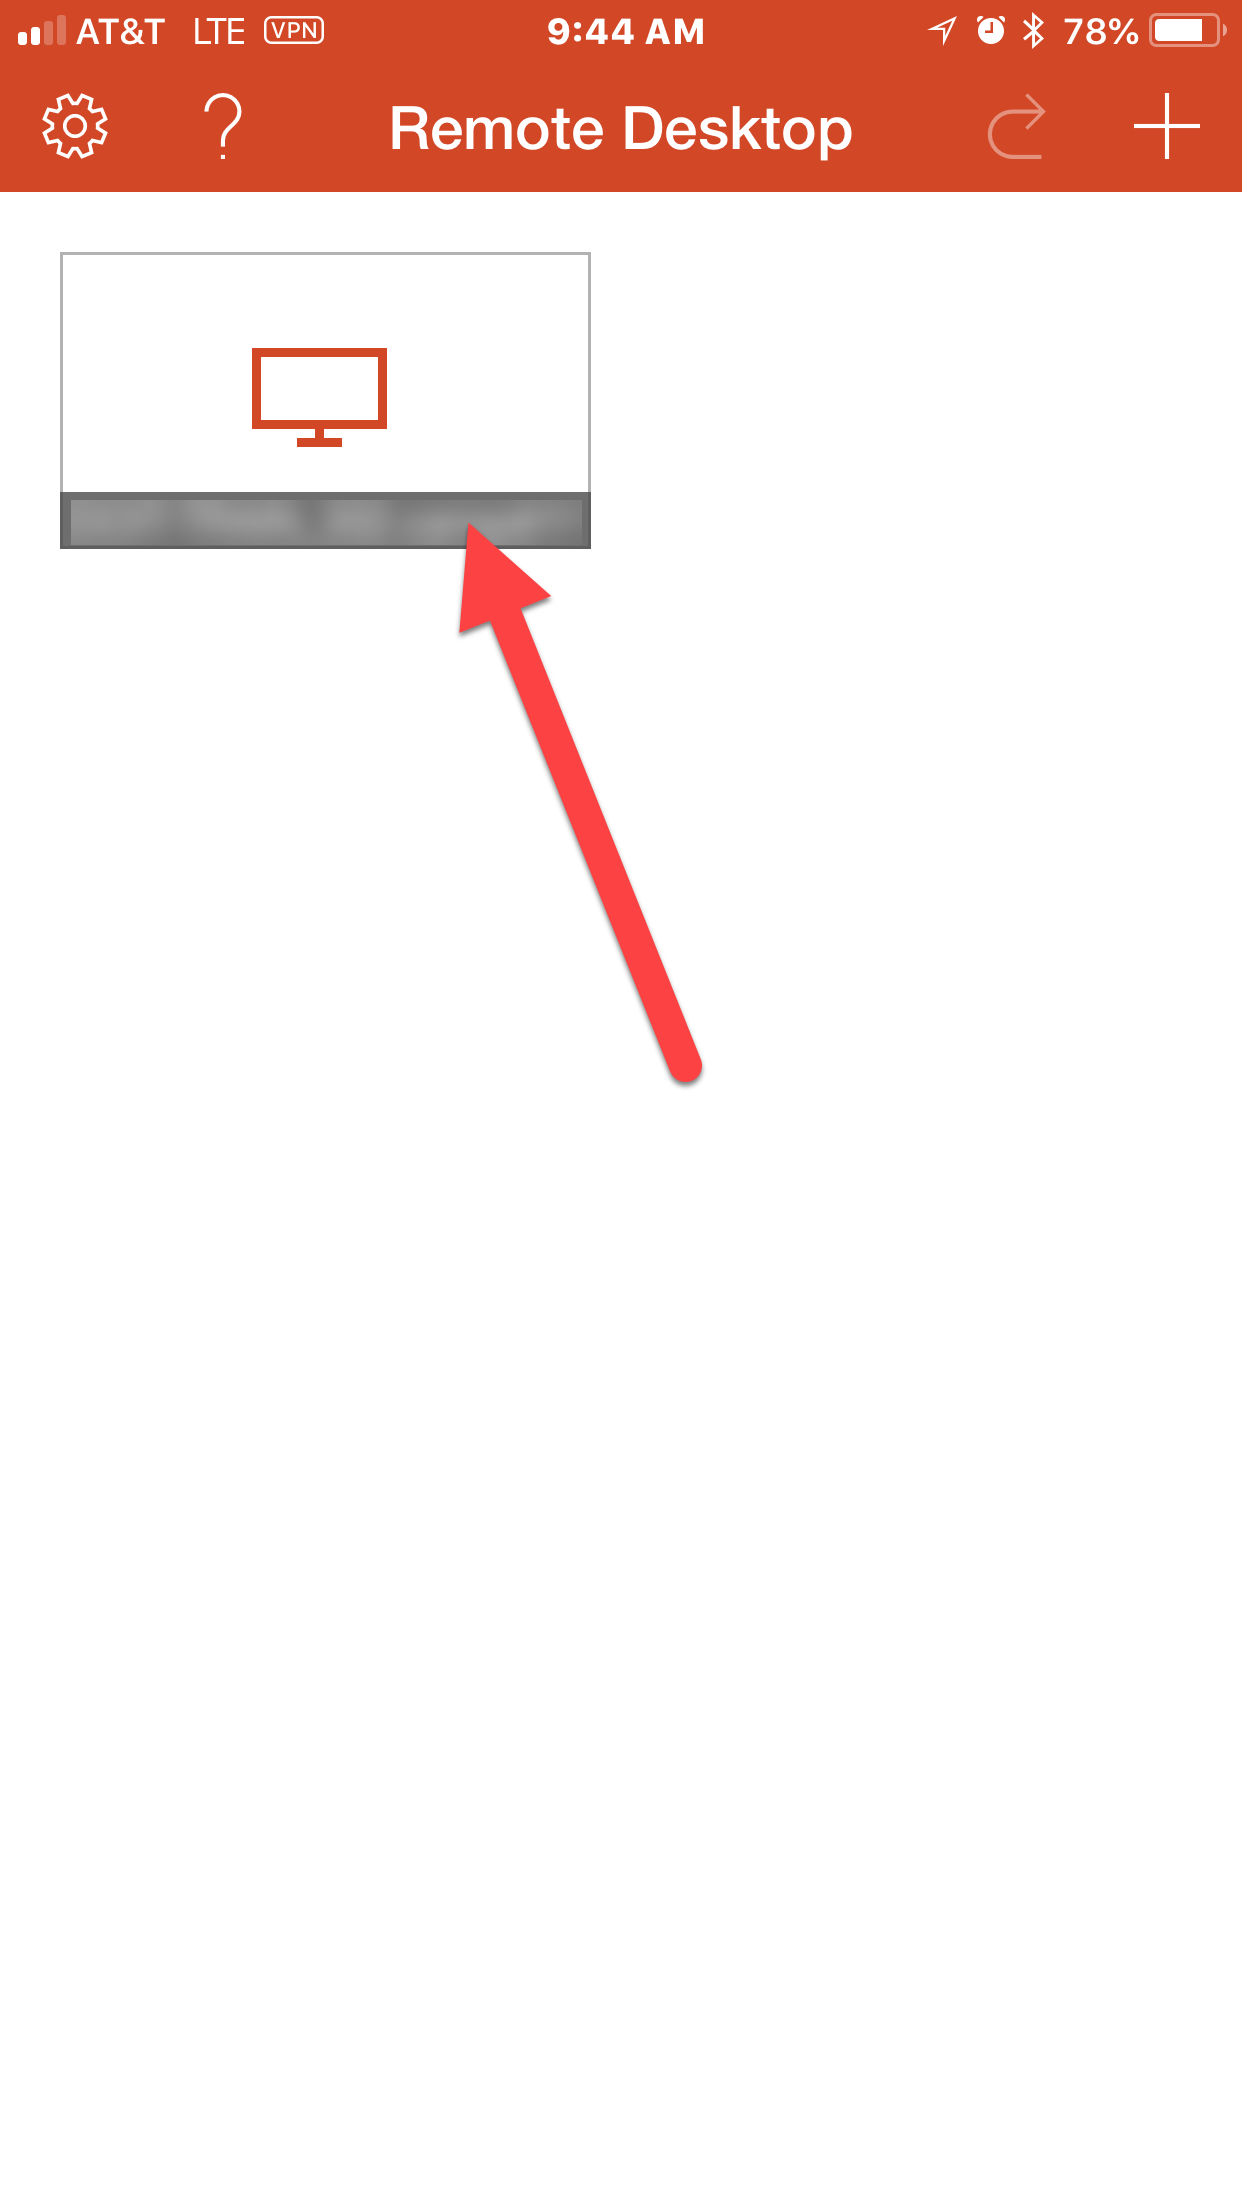
- Tap the connection you just created.
Connection will initiate: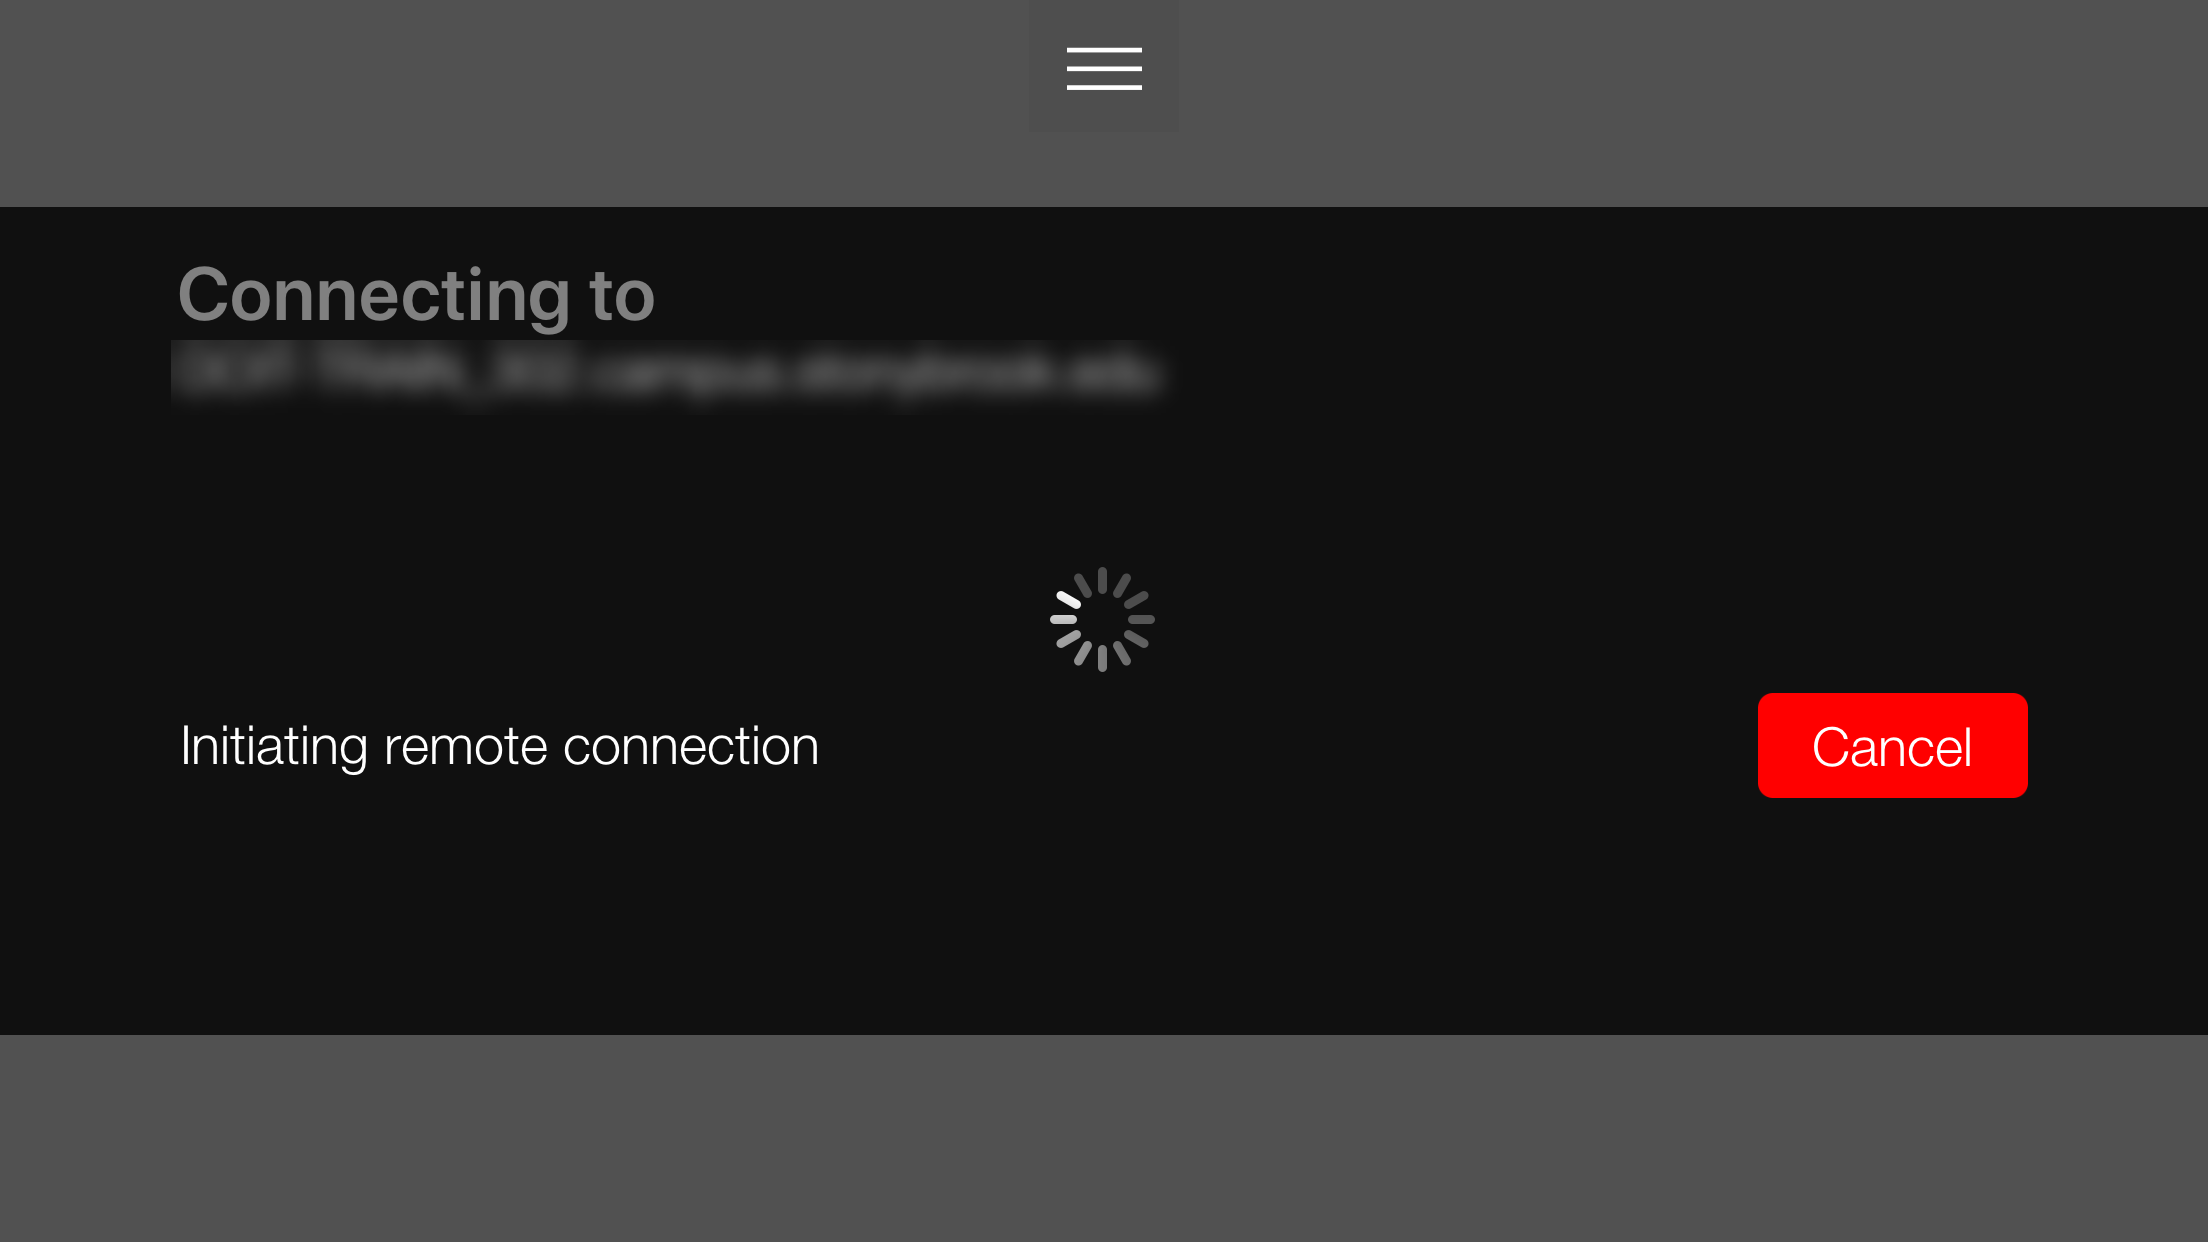
- Upon success, you'll see the computer screen on your mobile device.
If the connection fails:
- Check that your IP address is correct.
- To edit your connection, tap and hold it until an Edit button appears.
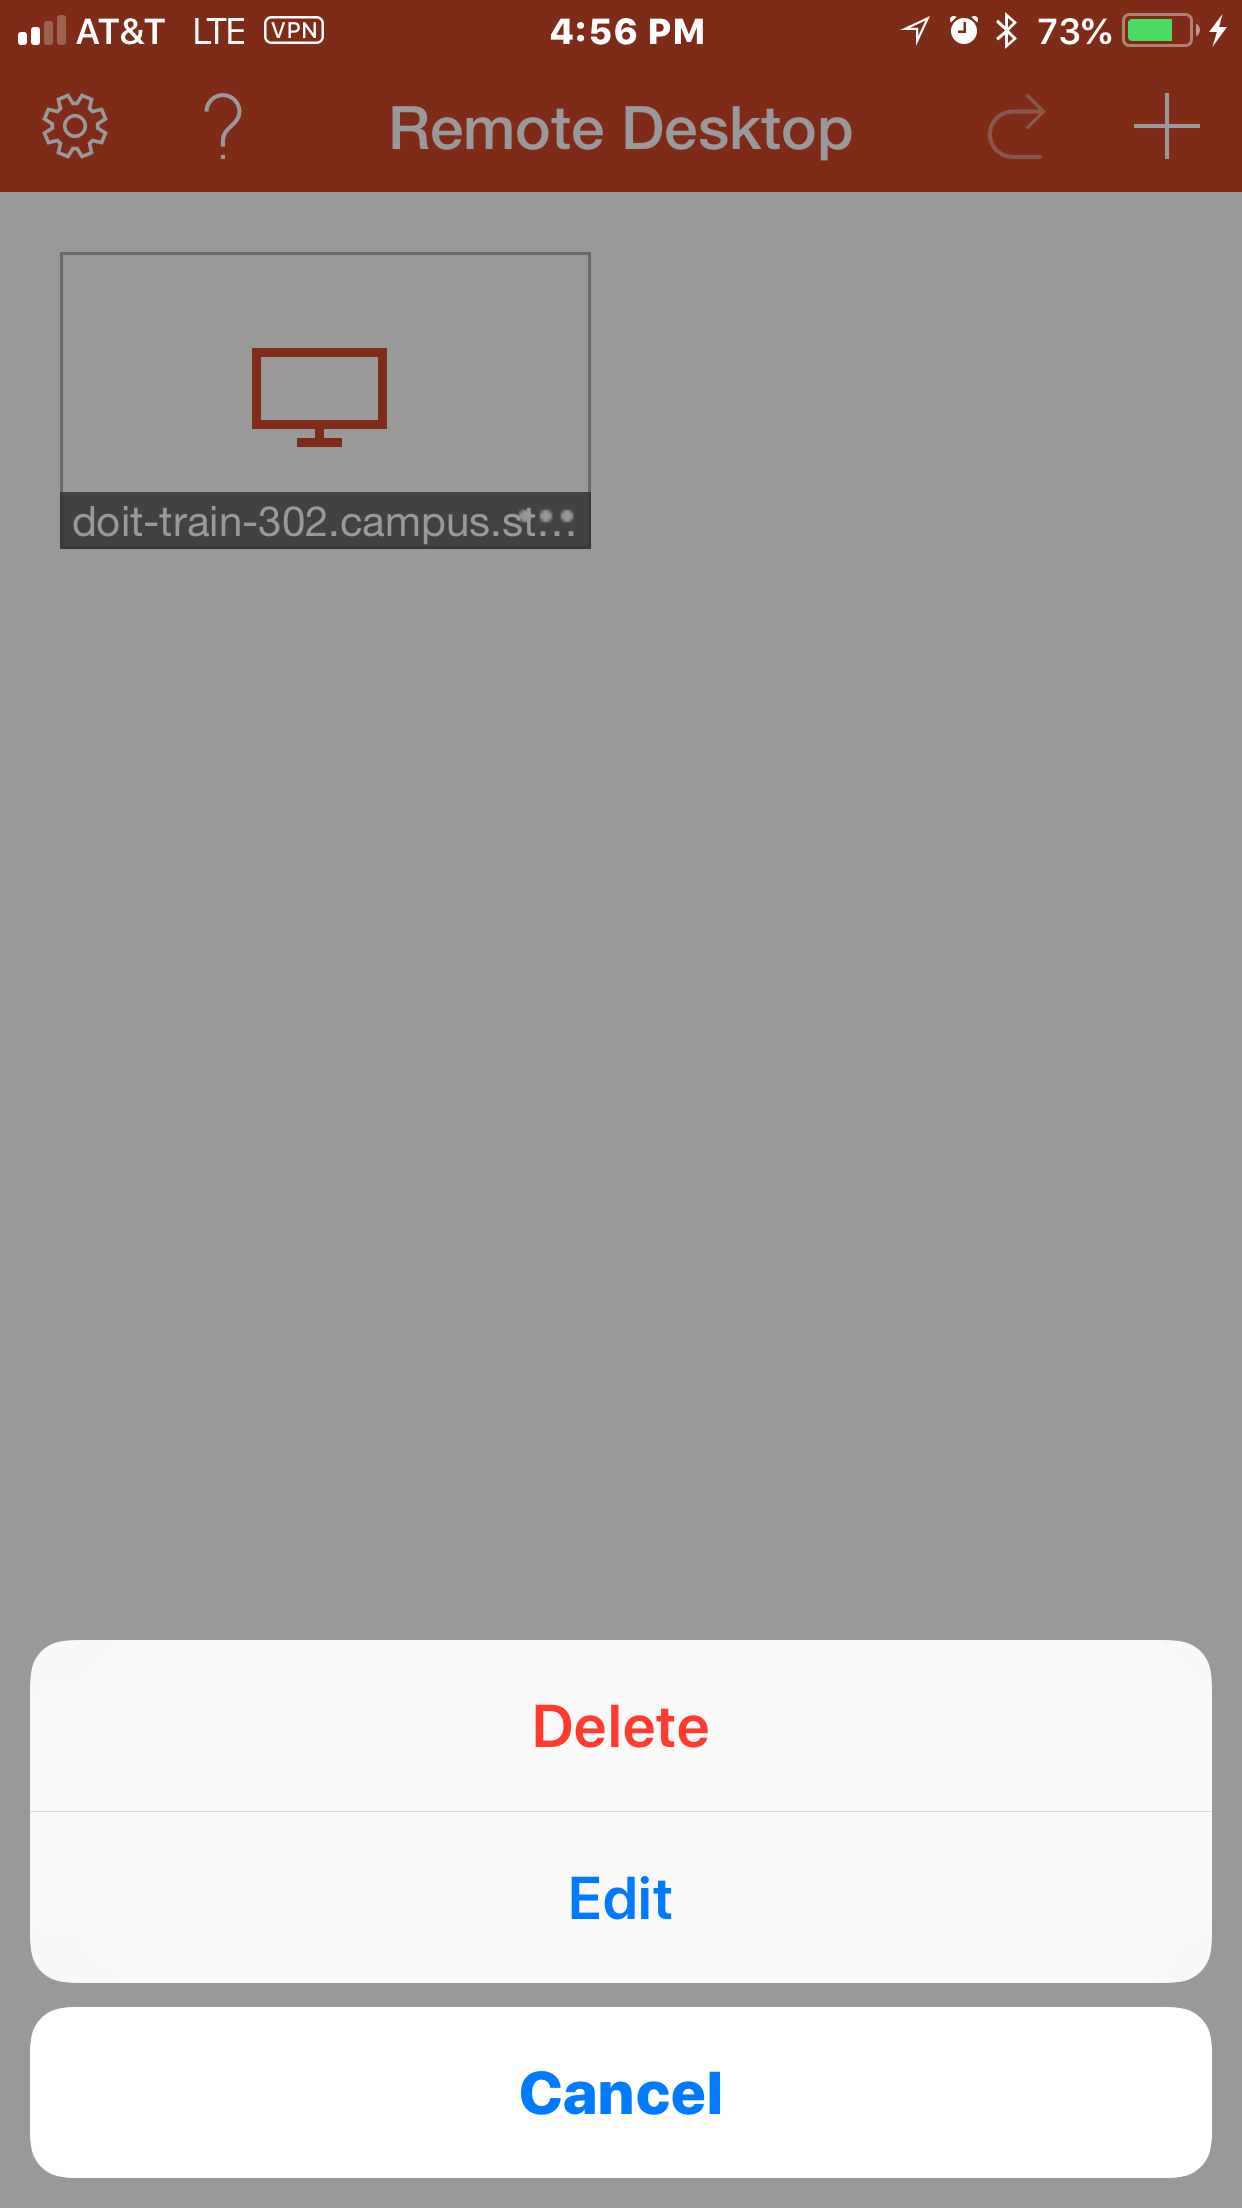
- Tap Edit and double-check your IP, Username and Password. Make sure you are using the backslash above the Enter key.
- To edit your connection, tap and hold it until an Edit button appears.
- Check with the owner of the computer or server you are trying to connect to. Ensure you are a user of the machine and that the firewall allows you to access this machine from a Remote Desktop Connection.
Disconnecting from the VPN and Remote Desktop connection
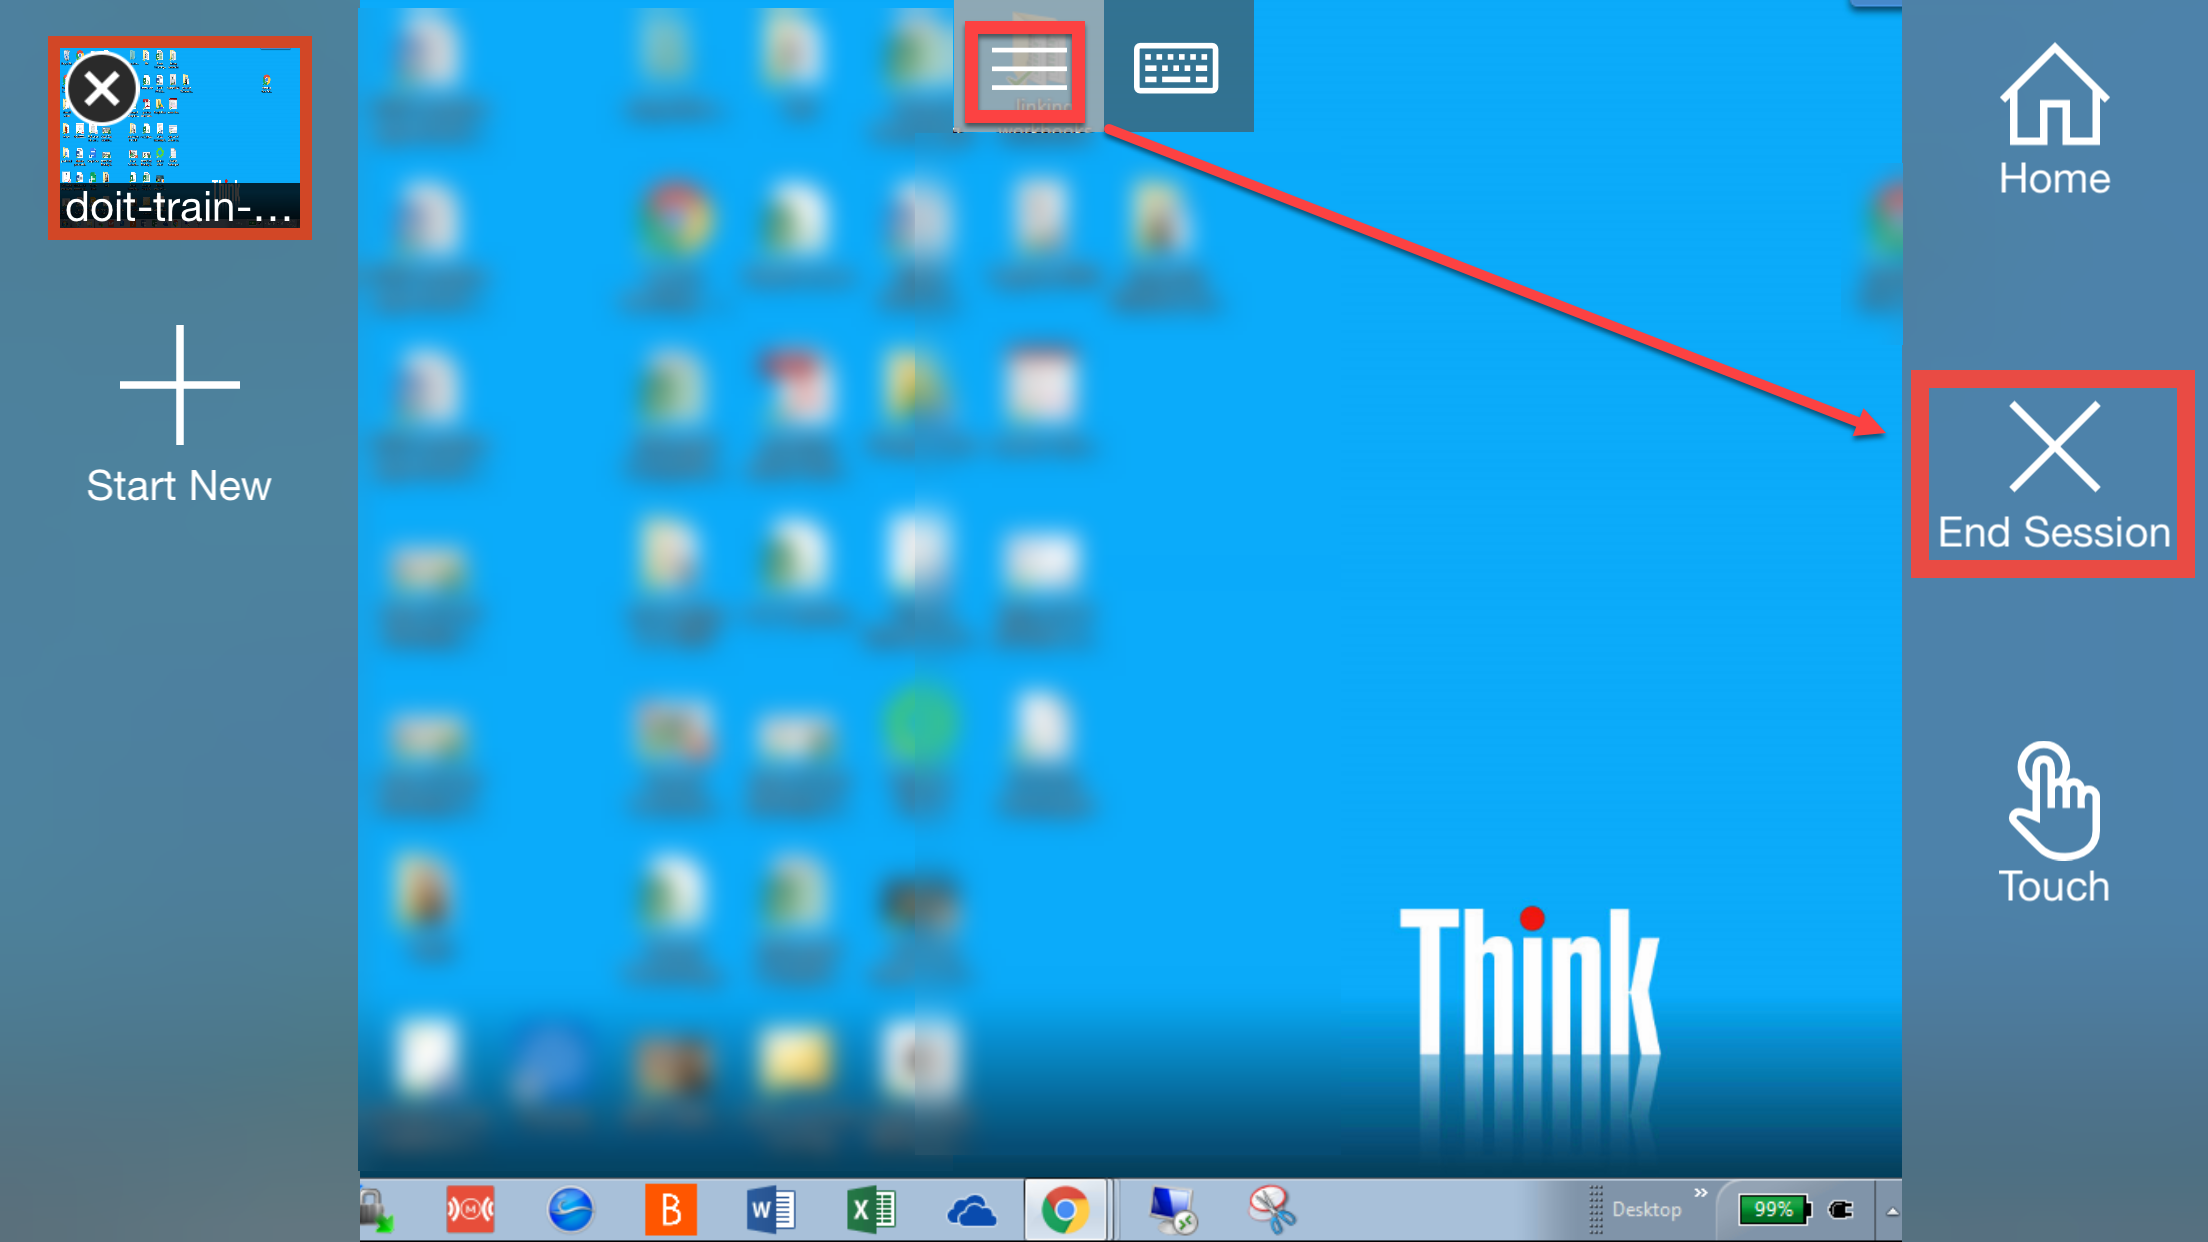
- Disconnect from the Remote Desktop connection by tapping the 3 lines at the top of your mobile device's screen and then tapping End Session
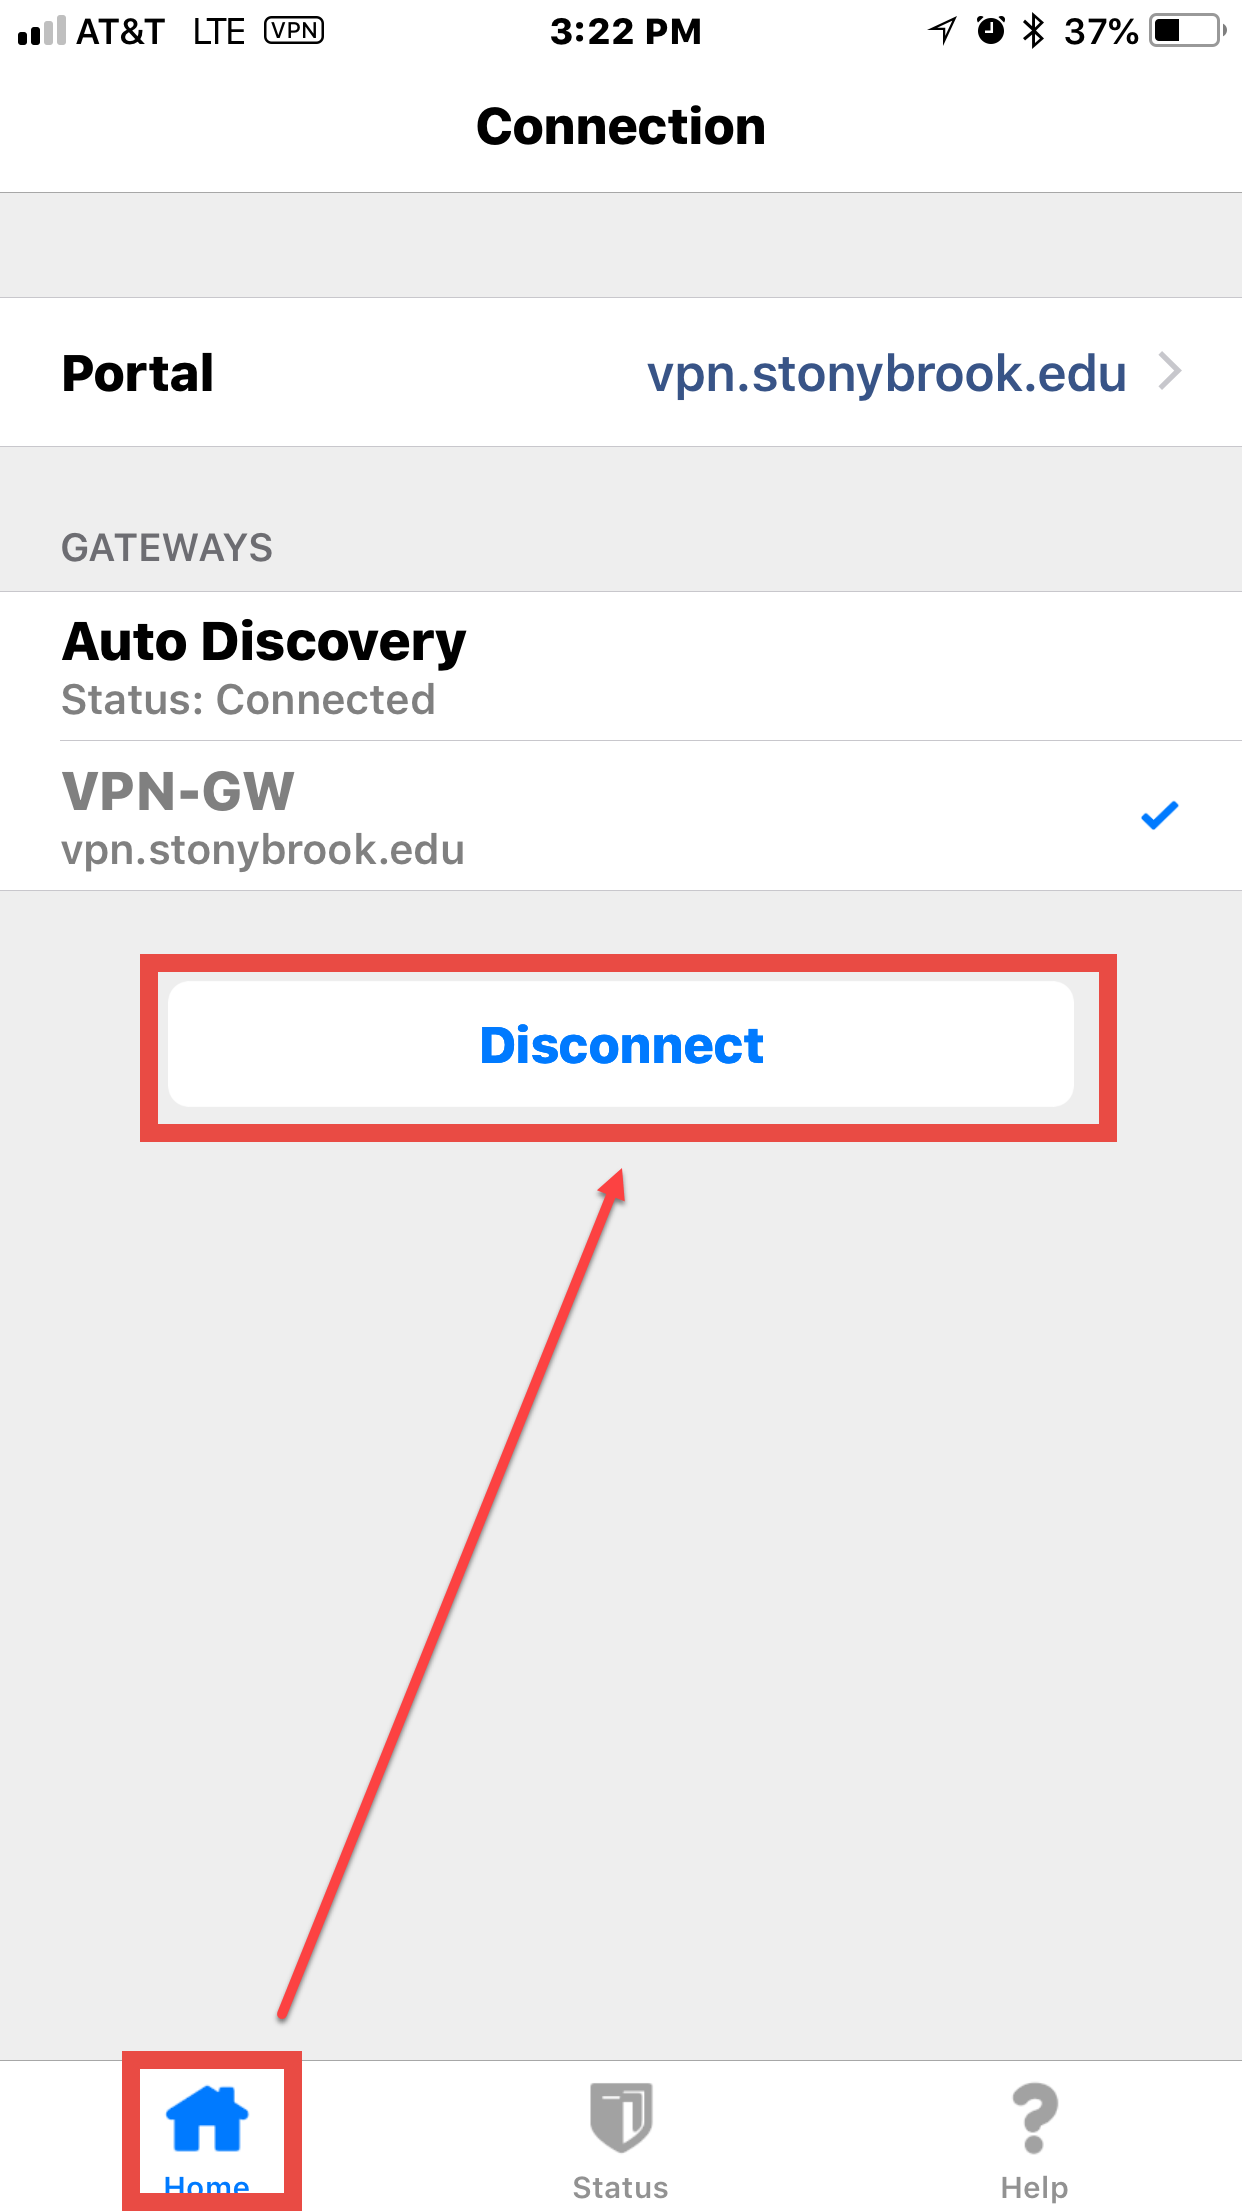
- Disconnect from the vpn by tapping the Global Protect icon > Home > Disconnect button
Supported By
Need Help? The fastest way to get support is by submitting a request through our ticketing system.
Get Help With the VPN