Using RD Gateway in Microsoft Remote Desktop to Remote from a Mac into your University owned Windows computer
Requirements
- Windows App from the App Store
- MacOS 12.0 or later
- A Duo Account for two-step login
Set up the Remote Desktop Gateway
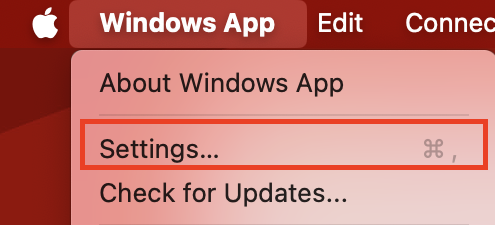
- Launch the Windows App
- From the MacOS menu bar, select Windows App, then select Settings
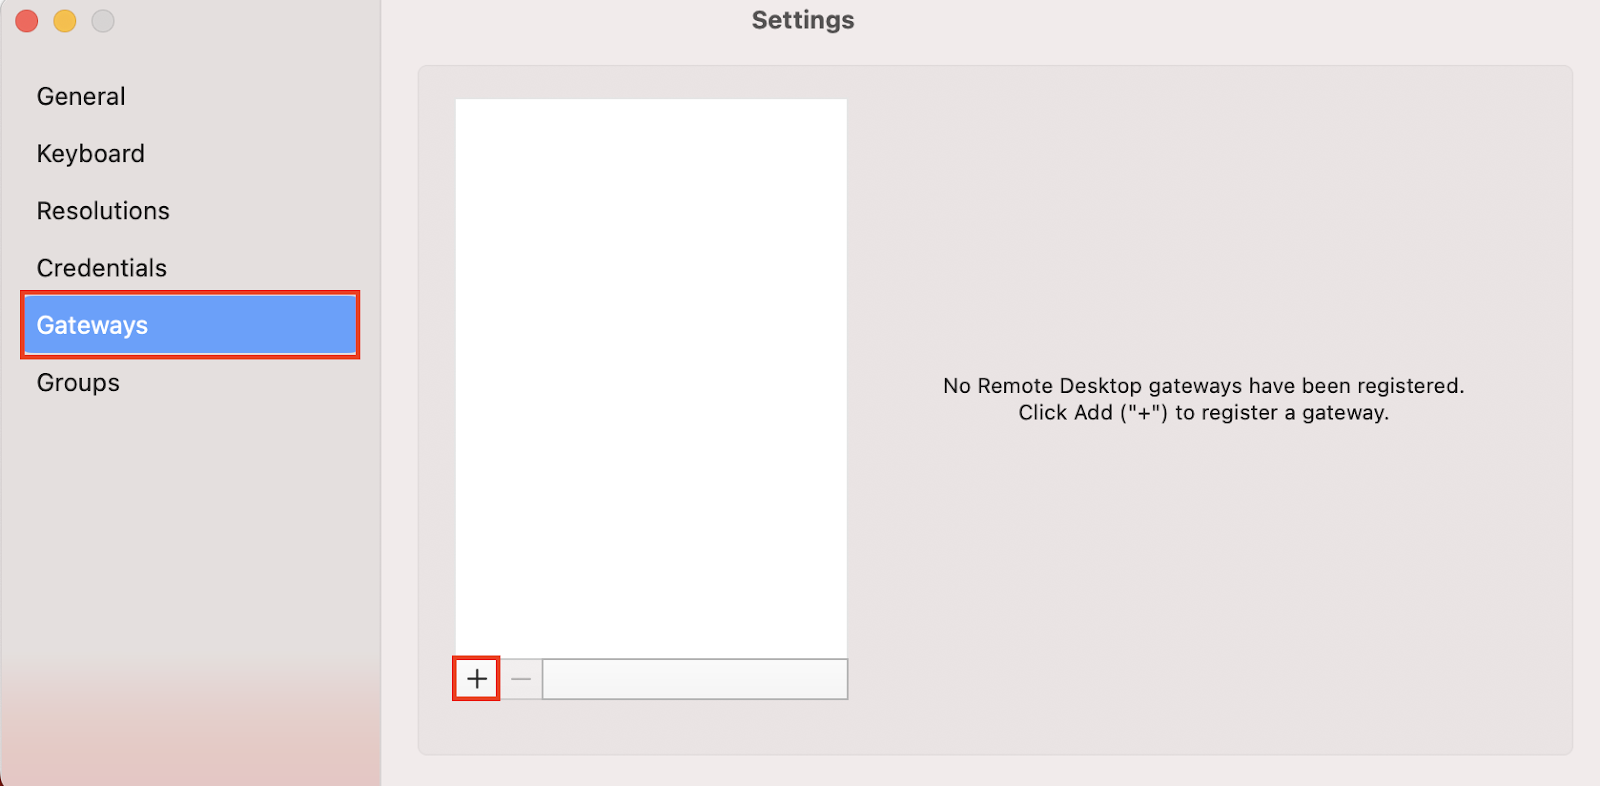
- On the Preferences pane, select the Gateways tab
- To add a Remote Desktop gateway, select the + (plus) icon and enter the values below in the fields:
- Gateway Name: rdpgw-2fa.cc.stonybrook.edu
i. User Account: Use PC User Account
ii. Friendly name: RD Gateway - User Account: Add Credentials
i. Username: sunysb.edu\NETID
ii. Password: NetID password
- Gateway Name: rdpgw-2fa.cc.stonybrook.edu
- click Add
Set up Desktop and Connect
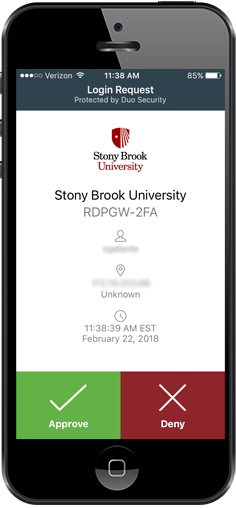
- Have your default Duo enabled device convenient to approve login during the last step
- Set up Your Desktop:
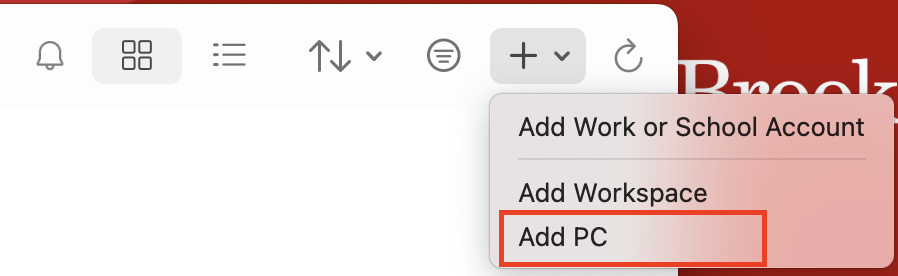
- Windows App will open on the Devices tab. Select the plus (+) icon, then select the option Add PC
- Windows App will open on the Devices tab. Select the plus (+) icon, then select the option Add PC
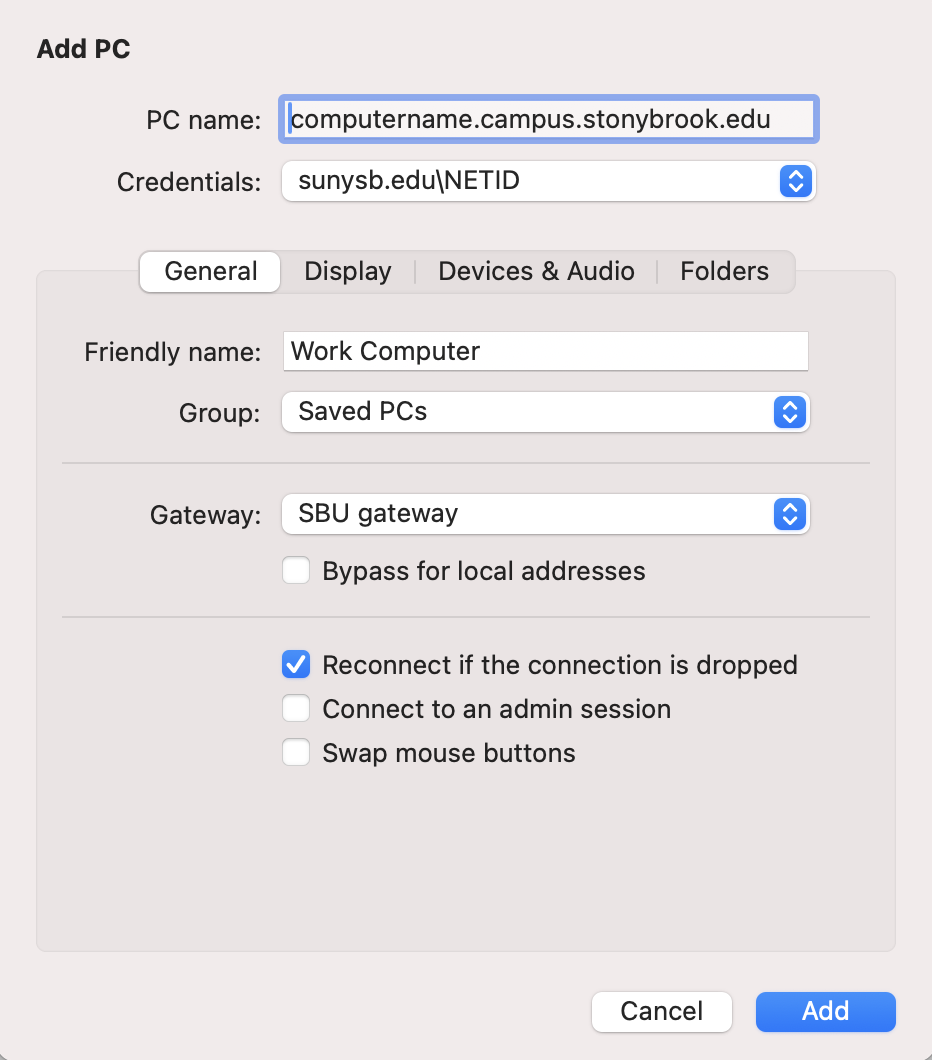
- Fill in the fields as follows, and then click Add:
- PC name: enter the name of the computer you're connecting to, followed by .campus.stonybrook.edu Example: mycomputer.campus.stonybrook.edu
- Credentials: Select the previously made account or enter your username as sunysb.edu\NetID (example: sunysb.edu\bsmith) and password as your NetID Password.
- Friendly Name: Work Computer (or a name for the computer you're connecting to)
- Group: Saved Desktops or Saved PCs
- Gateway: Select the RD Gateway you set up above
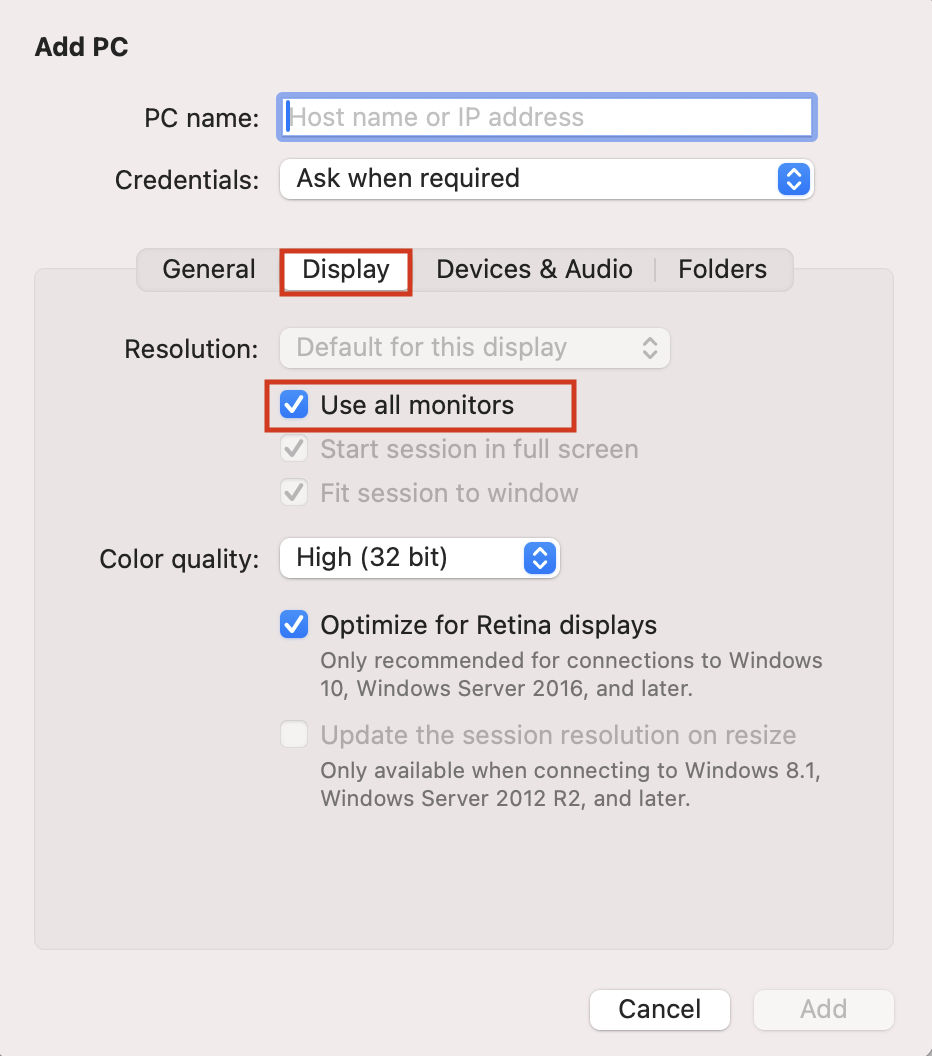
- To use 2+ monitors on the computer you're physically sitting at, click the Display tab
- Select ☑︎Use all monitors
- Click Save
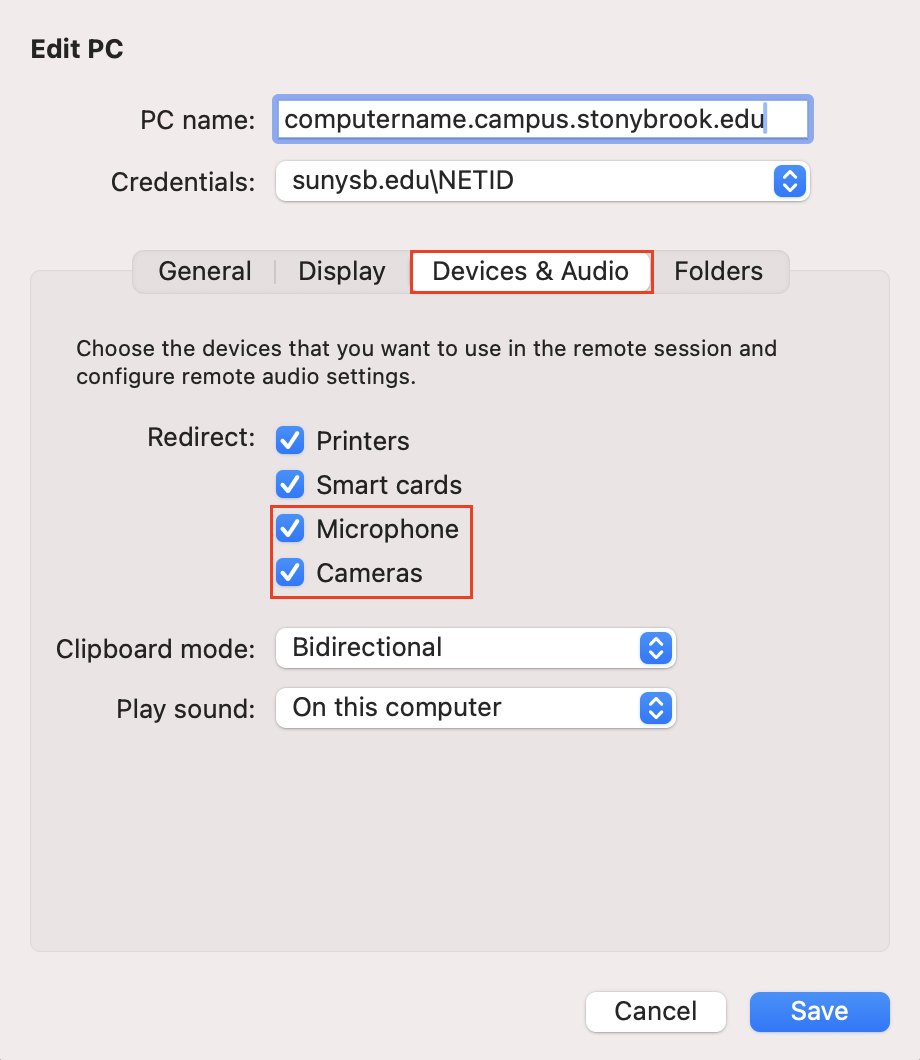
- To use Zoom and set to use the Microphone and Camera from the computer you're physically sitting at, click the Devices & Audio tab
- Select ☑︎Microphone and ☑︎Cameras
- Click Save
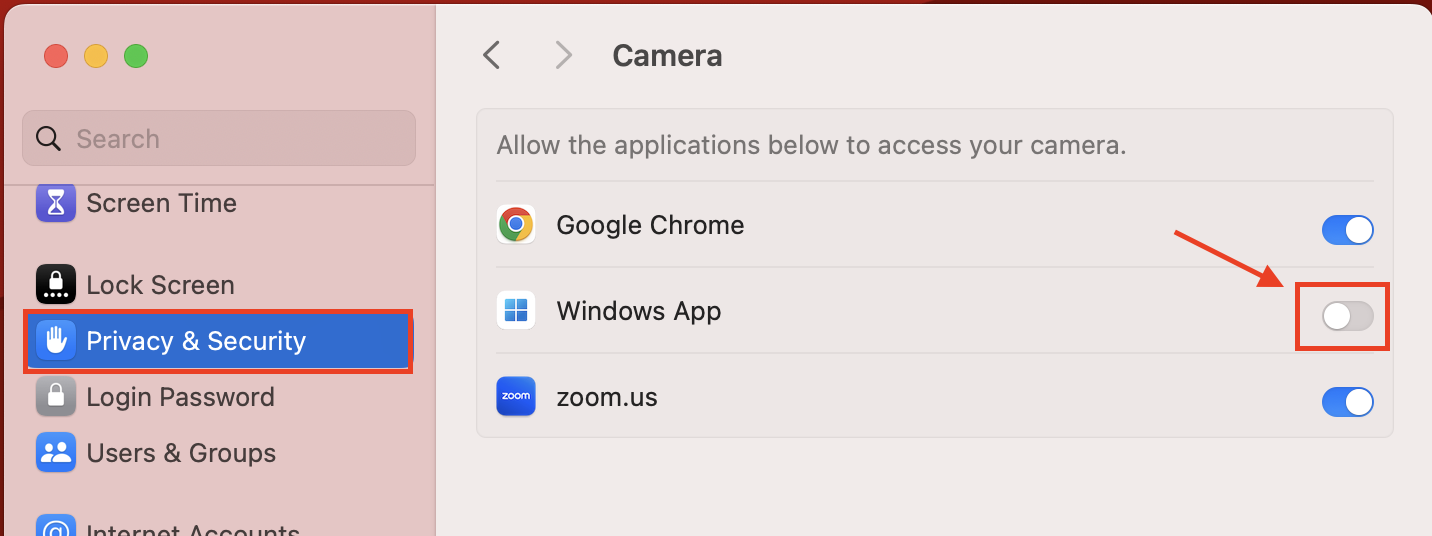
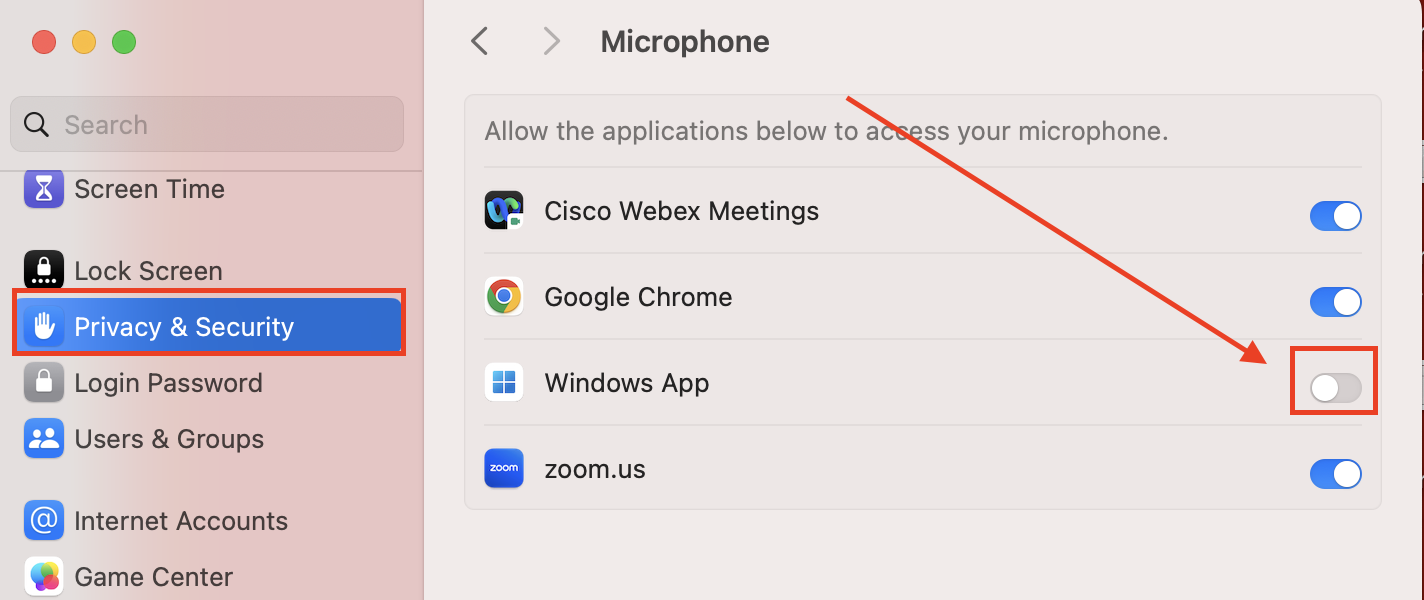
- Note: If running MacOS 15 and above, camera and microphone access will first need to be granted within System Settings
- Camera Access: System Settings > Privacy and Security > Camera > toggle on Windows App > Quit and Reopen
- Microphone Access: System Settings > Privacy and Security > Microphone > toggle on Windows App > Quit and Reopen
- Camera Access: System Settings > Privacy and Security > Camera > toggle on Windows App > Quit and Reopen
- Note: If running MacOS 15 and above, camera and microphone access will first need to be granted within System Settings
- From the main Windows App, double click on the New Connection you just created, and a window will open showing Connecting ... (it may take several moments to connect)
- If prompted to log in, use the following
User name: sunysb.edu\NetID (replacing NetID with your NetID, e.g., sunysb.edu\bsmith)
Password: your NetID password - Approve the Login Request on your default DUO enabled device (the DUO prompt will indicate that the login request is from RDPGW-2FA)
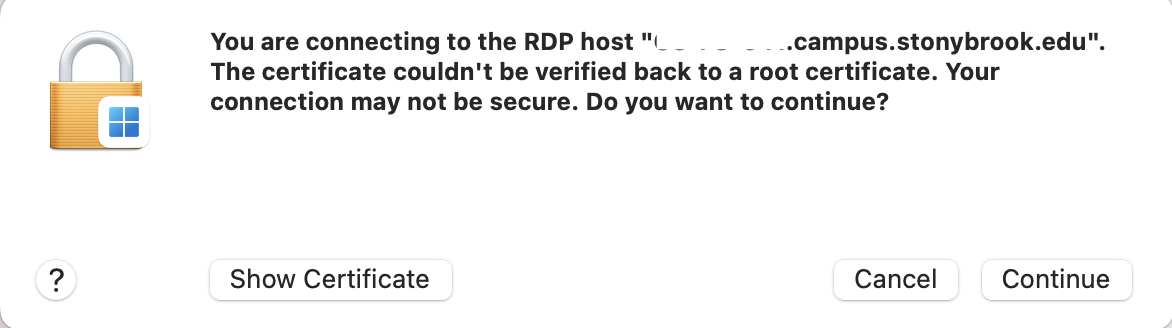
- If you receive a Verify Certificate prompt, click Continue
- Accept the certificate by selecting Continue
Supported By
Customer Engagement and Support
Need Help? The fastest way to get support is by submitting a request through our ticketing system.
Get Help With the RD Gateway