The Documents Tab Overview
Document Tools
To get to the Document tab, find and open a document by either the Custom Queries or Retrieval tool. If you cannot find a document because the index is incorrect try to use the wildcard character *.
Working With a Document
Once you open a document you can:
- View and update Keywords
- This will allow you to change the Keywords of a document like fixing names or numbers that were made erroneously during importing and indexing.
- View the documents Cross References
- View Revisions, History and the Properties
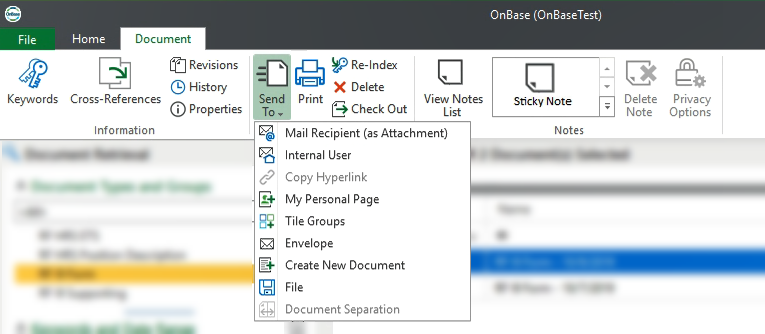
- Send to
- Email Recipient
- This will open Outlook email. If you are not an Outlook email user, choose File, instead. This will create a copy of the file on your desktop. Then manually create the email and send the file as an attachment from your own email system.
- My Personal Page
- Envelope (use the Envelope feature to group documents together for other OnBase users)
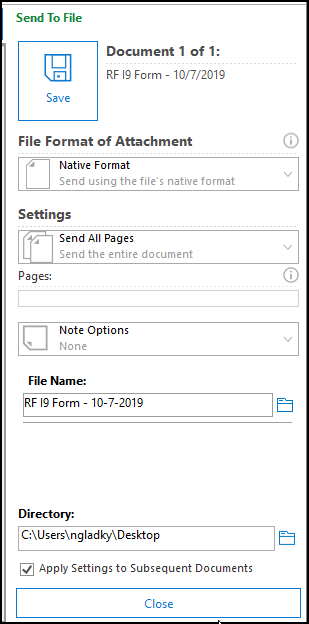
- File
- Email Recipient
- Re-Index
- This will allow you to change the document type and keywords. If Keywords that you want to change appear grayed out, click the arrow-X next to Keywords. This will remove all keywords for you to retype:

- This will allow you to change the document type and keywords. If Keywords that you want to change appear grayed out, click the arrow-X next to Keywords. This will remove all keywords for you to retype:
- Delete
- This will delete a document.
- Only administrators can bring it back if it was accidentally deleted.
- Check Out
- This will prevent others from working on the document while you have it checked out.
- View Notes List on the document
- Create Sticky Notes
- When you create a note, click off of it to save it:
- To view all of a document's notes, click View Notes List.
- You can request from the administrators the creation of other types of notes with different colors and names.
- When you create a note, click off of it to save it:
- Delete Note
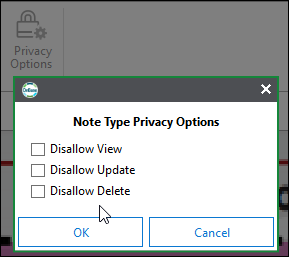
- Set Privacy Options
- The Privacy Options are for the notes you create and not the document itself. For questions on the security of a document type, please direct them to the Point of Contact in your department who can then speak with the OnBase administrators.
- You can prevent Viewing, Updating, and Deleting of Notes in the Privacy Settings.