Scheduling Zoom Meetings for Someone Else So They Are the Host

Audience: Staff

This KB Article References: Zoom
This Information is Intended for: Staff
Last Updated: February 09, 2022
Average Rating: Not Rated
Your feedback is important to us, help us by logging in to rate this article and provide feedback.

Zoom Scheduling Privileges allows you to schedule Zoom meetings for someone else (like your manager) so that s/he is the host and has complete control of the Zoom Meeting room.  Once you have scheduling privileges, you can create meetings for that person in Google Calendar, Outlook, Zoom app, and more.

Step 1: Completed by the person you need to schedule for (i.e., your supervisor)

First, the person you need to schedule for must assign scheduling privilege to you in Zoom's settings by following these instructions. 
Learn more about Scheduling Privileges

Video:

  1. Log into stonybrook.zoom.us
  2. Click Settings.
  3. Scroll down to the bottom of the page. Next to Assign Scheduling Privilege to, click the + sign and add the @stonybrook.edu email address of the person you want to schedule Zoom meetings for you. 
    *If a message appears that they are not a user in your Zoom account, please ask them to sign in to Zoom correctly so a Stony Brook account is created for them.

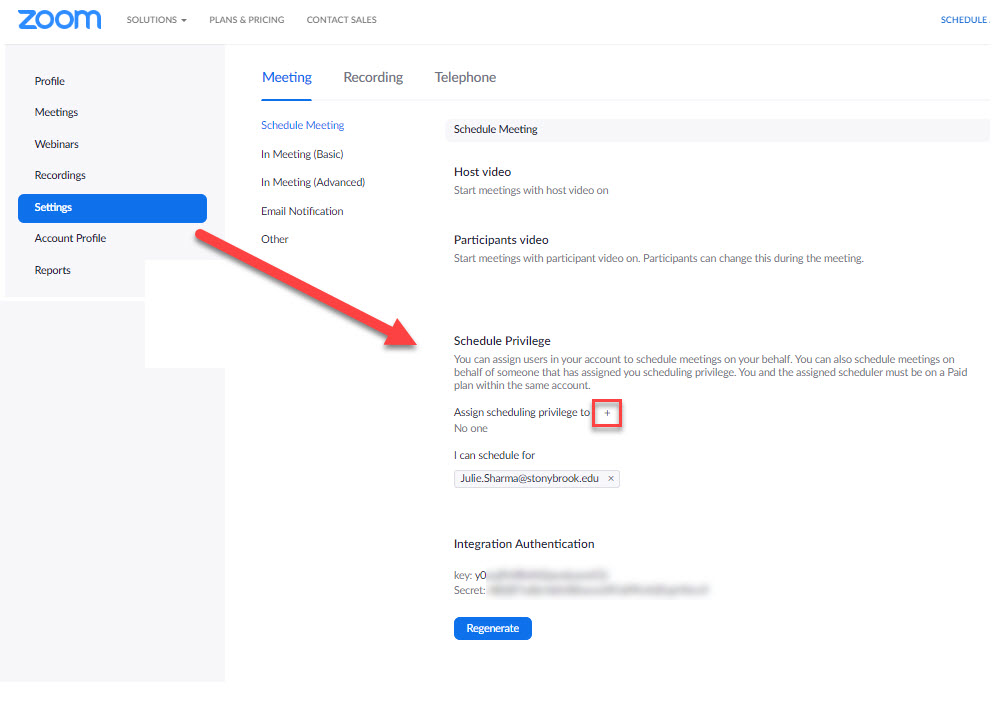
Step 2. Completed by the person who will do the scheduling (i.e. the assistant)

Next, the assistant may use the follwing tools to creating meetings where someone else is the host (once Scheduling Privileges are provided).  

*Outlook and Google Calendar users will have the most seamless way to get Zoom meetings on calendars using these tools respectively.


More on Scheduling Privileges.


Chrome Extension 

Use the Chrome Extension as an alternative to the Zoom for GSuite addon.  To edit any Zoom meeting settings created in the Zoom Chrome Extension, go to Zoom Web Portal at https://stonybrook.zoom.us
 

Video:

  1. Log in to stonybrook.zoom.us
  2. Click Chrome Extension under Meetings
     
  3. Add to Chrome:
  4. Configure the Chrome Extension:
    1. Click on the new extension in the top right of your Chrome window
    2. Sign in if necessary:
      • Click "Sign in with SSO"
      • Enter your email address or to manually enter domain, enter "stonybrook"
      • Enter NetID and password when prompted
    3. Click on the Gear in the extension:
    4. Make sure Allow me to specify meeting options each time is checked and then Save Changes.
  5. Go to Google Calendar.   Refresh the screen so you see the updates.
  6. Create an event with Zoom meeting, click More Options
    ""
     
  7. Add the Title of the event, Date, Time, Guests, and any other Google Calendar options.  Click Make it a Zoom Meeting and choose the person you are scheduling for (the person who should own the room (i.e. your superivisor).

    *Be sure to scroll down to the bottom of the Scheduling Options form, to specify the Zoom Meeting options and if there should be an alternative host in the owners absence.
    ""
  8. To ensure that you have set up the Zoom meeting correctly (where you are not the host but your supervisor is) log in to stonybrook.zoom.us
    Click Meetings and under Upcoming Meetings, choose the person whose meetings your would like to see (there is a dropdown list on the right side of your screen) and then update the settings if necessary.
    ""

Additional Information


There are no additional resources available for this article.

Provide Feedback


Your feedback is important to us, help us by logging in to rate this article and provide feedback.

Sign in with NetID

Getting Help


The Division of Information Technology provides support on all of our services. If you require assistance please submit a support ticket through the IT Service Management system.

Submit A Quick Ticket

Supported By


Customer Engagement and Support