Inviting Guests (External to Stony Brook) to Zoom Meetings
You can invite guests (external to Stony Brook) to Zoom Meetings by using the zoom web portal or through the use of Brightspace.
This article will explain the best way to invite guests external to Stony Brook University, while leaving the default settings on to ensure the highest level of security for your meetings:
- Creating a Zoom Meeting that Guests External to Stony Brook can Join (3 ways)
- What Your Guests Can Expect
- Information for Your Guests
Stony Brook's Default Settings
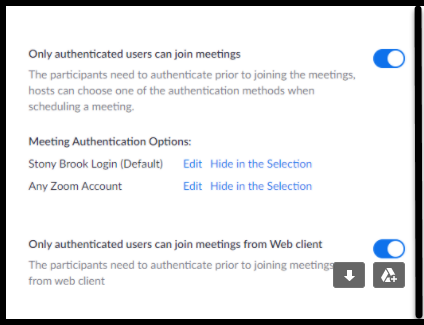
By default, "Only authenticated users can join meetings" and "Only authenticated users can join meetings from Web client" are turned on in the Zoom Web Portal at Stony Brook University Zoom. These settings are not locked and can be toggled on and off as needed. It is advised that these settings should be left on for the highest level of security.
Creating a Zoom Meeting that Guests External to Stony Brook can Join in 2 ways:
Option 1: Using the Zoom Web Portal (everyone can use this option)
- Log into the Zoom Web Portal at Stony Brook University Zoom
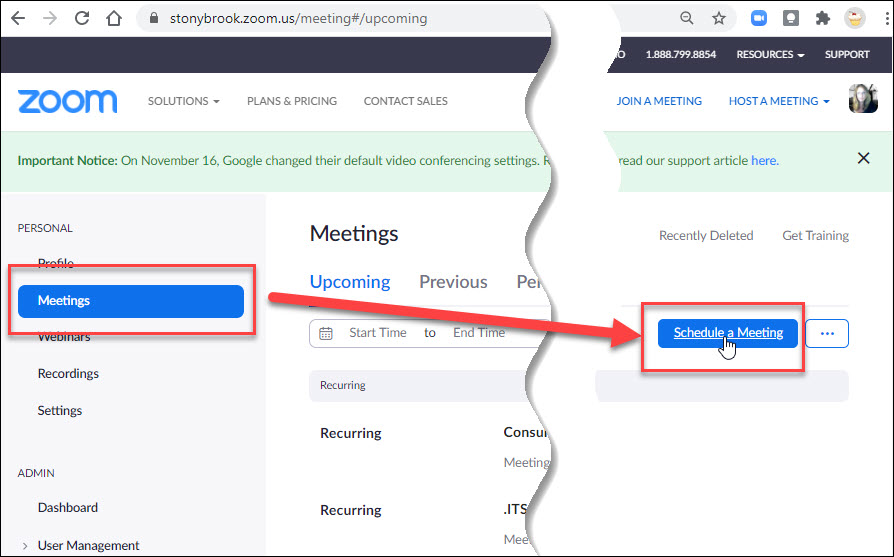
- With the default settings (above) turned on, to allow guests external to Stony Brook to enter a meeting, click on Meetings > Schedule a Meeting
- Fill in the form with Topic, Description, Date and decide which options to use. Consider using the Registration and/or Waiting room options for security.
- In the Security section, leave "Only authenticated users can join" unchecked.
Unchecking this setting overrides the first setting in the Web Portal, "Only Authenticated users can join meetings", but not "Only authenticated users can join meetings from the Web Client". Thus, as described below, users will need to use the Zoom Client or App to get into the meeting; they will not be able to join via the web client.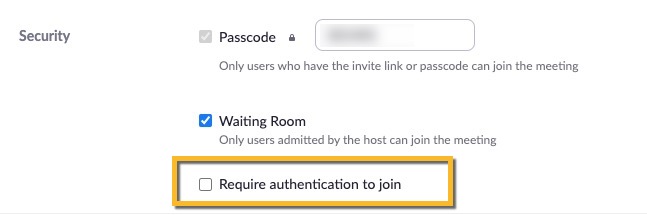
- Click Save to save the meeting.
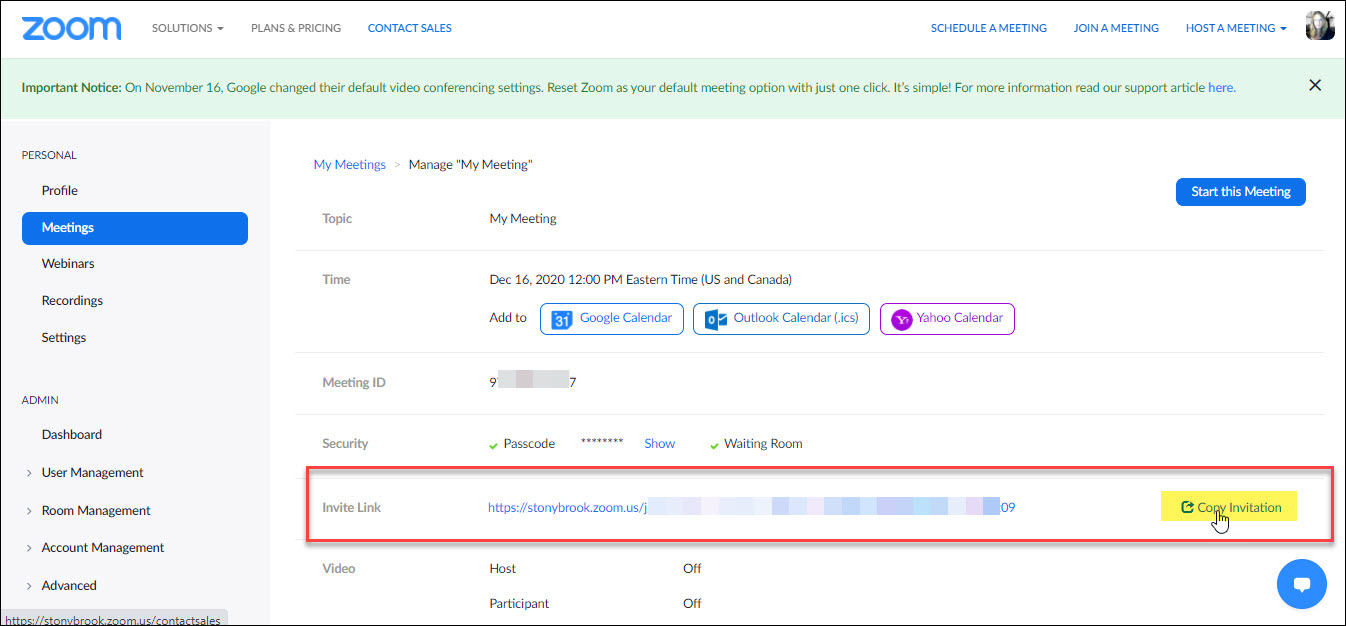
- Next to the Invite Link, click Copy Invitation and paste this information in an email or calendar invitation for your guests.
Option 2: On Brightspace
- Log into Brightspace
- Click on your course and add a new or open existing a Zoom Meeting link.
- Fill in the form with Topic, Description, Date and decide which options to use. Consider using the Registration and/or Waiting room options for security.
- In the Security section, leave "Only authenticated users can join" unchecked.
Unchecking this setting overrides the first setting in the Web Portal, "Only Authenticated users can join meetings", but not "Only authenticated users can join meetings from the Web Client". Thus, as described below, users will need to use the Zoom Client or App to get into the meeting; they will not be able to join via the web.- If you are editing recurring meeting, when prompted whether to edit one occurrence or all occurrences, select Edit All Occurrences (you can change the authentication requirement for all occurrences but not for individual occurrences).
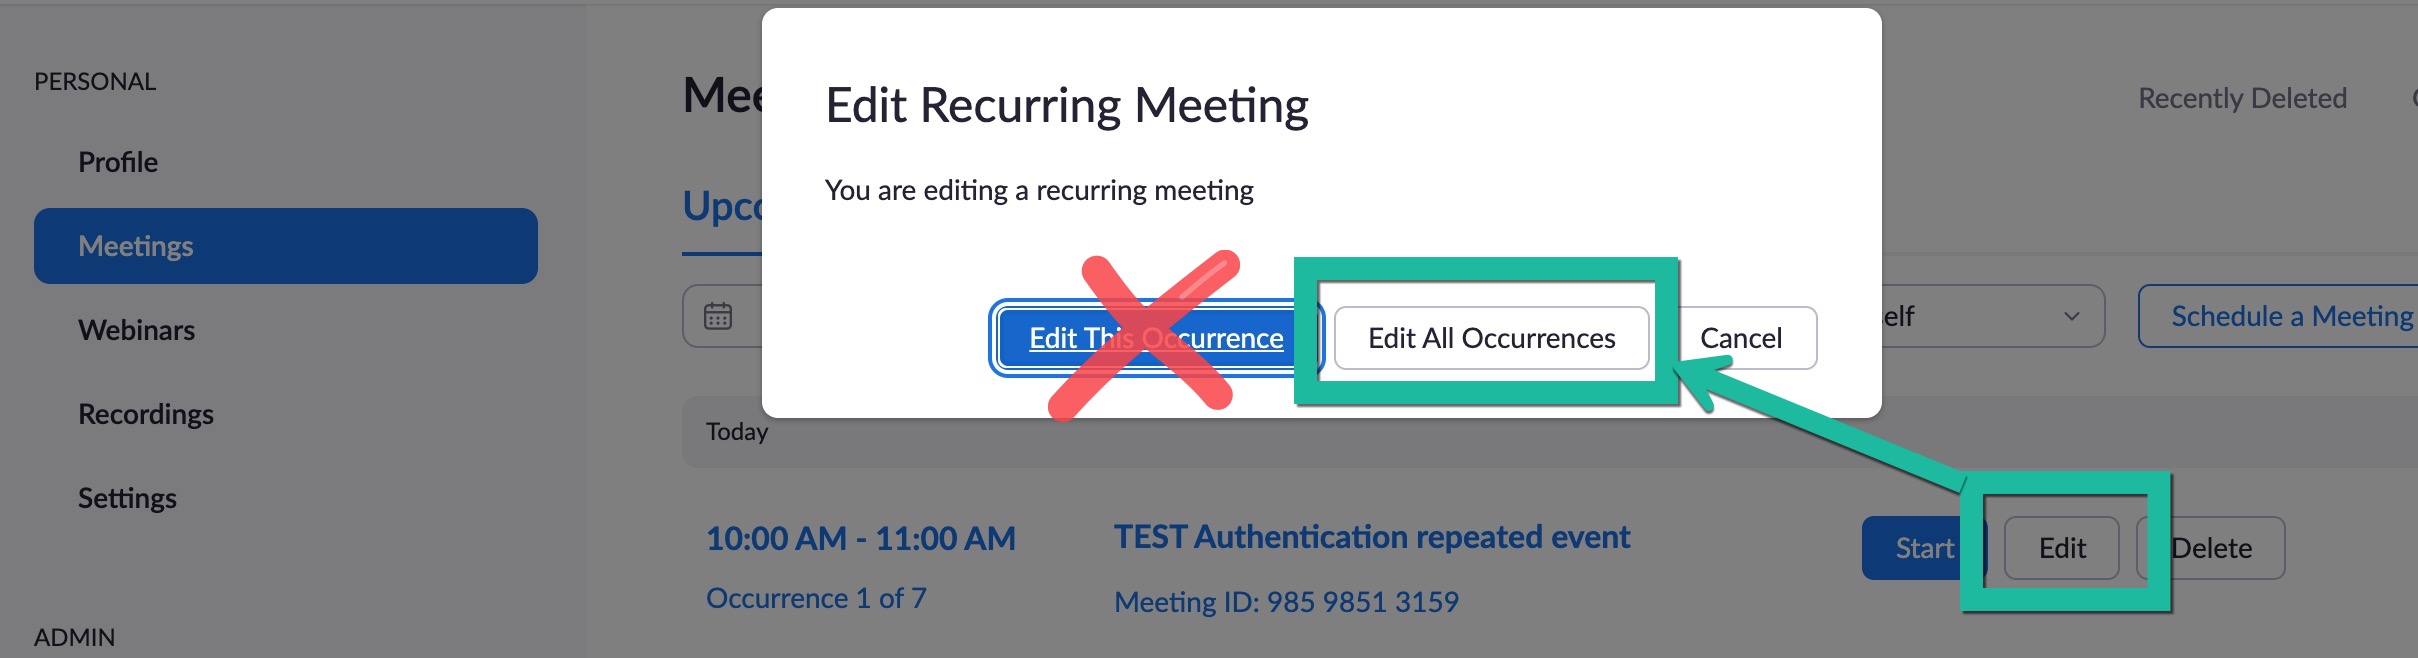
- If you are editing recurring meeting, when prompted whether to edit one occurrence or all occurrences, select Edit All Occurrences (you can change the authentication requirement for all occurrences but not for individual occurrences).
- Click Save to save the meeting.
- Next to the Invite Link, click Copy Invitation and paste this information in an email or calendar invitation for your external guests.
Option 3: Using Google Calendar
- Create a meeting like you normally would in Google Calendar.
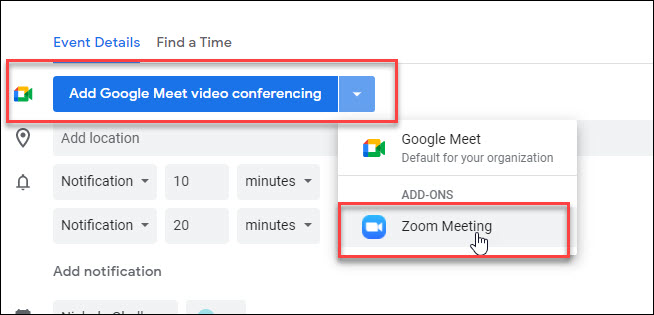
- Add Zoom video conferencing by clicking the down pointing arrow for Zoom Meeting
- Open the Zoom Add-on Settings available on the right side of the screen. Click the Zoom icon to reveal the Zoom Meeting settings for this meeting.
Turn off "only signed in users can join"
*Be sure to match the meeting IDs before changing settings. If they do not match, follow the Zoom Web Portal instructions above.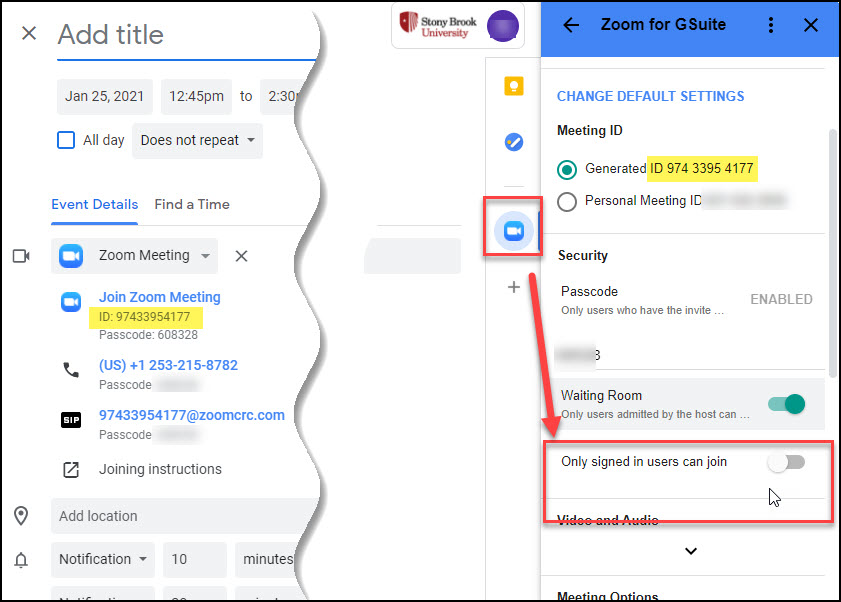
- Add your guests.
*Regardless of what email system they use they will get this invitation in their email and on their calendars. - Click Save for your meeting.
What Your Guests Can Expect
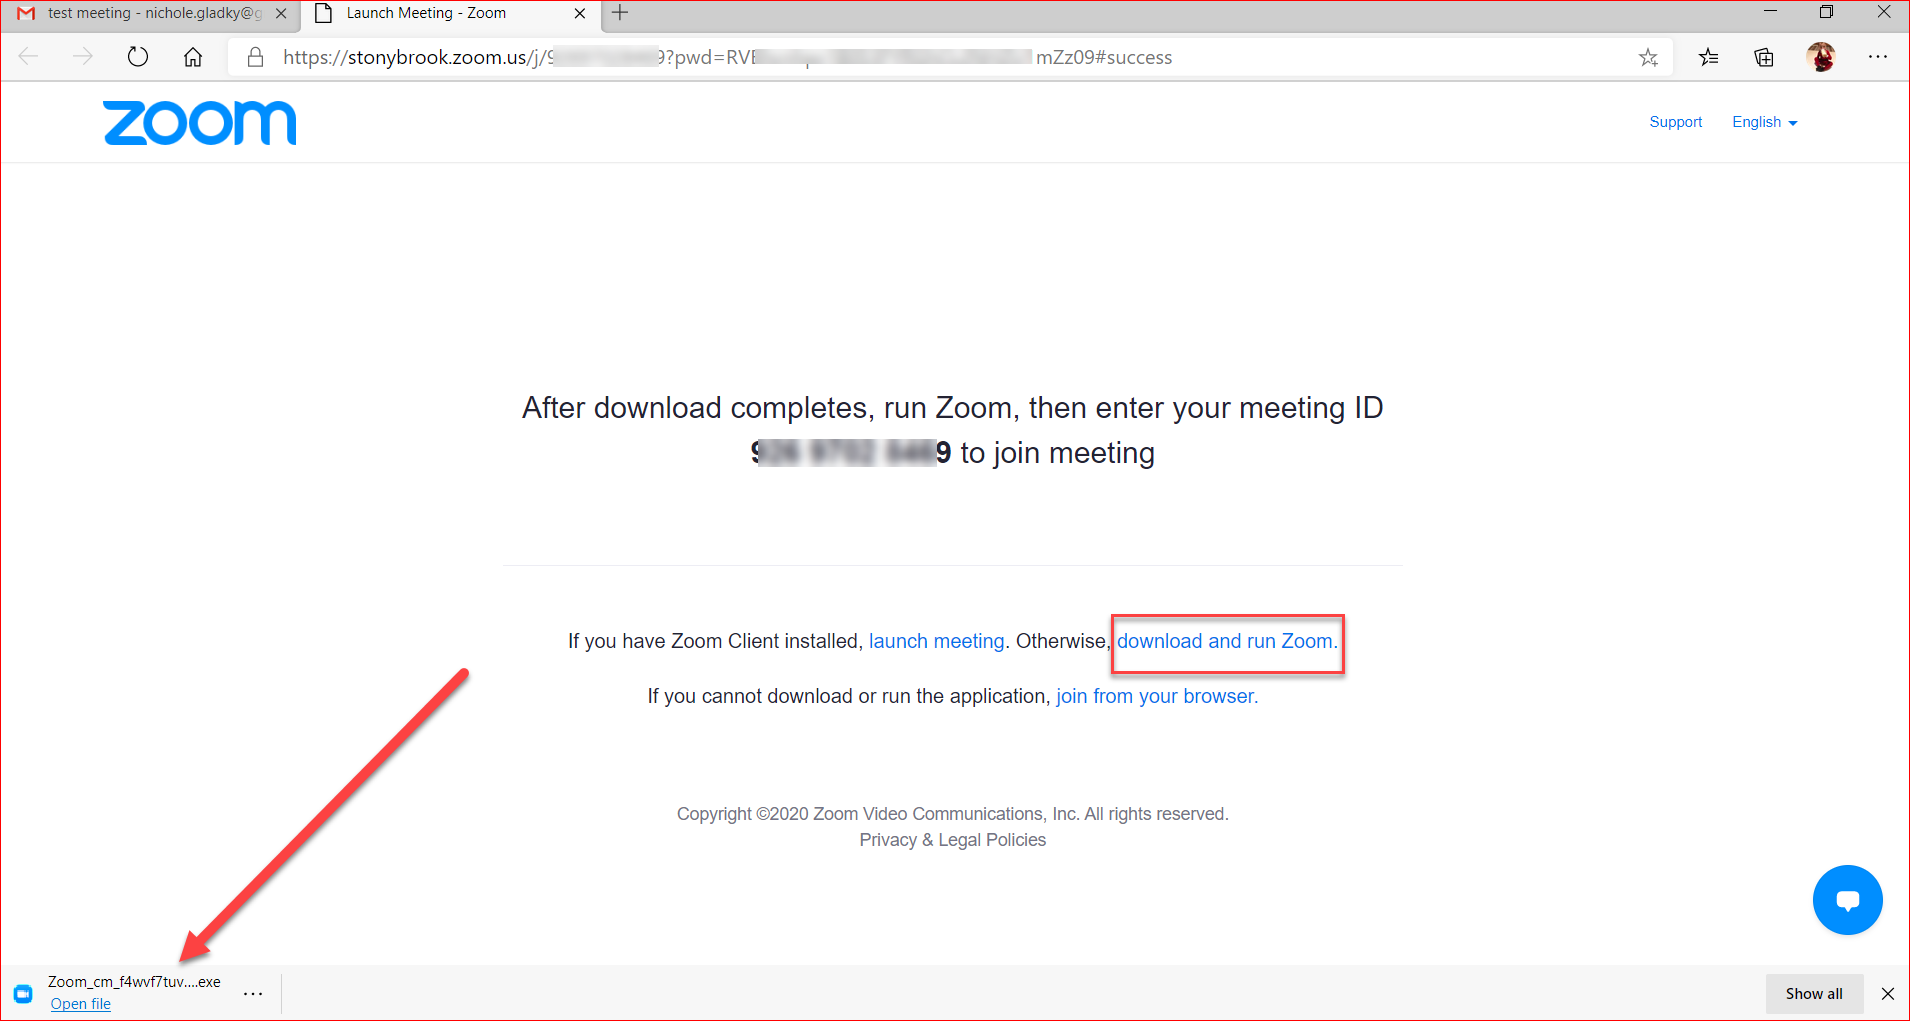
- If your guests do not have the Zoom Client installed on their computer
- When your guests click on the link to enter the meeting, they will be prompted to download the Zoom app to enter the meeting from their browser.
- If there no download automatically appears, they can click on download and run Zoom.
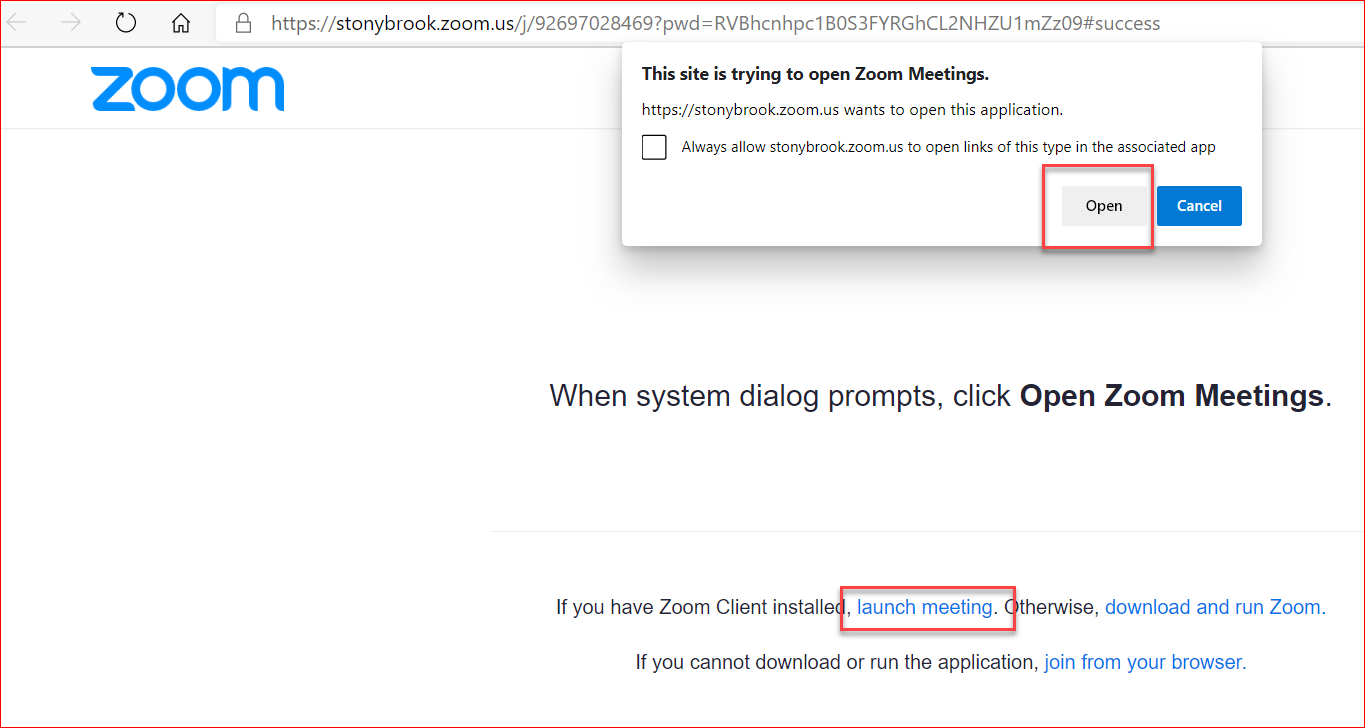
- If your guests already have the zoom app on their computer
- They can click open or run in the pop up. If a popup does not appear they can click Launch Meeting.
- They can click open or run in the pop up. If a popup does not appear they can click Launch Meeting.
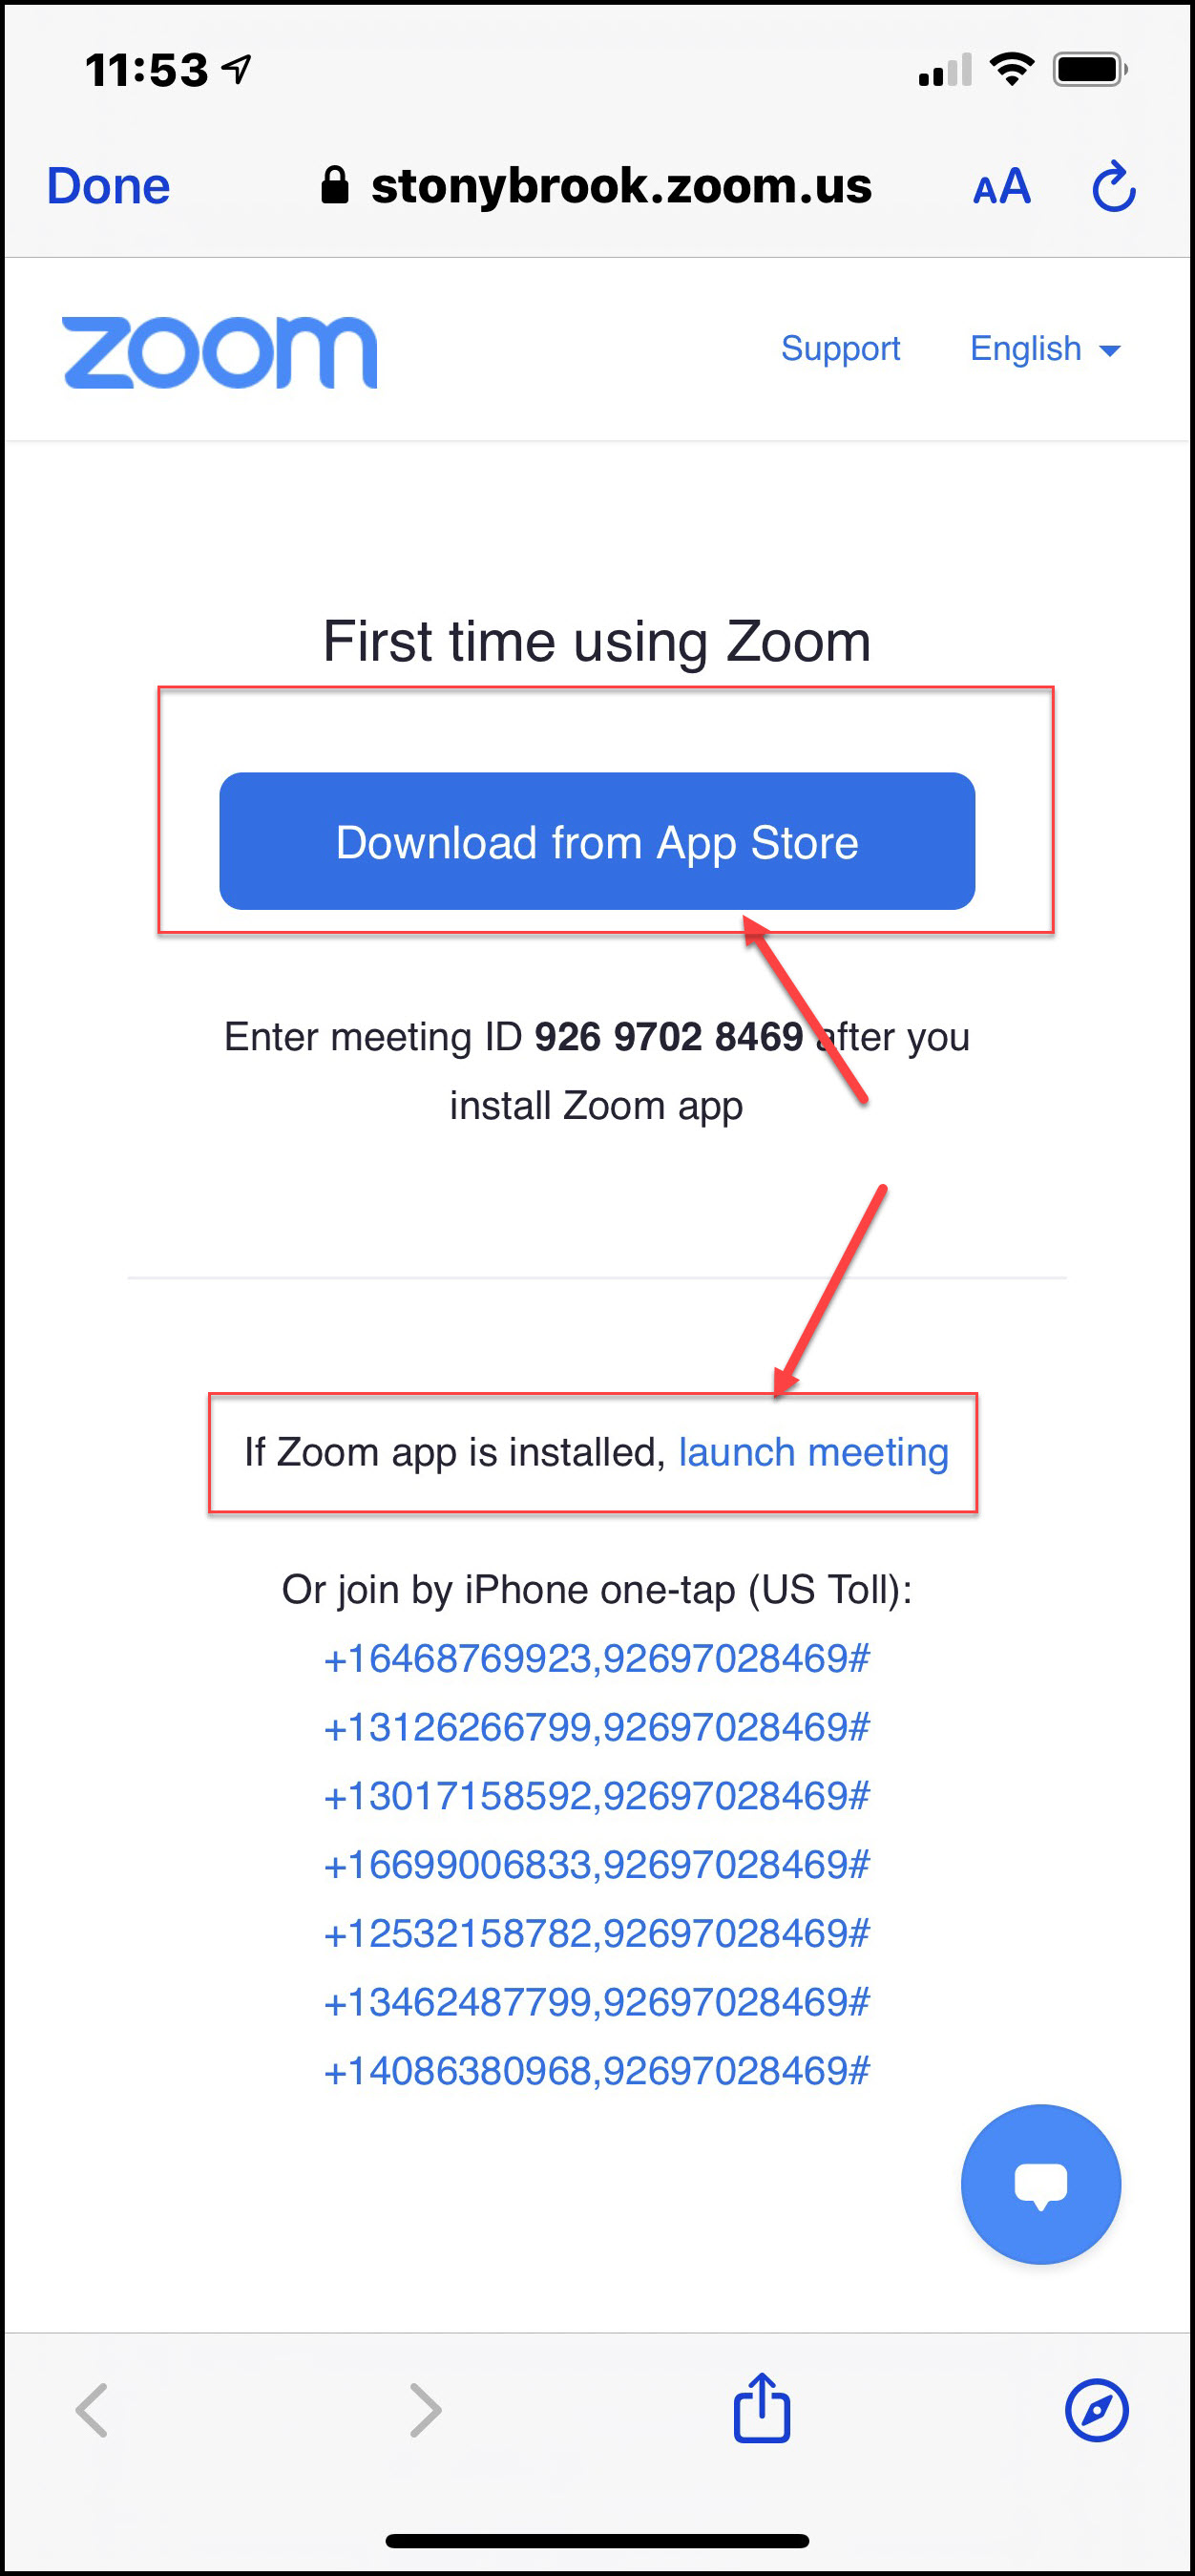
- If your guests are connecting from a mobile device
- They will be prompted to either download the Zoom App or launch the meeting if they already have the app installed.
- They will be prompted to either download the Zoom App or launch the meeting if they already have the app installed.
Information for Your Guests
Note : Guests should be encouraged to, before the meeting, download the Zoom Client or Mobile app from the Zoom Download Center; doing so ahead of time will allow them to get into the meeting once it's time more quickly and easily. They will not be required to create an account with Zoom.
Note : Guests will not be able to enter the meeting by clicking join from your browser.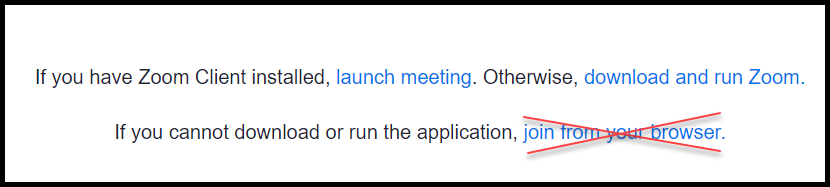
Note : Chromebook users can join using the Zoom Chromebook App.
Provide your guests with the information on how to get into a meeting as a Guest.
Your guest may also join a test room to ensure their computer/device is ready to use Zoom.