Brightspace: New Exam/Quiz Experience
Learn how to setup Quizzes and Exams in Brightspace
As of May 18th, 2023, we have transitioned to the New Exam/Quiz Experience in Brightspace. This new experience has changed the appearance of the Exam/Quiz creation area to be uniform with the area to create an Assignment. While this new experience may change the appearance of the Exam/Quiz creation area, this new experience will not effect the following:
- Exam/Quiz Settings
- Taking an Exam/Quiz
- Grading an Exam/Quiz
Overview:
- The Design
- Creating a Grade Item
- Categorizing a Grade Item
- Linking an Exam/Quiz to an Existing Grade Item
- Enabling Respondus
- Displaying Questions After an Attempt
- Adding a Due Date
- Question Paging
- Previewing Your Exam/Quiz
- Hiding an Exam/Quiz
What Has Changed?
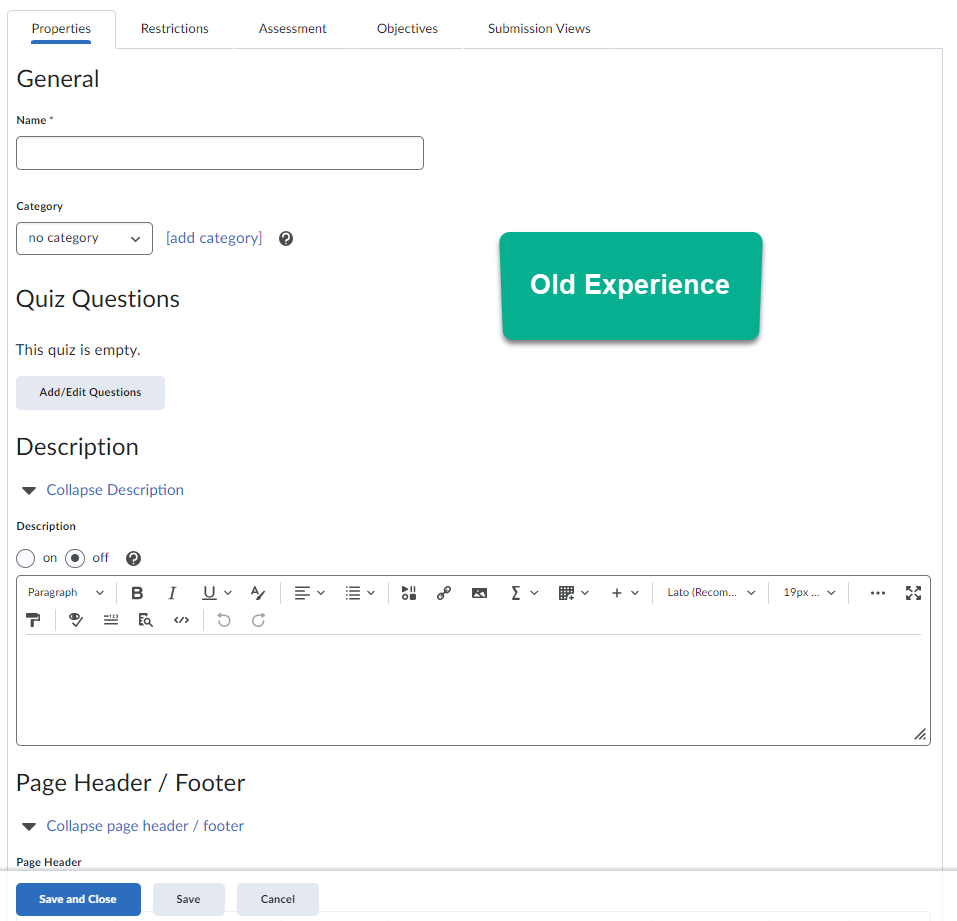
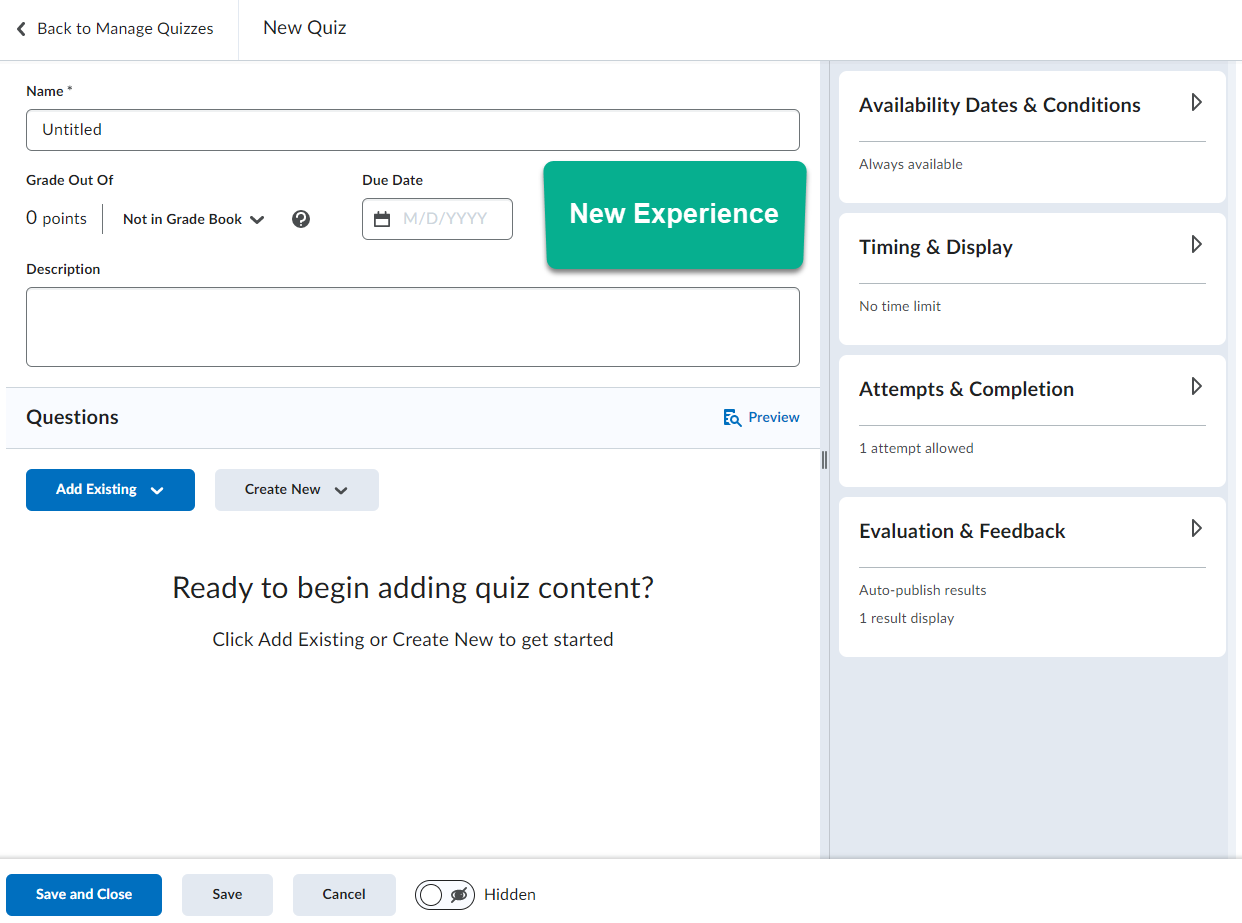
The Design
When creating an Exam/Quiz, the creation area will now resemble how it appears when creating an Assignment in Brightspace. The old experience had various tabs at the top of the screen that would allow instructors to customize their Exam/Quiz; these have now moved to the right of the screen in the new experience, and they have been given new titles.
Creating a Grade Item
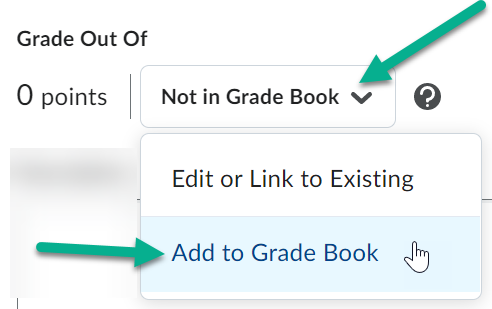
In the old experience, if you wanted to create a grade item for your Exam/Quiz, you would have to go to the Assessment tab and either create the grade item, or link it to an existing one in the gradebook. In the new experience, this works differently. Instead of going to a separate tab, you will have access to a section titled Grade Out Of, directly in the main Exam/Quiz creation area.
In this area, select the box that says Not In Grade Book, and then choose Add to Grade Book, this will create a grade item for your exam/quiz. Please note! This grade item will not be categorized in your gradebook. If you have a weighted gradebook, you will not be able to set the weight of the grade item from here, this must be done in Grades.
Categorizing a Grade Item
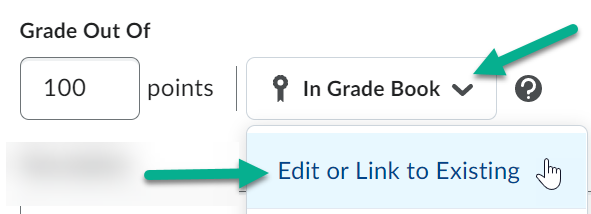
To assign a grade item you created from the Exam/Quiz creation area to a Grade Category, select the button that says In Grade Book, and then choose Edit or Link to Existing.
Once clicked, make sure you have the option Create and Link to a New Grade Item selected, and then you can click a button titled Choose Grade Category.
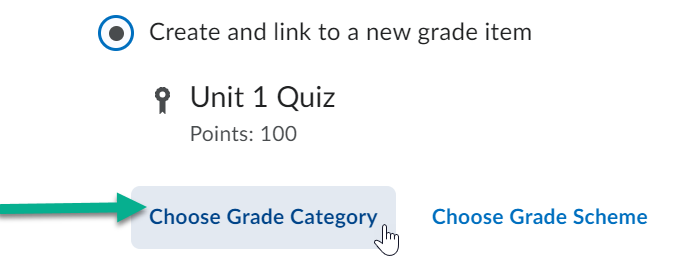
Once selected, you can choose the applicable category to assign this grade item to.
Linking an Exam/Quiz to an Existing Grade Item
In the new experience, if you would like to link your Exam/Quiz to an existing grade item, you can do so by selecting the In Grade Book button, and then choose Edit or Link to Existing.
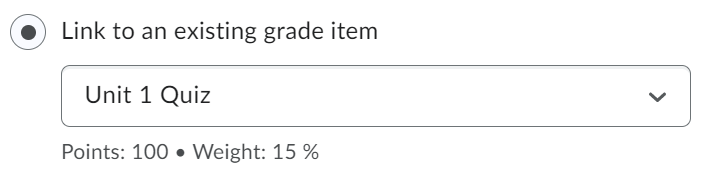
Once clicked, you can choose the option titled Link to an Existing Grade Item. Then choose the drop down selector to find the grade item you wish to link the exam/quiz to.
Enabling Respondus
In the old experience, you had the ability to enable Respondus when creating a specific exam. This feature has been removed in the new experience, however you may still enable Respondus from the main Exam/Quiz menu. To learn how to enable Respondus for your exams, click here.
Displaying Questions After an Attempt
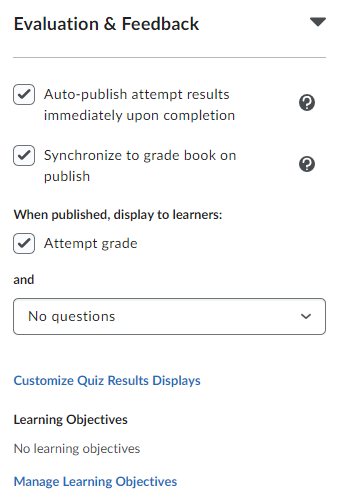
When Exam/Quiz results are published, by default, students cannot see which questions they answered correctly or incorrectly. In the old environment, instructors needed to go to the submission views tab and change default view settings in order to display these questions. The new experience however, has made the process of displaying these questions much simpler.
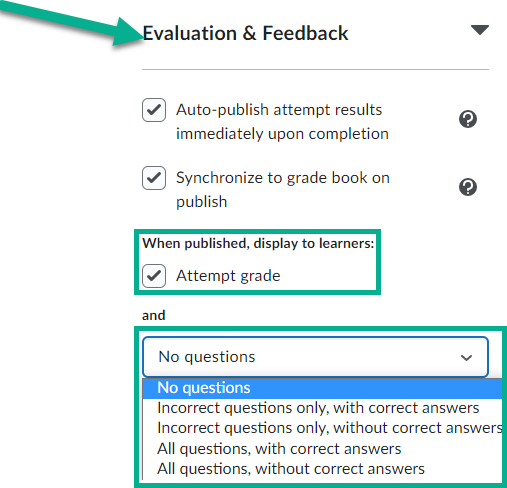
To do this, go to the Evaluation & Feedback area, and then find the section titled When published, display to learners. Under this section, select the checkbox for Attempt Grade, and below the checkbox, click on the dropdown selector and choose one of the following options to display questions:
- Incorrect questions only, with correct answers
- Incorrect questions only, without correct answers
- All questions, with correct answers
- All questions, without correct answers
If you would like to further customize displayed answers, you can do so by selecting the Customize Quiz Results Displays button.
![]()
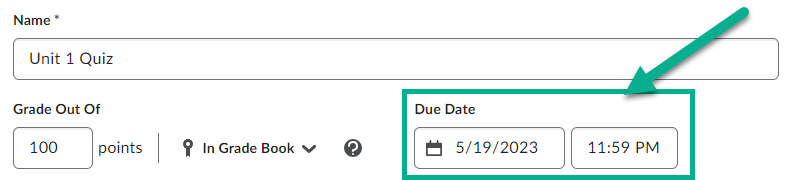
Adding a Due Date
The Due Date feature is now available from the main Exam/Quiz creation page as opposed to being located in a separate tab.
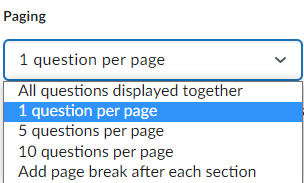
Question Paging
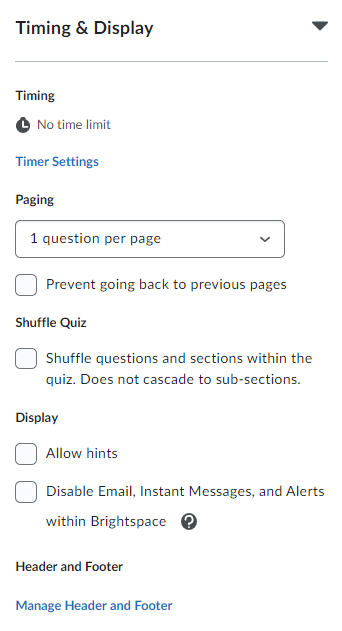
In the old environment, you could type in any amount of questions that you would like to display on each page of the Exam/Quiz. In the new environment, you are limited to choosing either 1, 5, or 10 questions to appear on each page, or to display all questions at once. This paging option can be found in the Timing & Display section when editing your Exam/Quiz.
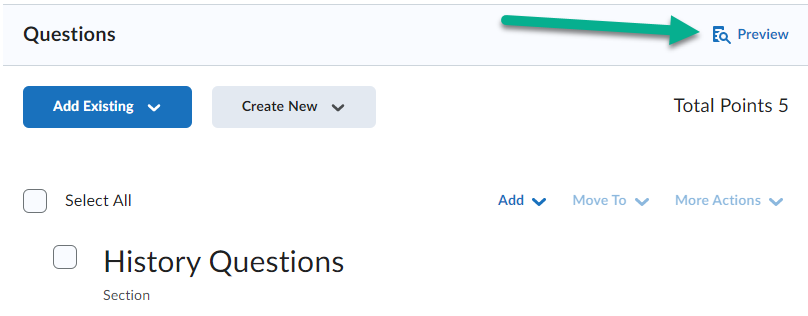
Previewing Your Exam/Quiz
In the new environment you are given an additional location to preview your Exam/Quiz directly when creating or editing it. This can be found in the Questions section of your Exam/Quiz.
Hiding an Exam/Quiz
When creating or editing an Exam/Quiz, you are now able to hide it from learners at the bottom of the screen by selecting the eye icon.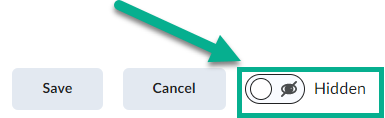
What Has Moved?
All customization options that existed in the old Exam/Quiz experience still exist in the new one. These features have been moved to four new areas of the Exam/Quiz creation screen:
- Availability Dates & Conditions
- Timing & Display
- Attempts & Completion
- Evaluation & Feedback
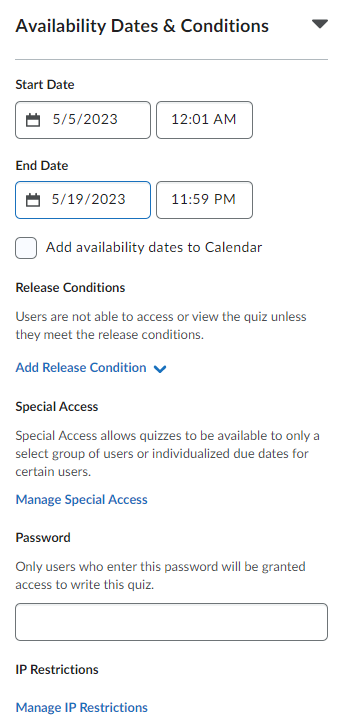
Availability Dates & Conditions
In the Availability Dates & Conditions section, you can find the following:
- Start and End Date
- Add your dates to the Course Calendar
- Release Conditions
- Managing Special Access
- Adding a Password
- Creating IP Restrictions
Timing & Display
- Time Limits
- Question Paging
- Prevent learners from going back to previous pages
- Shuffling Questions
- Allowing Hints
- Disable Email, Instant Messages, and Alerts within Brightspace
- Adding a Header and Footer
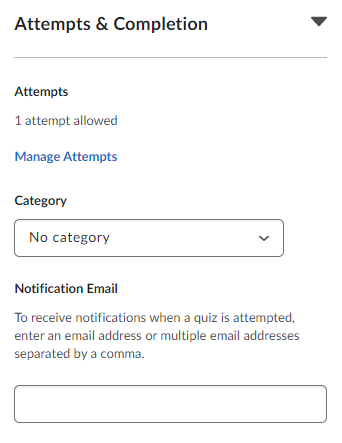
Attempts & Completion
- Attempt Amounts
- Overall grade calculations for multiple attempts
- Assigning Quiz Categories
- Notification Email for Attempt Completions
Evaluation & Feedback
- Auto-publish attempt results immediately upon completion
- Synchronize to grade book on publish
- Display Attempt Grade when Published
- Display Questions when Published
- Customize Quiz Results Displays
- Manage Learning Objectives