Hiding Assignments in Brightspace
There may be times when you want to create or edit assignments in Brightspace without making them immediately visible to students—such as when you're still finalizing instructions, dates, or grading criteria. Brightspace allows instructors to control the visibility of assignments, enabling you to hide them temporarily until you're ready to release them. This article will show you how to hide and later unhide assignments to manage student access effectively.
Hiding Assignments Indefinitely
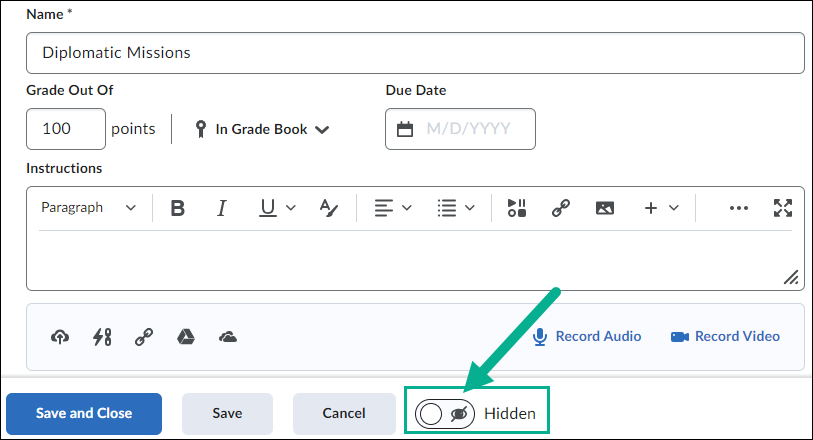
By default, assignments are set to be hidden when you create them. However, if you make your assignment visible, and wish to set it back to it's hidden status, you can hide it using any one of these three ways:
- When editing the assignment, you can select the hidden button at the bottom of the screen which will hide it from learners.
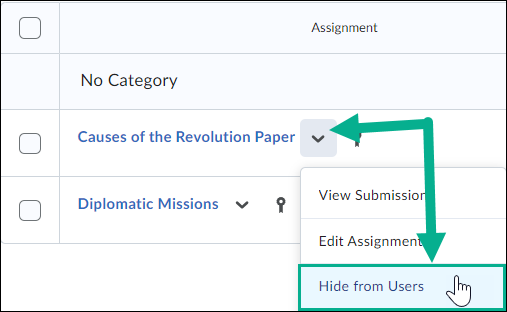
- In the main assignment area, select the arrow next to the assignment you wish to hide. Then select Hide From Users.
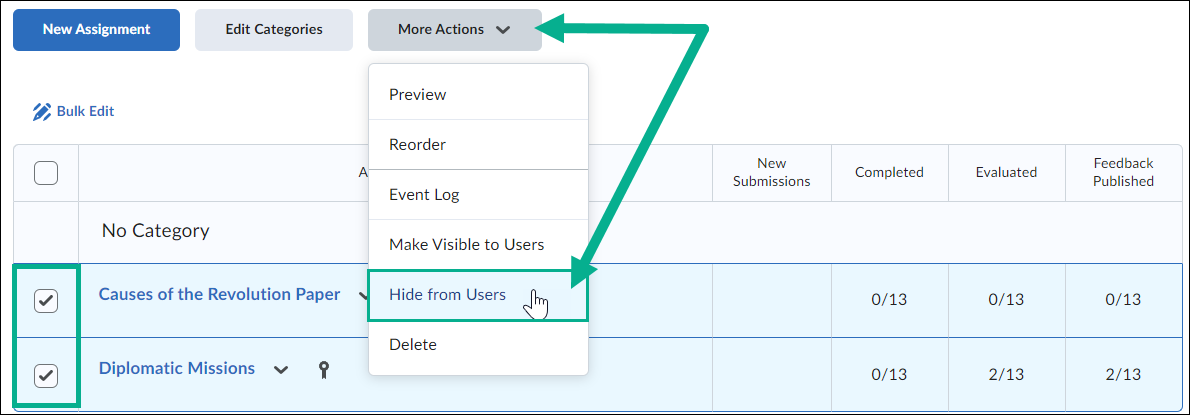
- In the main assignment area, select the assignments you wish to hide. Then select More Actions, and then choose Hide From Users. This option allows you to hide multiple assignments at once.
Please Note!
If you hide your assignments indefinitely, you must remember to manually make your assignment visible when it's ready, otherwise your students will not be able to view it. You can make the assignment visible by either:
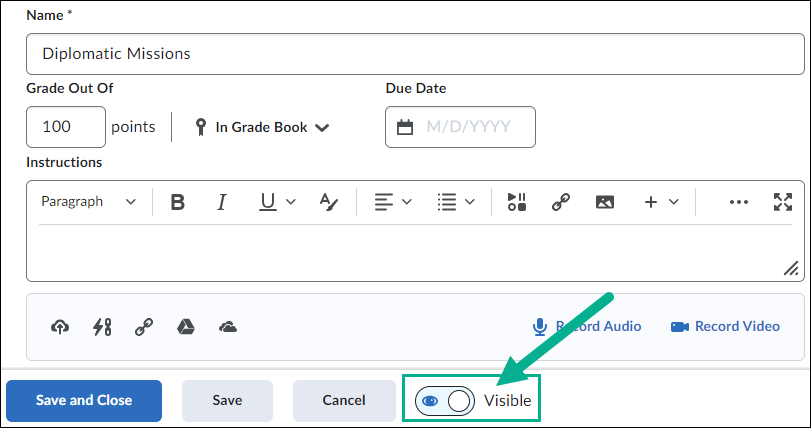
- Create/edit the assignment and at the bottom, switch the Hidden button to Visible.
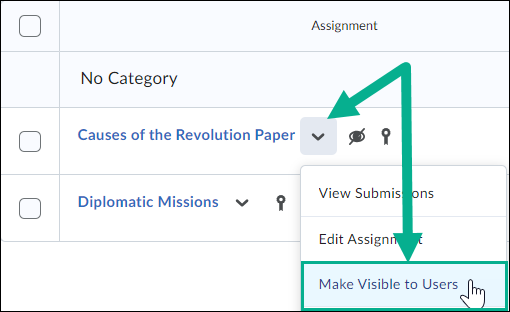
- In the main assignment area, select the arrow next to the assignment you wish to unhide and select Make Visible to Users.
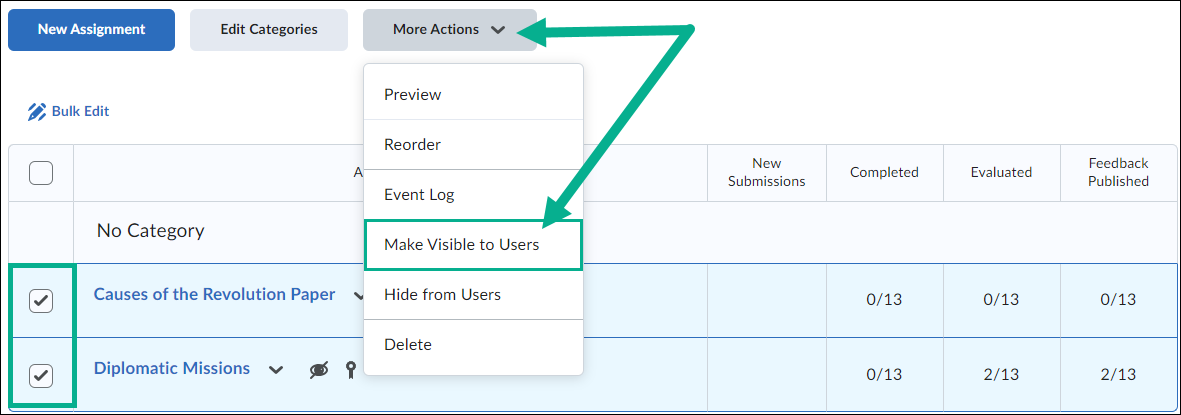
- In the main assignment area, select the assignments you wish to make visible. Select More Actions and then choose Make Visible to Users. This option allows you to make multiple assignments at once visible.
Hiding Assignments Until a Start Date
If your assignment was created, but you don't want students to access it until a specific date, you can set a start date for the assignment. To set a start date, follow these steps:
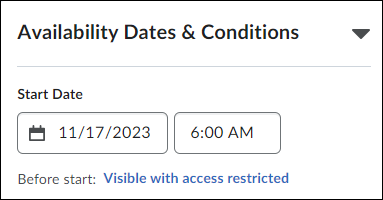
- When creating or editing your assignment, go to the Availability Dates & Restrictions section. Then enter your desired Start Date and Time for this assignment to be available to students.
- Under the Start Date, look for the option that says Before Start. By default next to it will say Visible with access restricted. If you click this link you will have the option to choose how this assignment will appear to students before the start date.
Options include:
- Visible with access restricted: Students will only be able to see the title of the assignment, as well as when it is available

- Visible with submission restricted: Students will be able to see the title of the assignment, when it is available, and a description of the assignment. However they cannot submit anything until the start date and time.

- Hidden: The assignment will not be visible until the start date and time
