Uploading Zoom Recordings to YouTube
You can upload and edit Zoom recordings to YouTube using your Stony Brook Google account. Follow these instructions and watch the video demo.
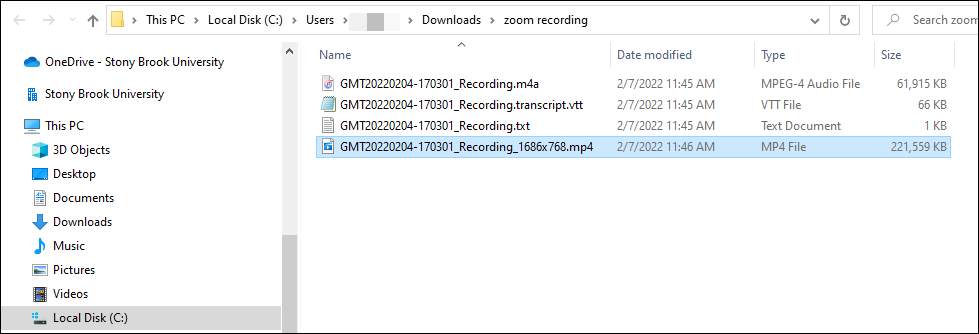
Find the Recording (Video) File
- Find the recording and if they are cloud recordings, download them to your computer.
- You will see 2 to 4 files for each recorded session:
- Audio Only (.m4a) - the audio recording of the event only
- Chat (.txt) - the chat text during the meeting
- Transcript file (.vtt)
- Video file (.mp4) - this is the video file you can upload to YouTube.
Upload to YouTube
- Log into your Stony Brook email account
- Click on the 9 squares in the upper right corner to open up the list of connected Google Apps
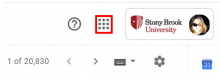
- Scroll down to the Youtube icon and click on it
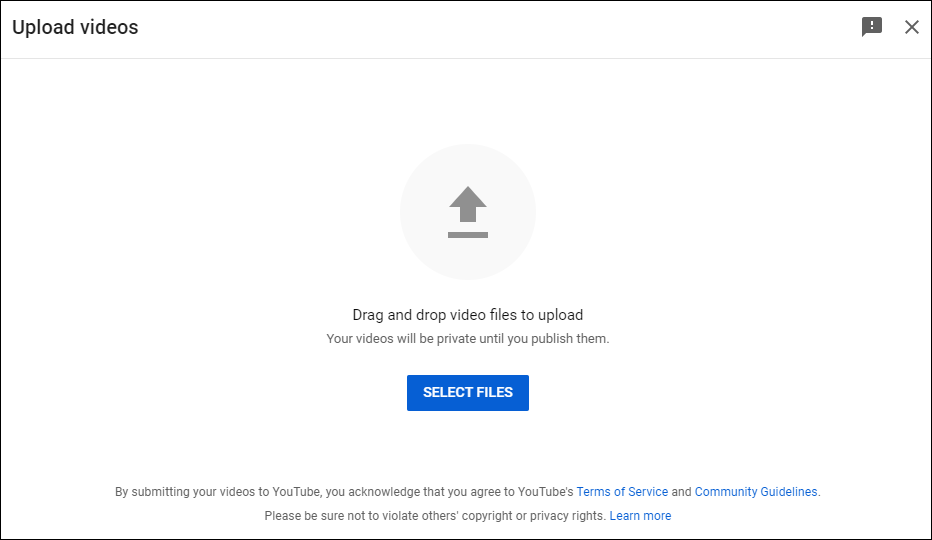
- Click on the Camera icon in the upper right corner and then click Upload Video

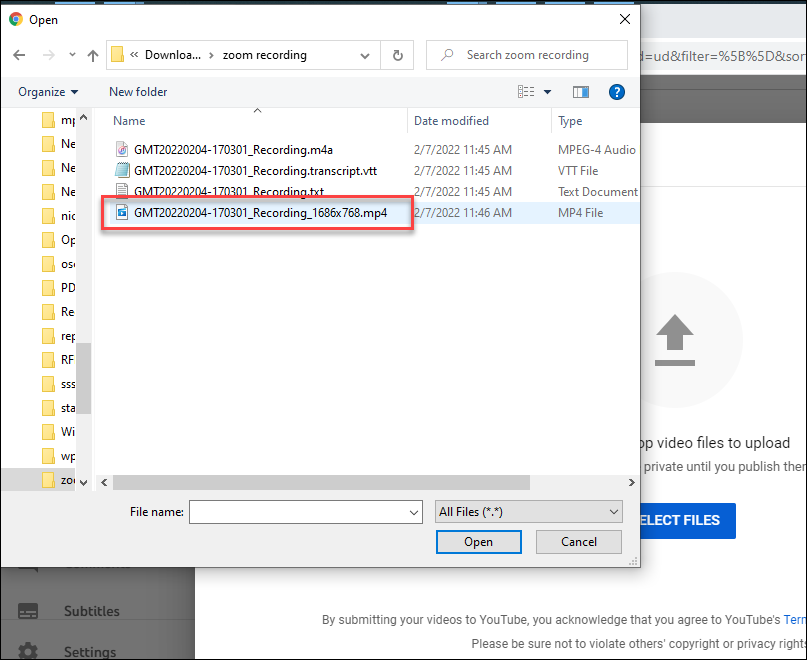
- In the Upload Videos window, click Select to find your video file (.mp4) or drag your video file into this window.
- Click the Copy button on the right to copy the link to your video (paste it somewhere for safe keeping).
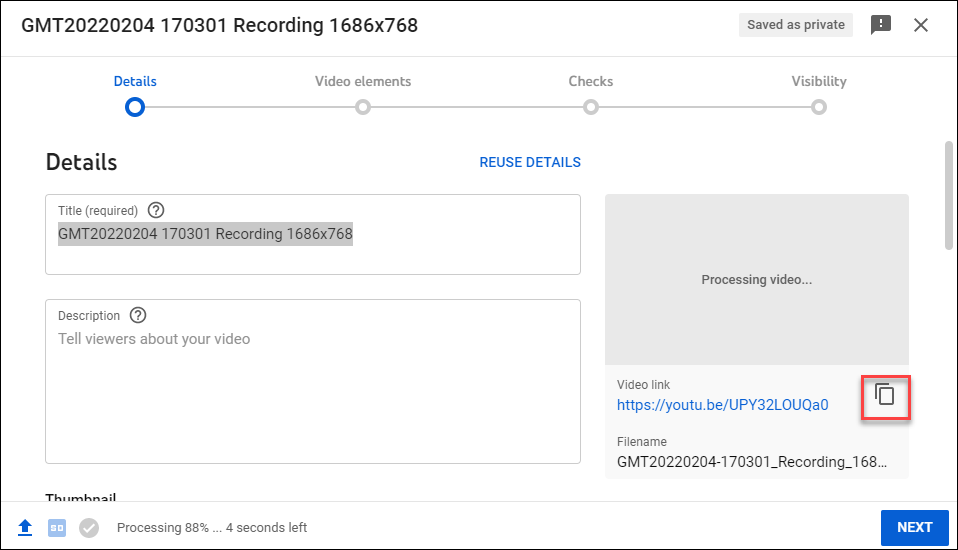
As your video uploads you can configure your settings for the video.- Title: Briefly describe your video. You can add dates here to help you sort them later
- Description: Tell your viewers more about your video
- Thumbnail: If you are uploading a large file, this field may not become immediately available you can skip this step.
- Playlists: You can add your video to playlists if you want to share your content out
- Audience: Is this video made for kids? We recommend you select No, it's not made for kids. Content that is made for children is protected and must meet certain standards.
- Click Next in the lower right corner. You can add automated subtitles and decide if the visibility should be Private, Unlisted or Public or do it later (see the last step). When finished, click Save.
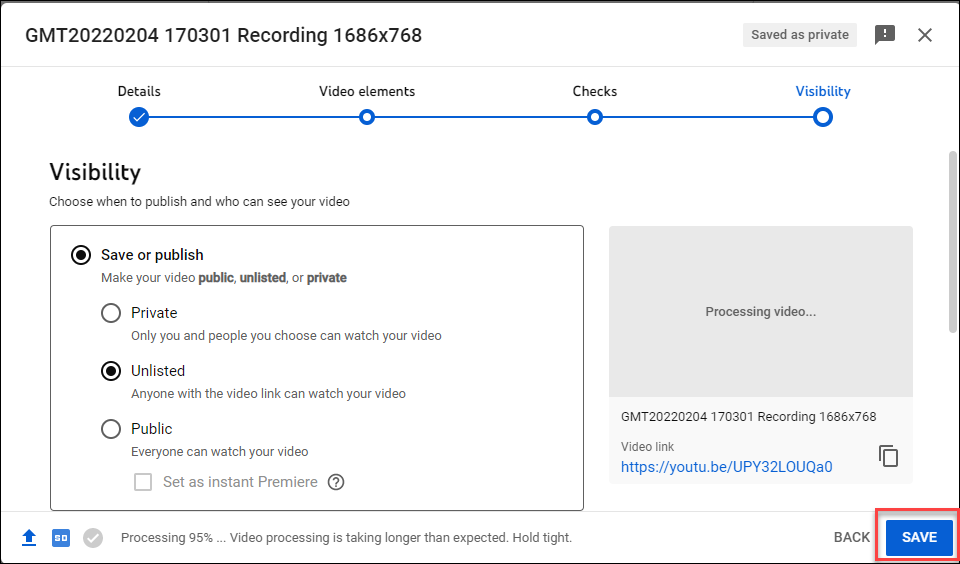
- Close the next window if your video is still processing. This could take a while for your content to become live, and it will process in the background.
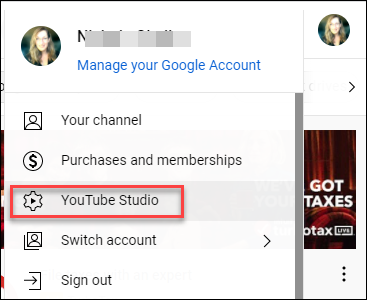
- You can check the status of your video, change the visibility, or manage subtitles in the studio editor any time by going back to your YouTube account (see steps 1-3) and then clicking on the avatar at the top right of the screen and then click YouTube Studio and then click Content.
Edit your Videos on YouTube using YouTube Studio
Supported By
Customer Engagement and Support