Finding My Zoom Recordings
After hosting or attending a Zoom meeting, you may want to review the recording—but locating it isn’t always straightforward. Whether your meeting was recorded locally on your device or saved to the cloud, Zoom provides a few different ways to access those files. In this article, we’ll walk you through how to find your Zoom recordings, depending on your settings and where they were saved.
Zoom has two types of recordings: cloud (online-for Faculty and Staff only) and local (on your computer-for Faculty, Staff, and Students). You can find and access cloud and local recordings two ways:
- In the Zoom Desktop Client (Mac/Windows)
- In the Zoom Web Client at stonybrook.zoom.us
Keep Zoom Cloud Recording Retention in mind for cloud recordings, as cloud recordings are automatically deleted as per that retention timeline.
Access/Find All Recordings in Zoom Desktop (Mac/Windows)
- Launch the Zoom Client on your Windows/Mac and sign into the client using SSO and your NetID and NetID password
- At the top, click Meetings
- On the left, click Recorded
- On the left, select the meeting you would like to view the recording for
- Click Open to open the folder/link for recording files. If you only see an Open button, the recording is a cloud recording; if you see more buttons like Open, Play Video, Play Audio Only, Delete, the recording is a local recording.
This screenshot depicts the Zoom Mac Client showing a Local Recording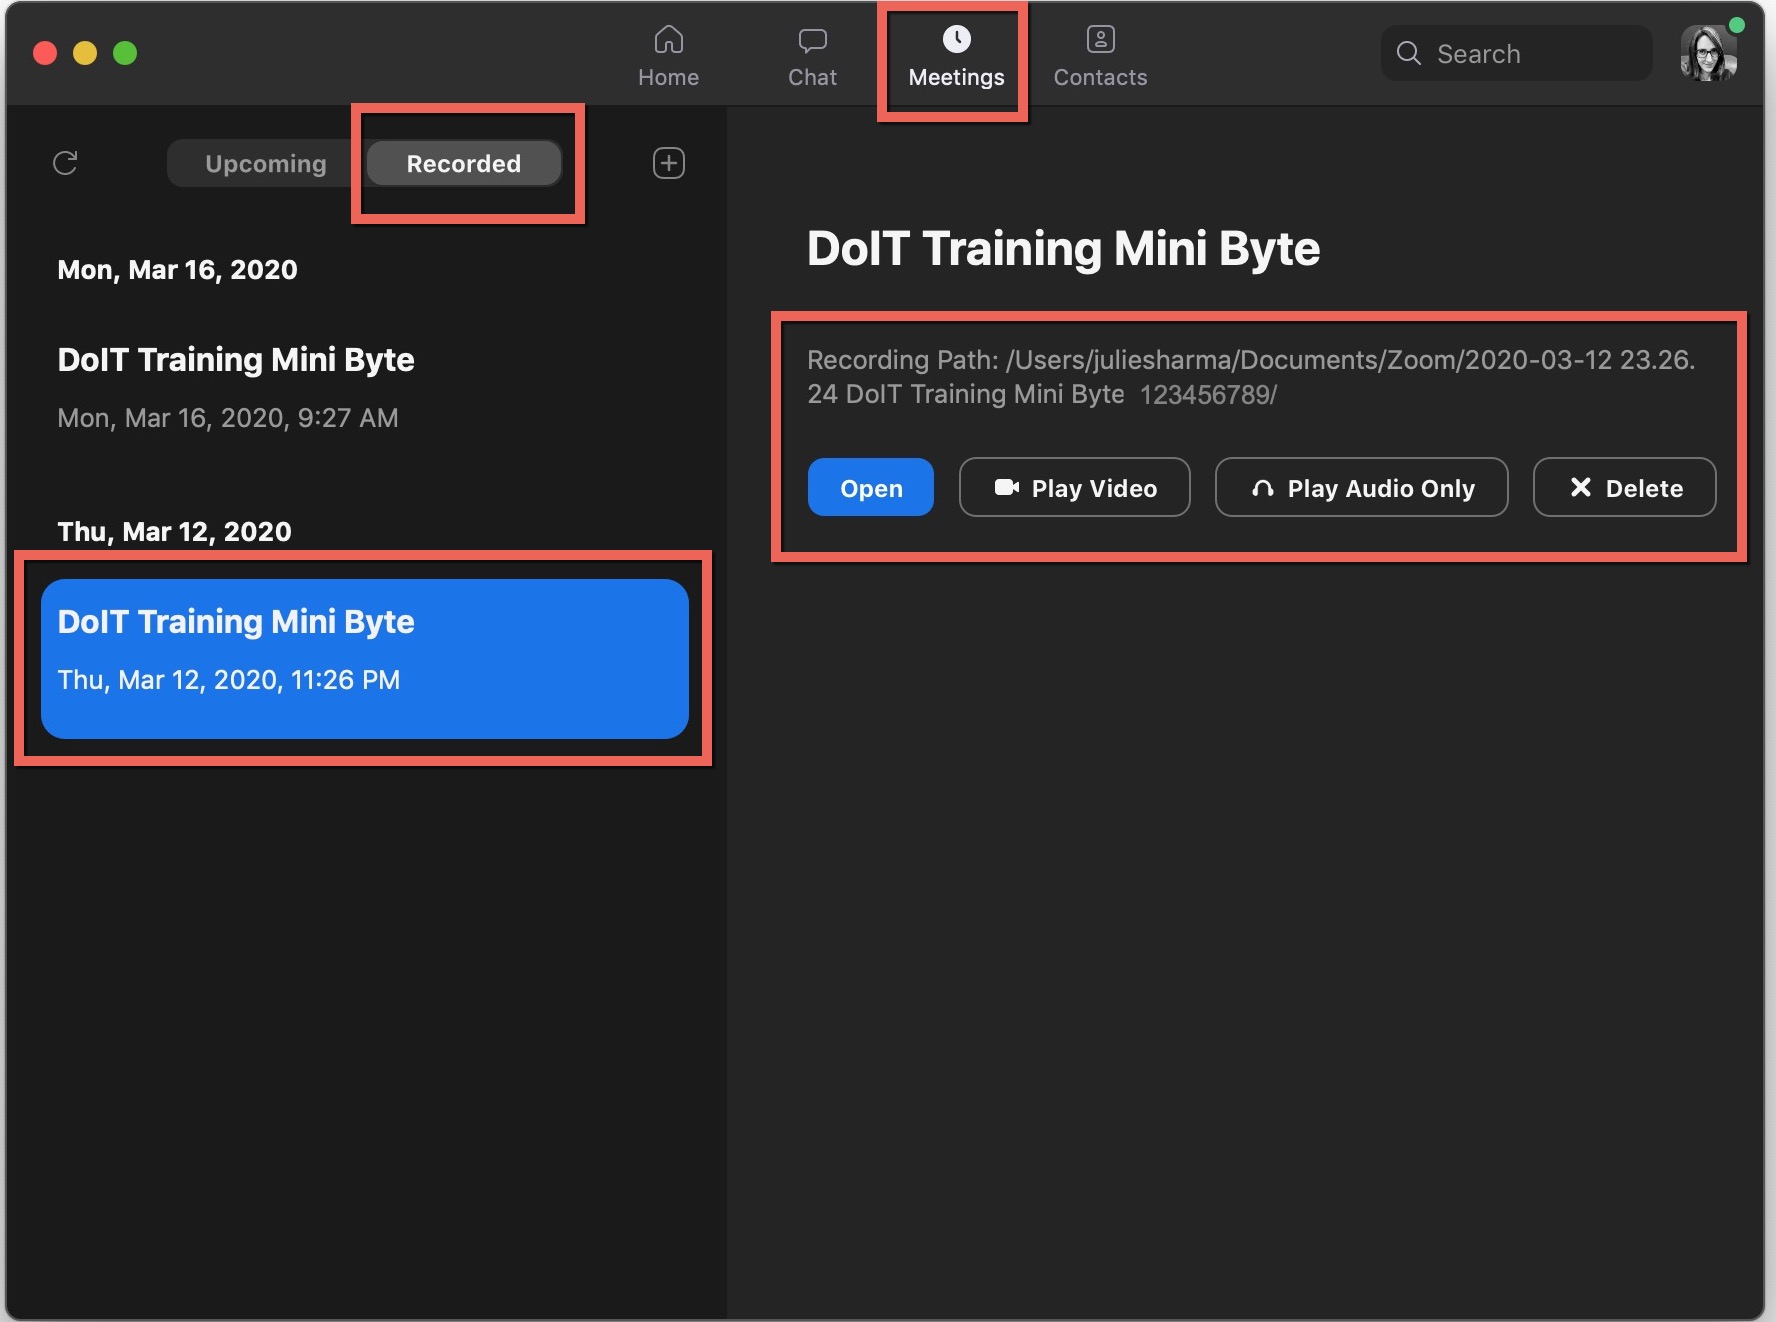
When you Open a cloud recording you will see the Download button to save a copy of the video to your computer.
Access/Find All Recordings in Zoom on the Zoom Web Portal
- Sign into your Zoom account at stonybrook.zoom.us with your NetID and NetID password
- On the left, click My Recordings
- Along the top, click Cloud* Recordings or Local Recordings
- For Cloud Recordings, you'll see an Auto Delete in column that shows how many days until the recording will automatically be moved to Zoom Trash
- To download a video, click on the video name and then click Download.
This image depicts the Zoom Web Portal showing Cloud Recordings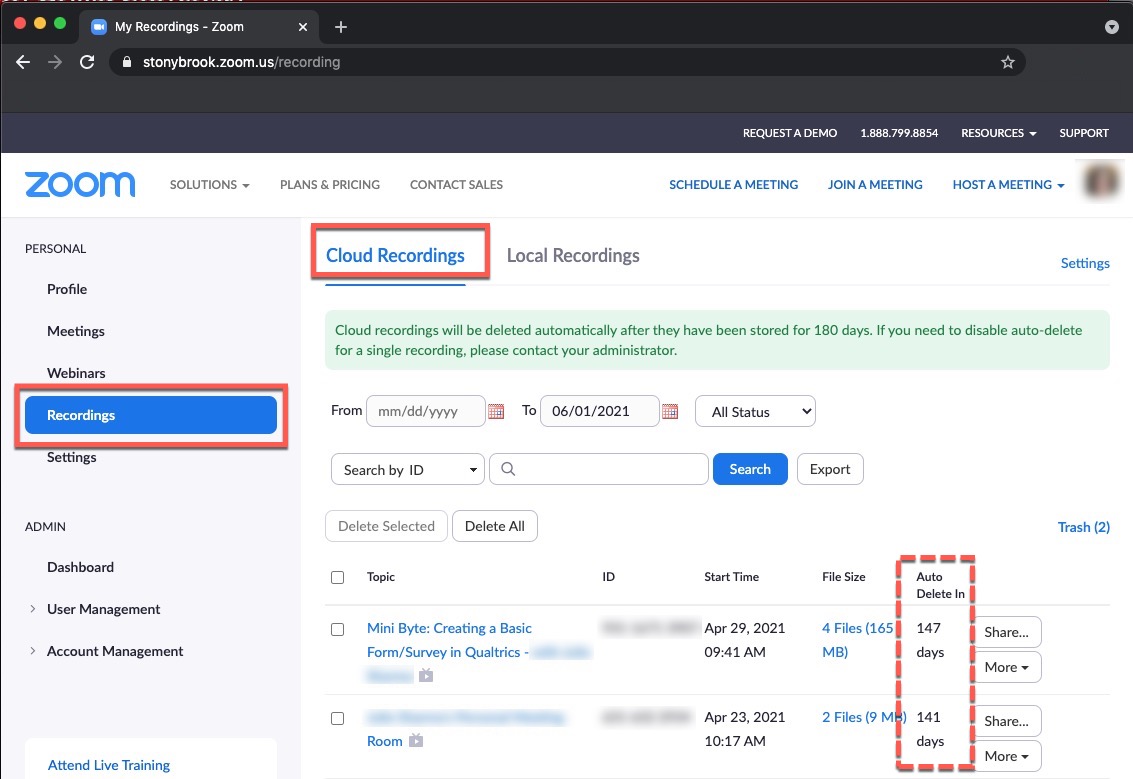
Supported By
Customer Engagement and Support