Creating a Zoom Meeting in a Browser
Creating a Zoom meeting directly in a browser is a quick and convenient way to schedule or start virtual meetings without needing to install the desktop app. Whether you're using a work computer, a shared device, or simply prefer not to download additional software, Zoom’s web interface provides all the essential tools to set up and manage your meetings efficiently. This article will walk you through the steps to create a Zoom meeting using just your browser.
You can Schedule a Zoom Meeting from any browser.
- In a browser, go to Zoom at stonybrook.zoom.us
- Click Sign in and sign in with your NetID and NetID Password*
- Click Schedule a Meeting near the top right
- Fill in this form with a title, date and time. Check the Security settings and the Options section to add an alternative host if necessary.
- Click Save.
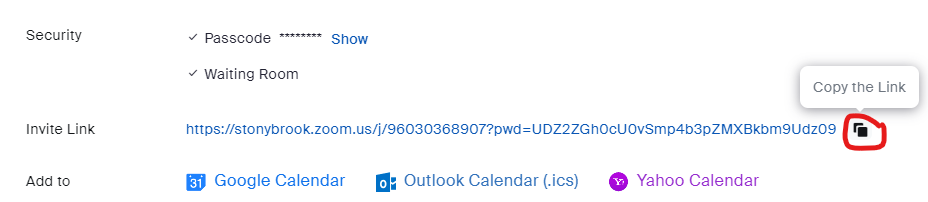
- On the next page you can copy the link to the Zoom meeting and paste it in an email or where ever you want to reach your audience:
Link to learn more about Getting Started with Zoom
*If you don't know your NetID or NetID password, you can visit the link to find them online now New!
(In the new Stony Brook Password Reset tool, start by updating your profile, and then you will see your NetID and/or be able to reset your password)
Link to finding your Zoom Recordings in the Web Portal
Link to setting/ changing password for Zoom Cloud Recordings