Button Panel Classrooms
This is a general help guide for all classrooms with this style touch panel. While the steps and location of buttons are the same regardless of which style room you are in, there may be slight discrepancies in font, color, options and icons, dependent on the slight differences in hardware.
For specific details about your classroom, please refer to the Installed Classroom Equipment Guide or contact Classroom Technology & Support Solutions.
Getting Started
Step 1: Power on the media system.
Locate the button panel. This is typically found near the computer station, mounted to the wall.
- Power on the system by pressing the power button located in the upper left corner.
- Please allow up to 20 seconds for the system to power on. During this time you will not be able to touch other buttons on the touch panel.
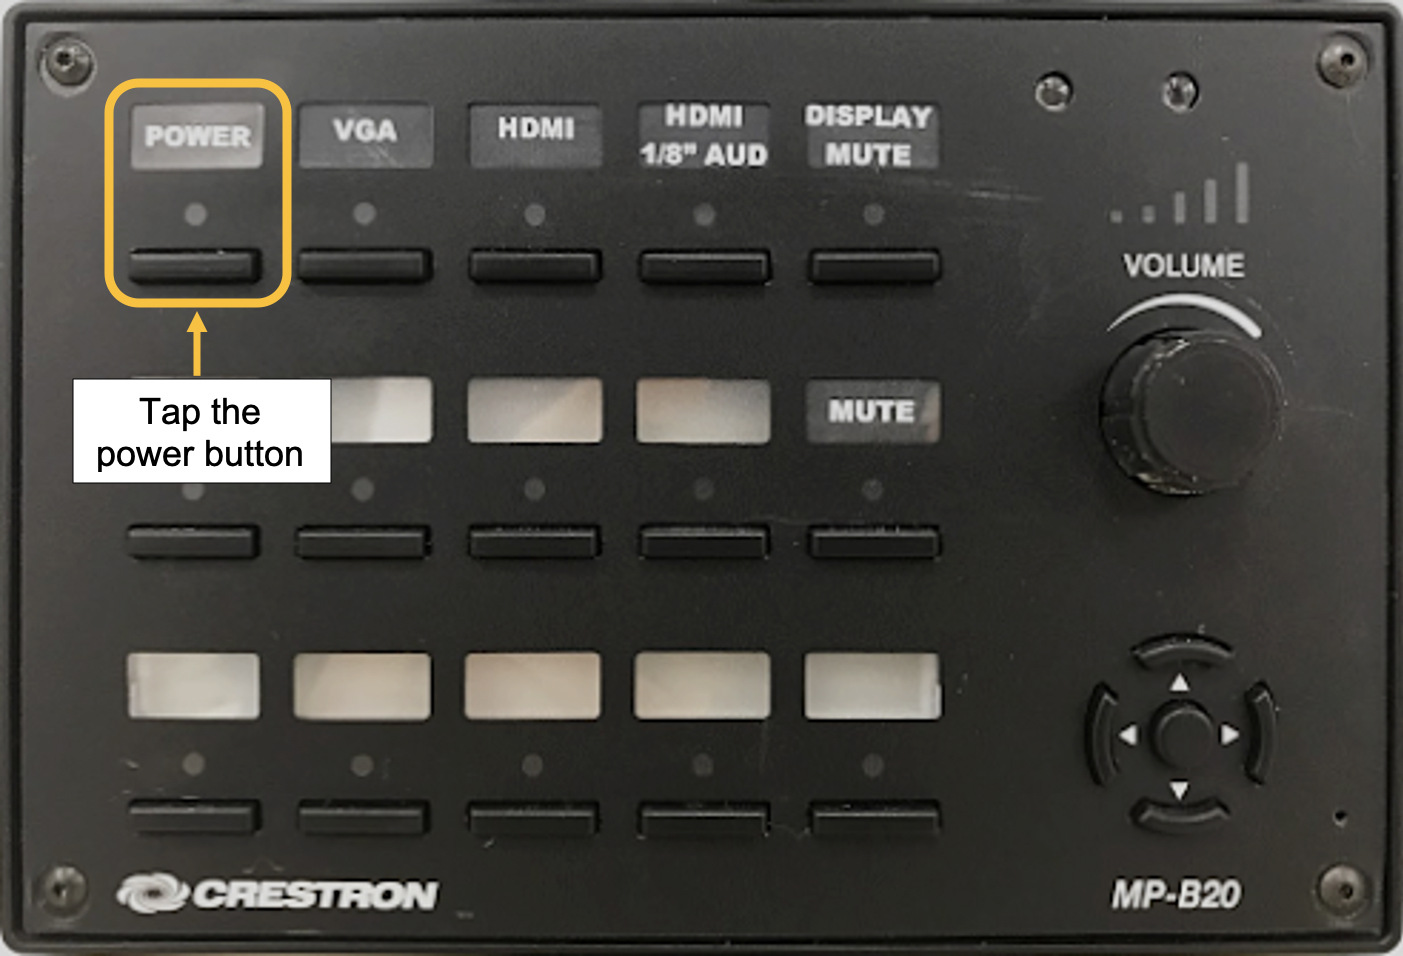
Once it is fully powered on, the LED light under “Power” will be a solid red color.
Step 2: Connect your device.
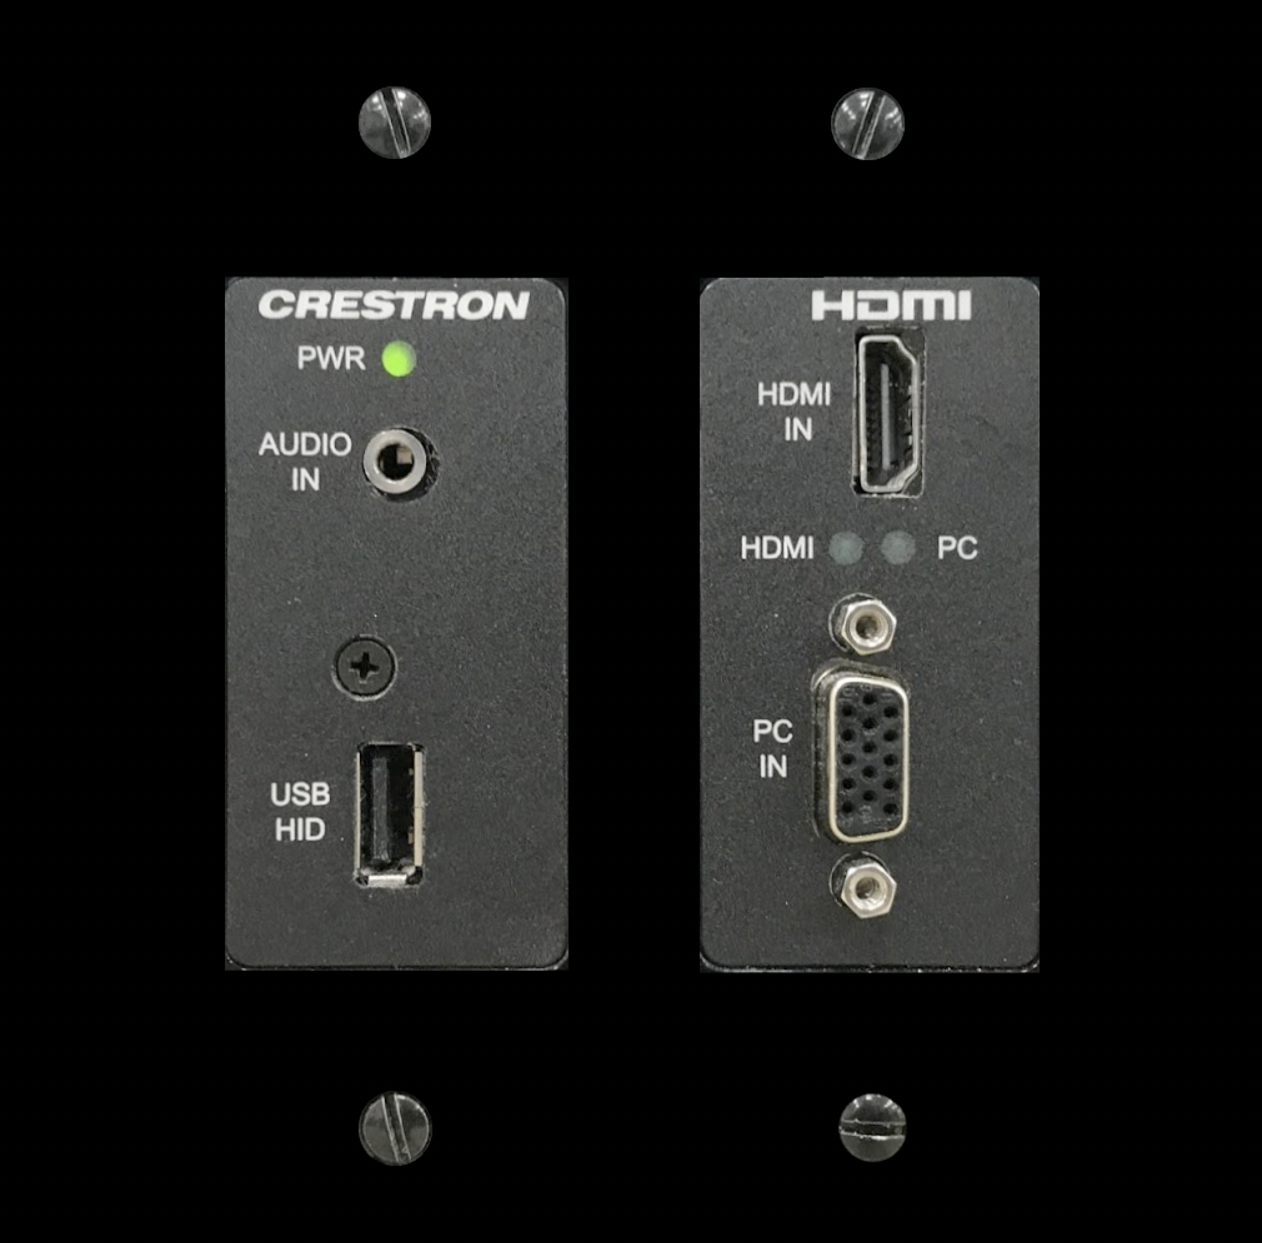
- Connect a VGA or HDMI cable to the input plate on the wall. It may be the same height as the electrical outlets.
- Connect the other end of the cable to your laptop or device.
Step 3: Select a source
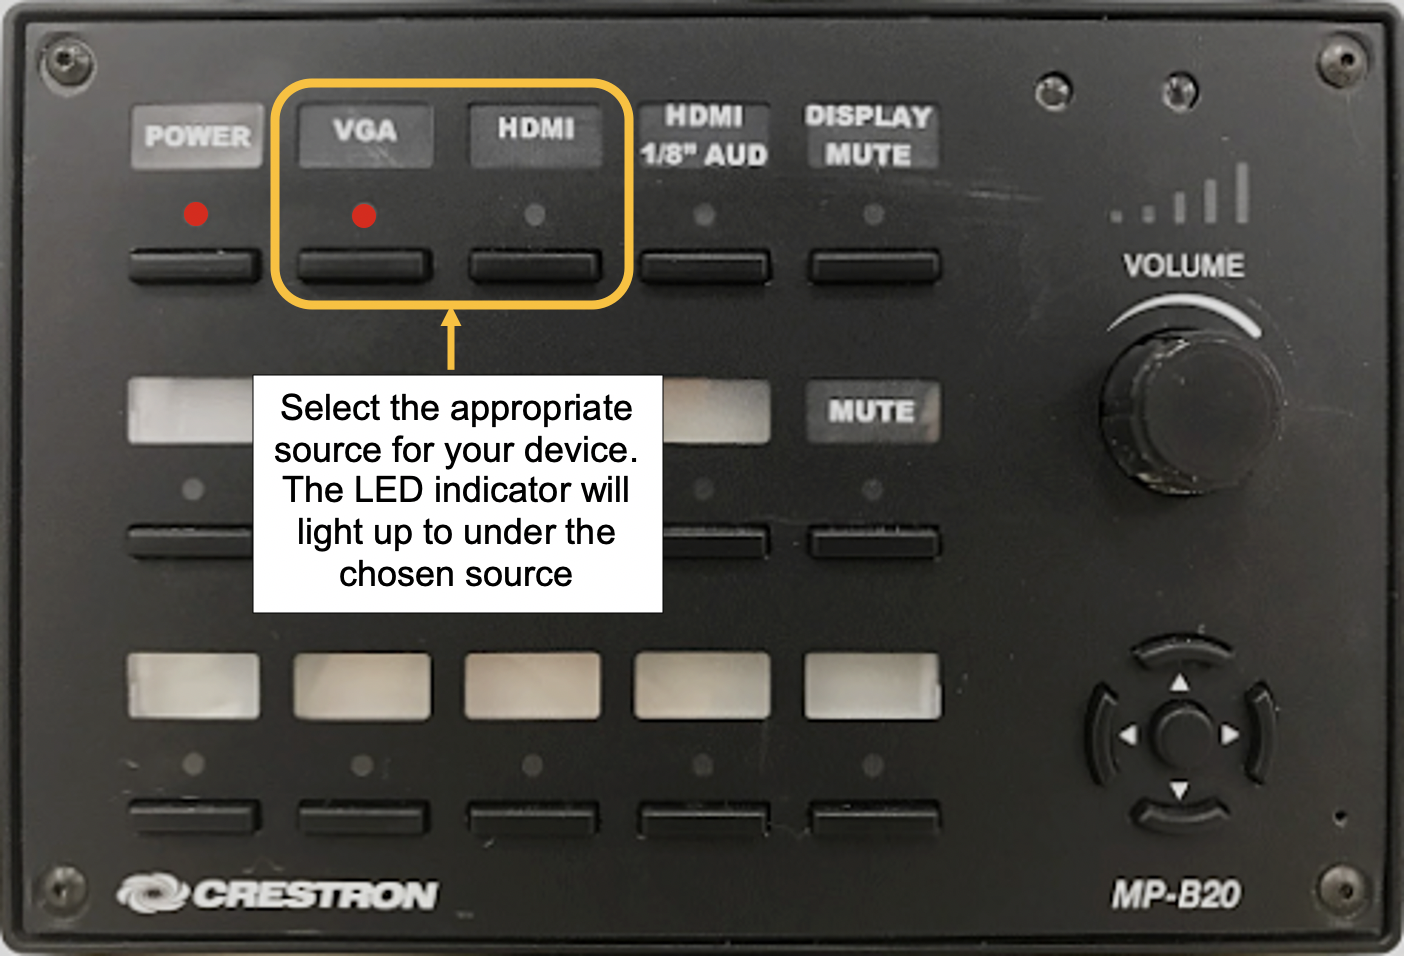
Locate the buttons labeled “VGA” or “HDMI”. Choose the one that is appropriate for your device's connection.
- Standard cables can be borrowed from the Support Office.
- Please provide your own adapters if your device does not have a dedicated port.
Step 4. Powering Down
When you are finished, please power down the media system. Press and hold the power button for 3 seconds. The LED light on the button panel will begin to flash to let you know it has started powering down.
- You will also see the projector has turned off and is no longer projecting an image.
Additional Controls and Options
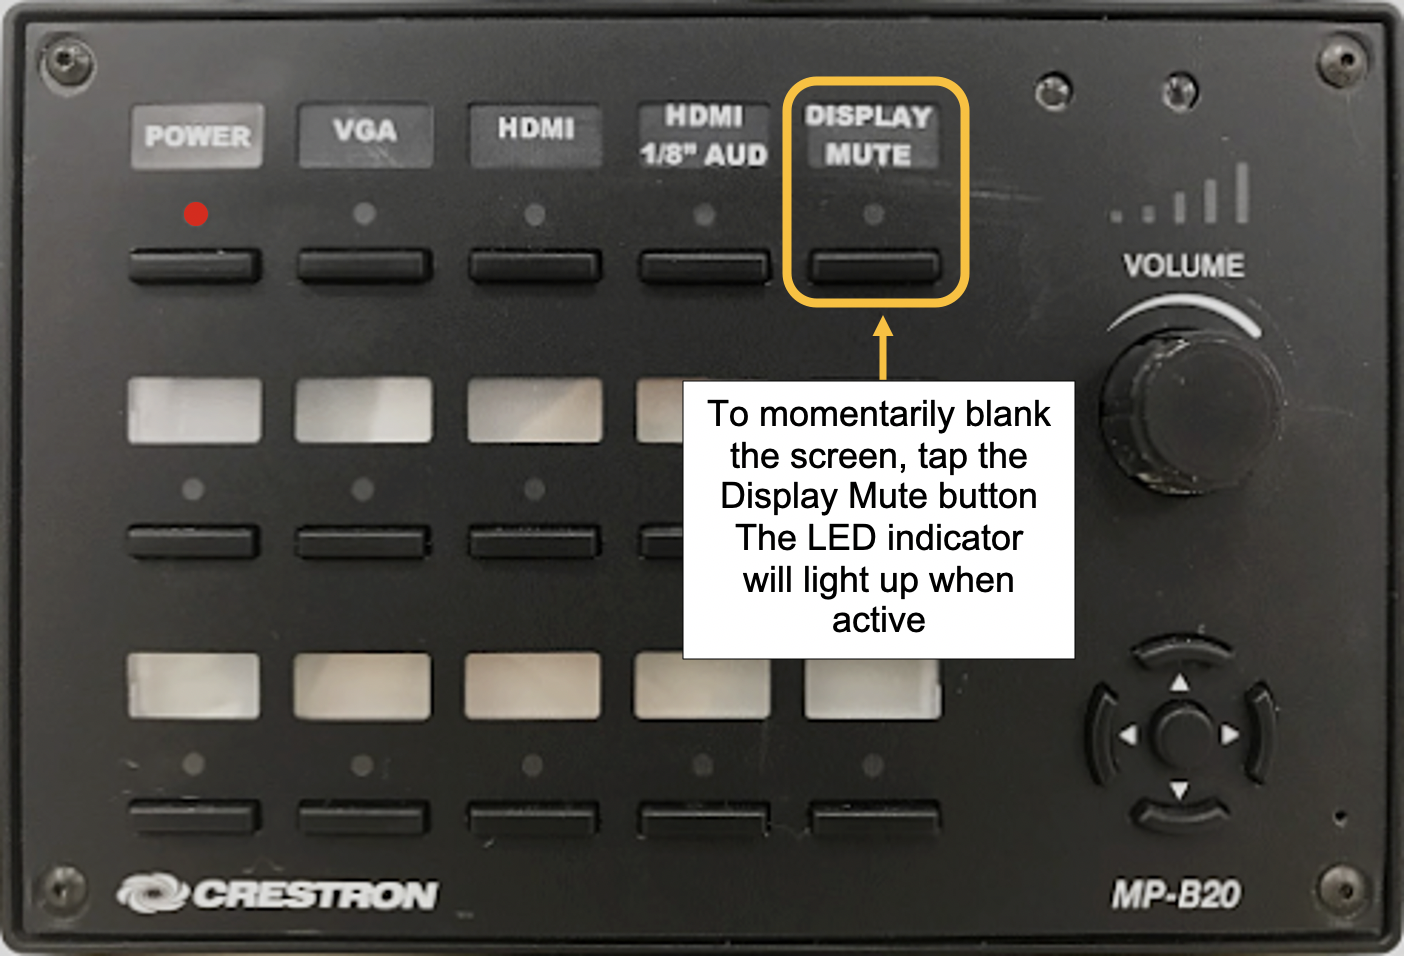
1. Hide the projected image.
To hide what the projector is displaying, without the need to turn off the system, press the Image Mute button.
- This will hide what is being displayed on the projector until you disable it.
- The LED light will light up while it is active.
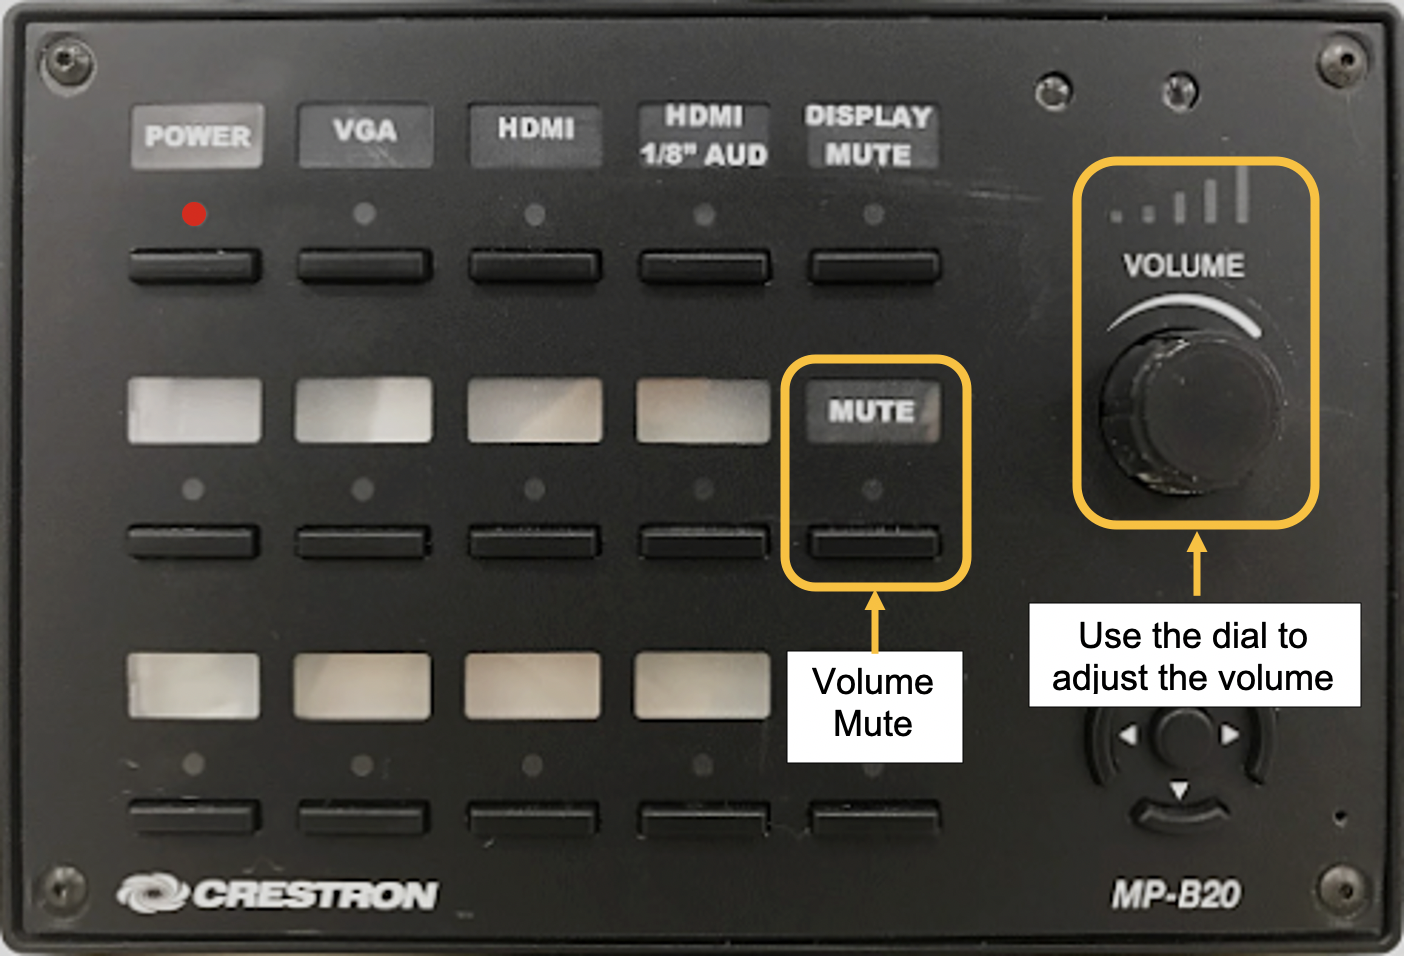
2. Adjusting the volume.
Use the knob on the right side to raise and lower the volume.
A clockwise rotation will increase the volume.
A counter-clockwise rotation will decrease the volume.
A separate mute button will let you quickly silence all audio in the room.
If you have any issues or would like to schedule one-on-one training with a member of our staff, please do not hesitate to reach out to us. Our contact information can be found below.