Working with Lists in Sharepoint
Lists allow you to classify and organize data on SharePoint.
Creating a List
- Sign into Sharepoint and navigate to your site (left bar)
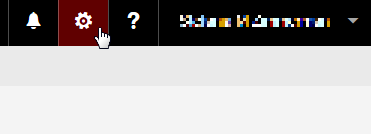
- Click on the gear next to your name (top right)
- Click Site contents
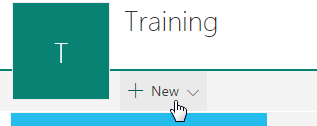
- Click New (under your site's title)
- Select list
- Enter a name and description
- Click Create
Adding Columns to Your List
Data is stored in columns, you'll need to create a column for each type of data you want to collect
- Open your list
- Navigate to your site
- Go to settings (gear, top right), then "Site Content"
- Your list will show in the bar to the left
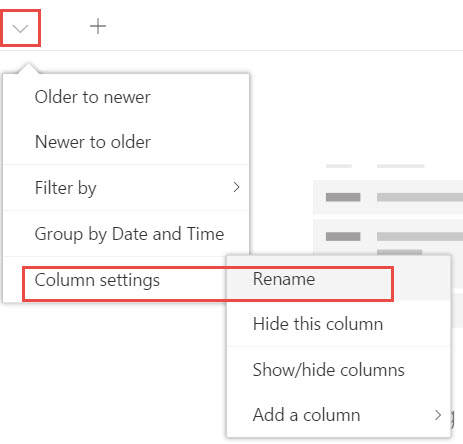
- "Title" is the default first column in your list. You cannot delete it but you can change the name by clicking on the down arrow > Column Settings > Rename
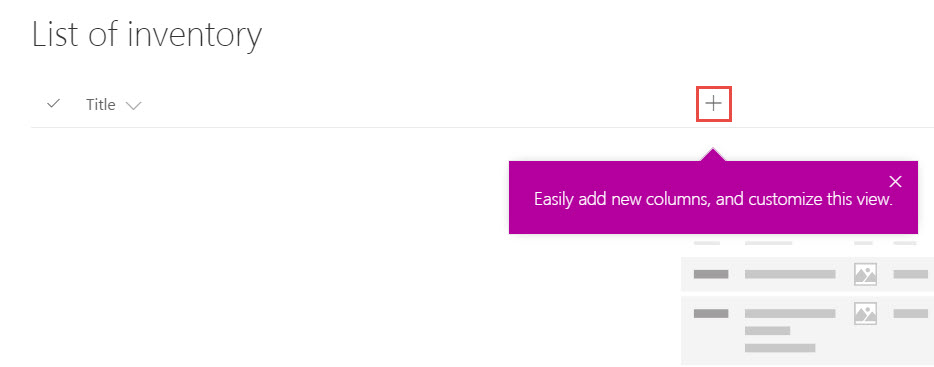
- Add more columns by clicking on the +
and then select the data type for your column (you can also click on More .. if none of the listed ones match what you're looking for)
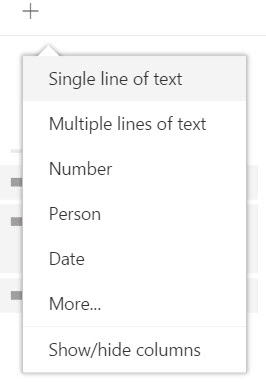
- Then give it a name:

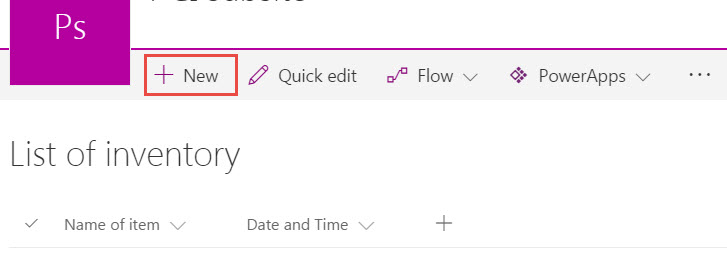
Adding a new item:
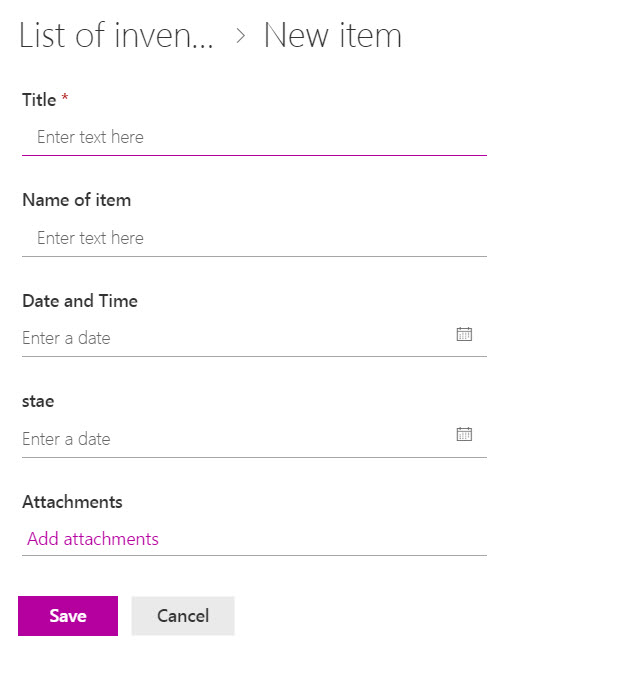
1. Click New
2. then fill out the form.
NOTE:
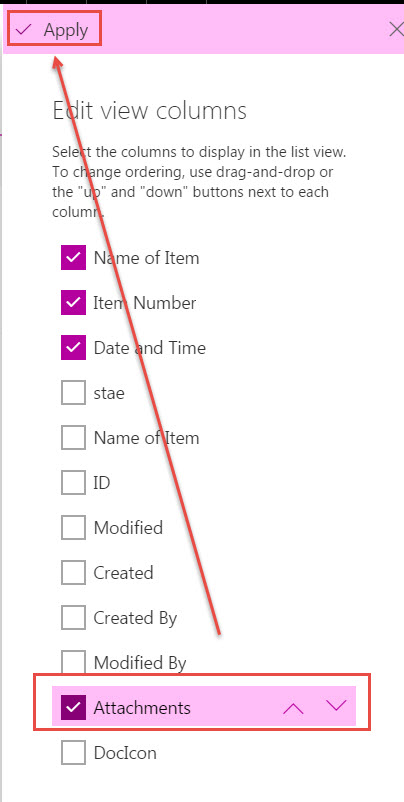
- You can even add attachments!
- To show the Attachment column click the + and click Show/Hide columns
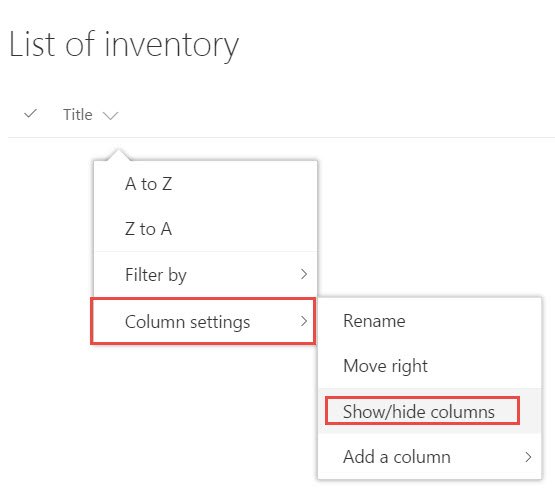
- check off Attachments and click Apply
Supported By
Customer Engagement and Support