Using Private Discussions for Journaling in Brightspace
In Brightspace, you have the ability to create private groups with restricted discussion areas where learners are able to keep a journal. These journals are only viewable to each individual student, and the instructors of the course.
Creating Journal Areas
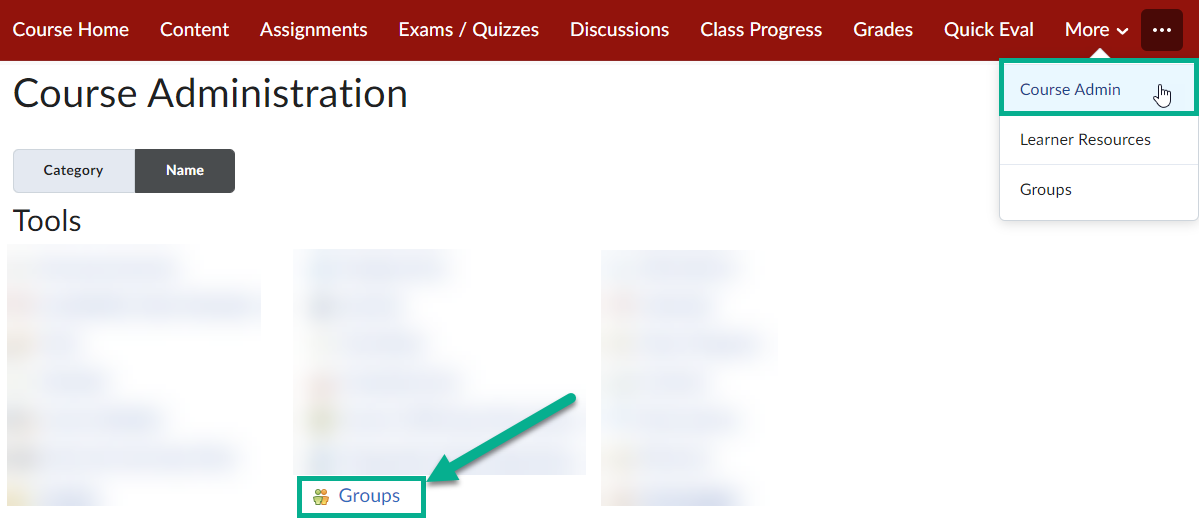
- Go into the Course Admin menu
- Select Groups
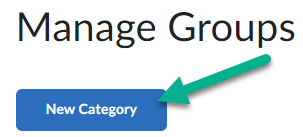
- Select New Category
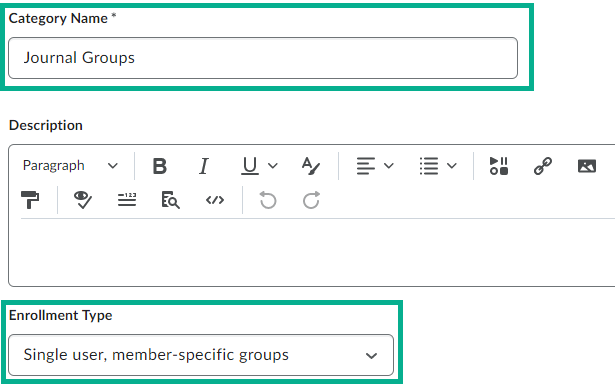
- Enter in a Category Name (and optionally a description)
- For Enrollment Type, select Single user, member-specific groups
- Under Additional Options, select Set up discussion areas
- Under Forum, use the drop down selector to choose a forum you would like to assign this journal to, or select New Forum to create a new forum. The forum will be present in the Discussions area of your course.
- Then select Create new topic
- Select Save. Once selected, your groups will be created in the background (this process may take a few minutes).

- You will then be prompted to create a restricted topic. This topic will be the journal area where your students can type in their own personal journals.
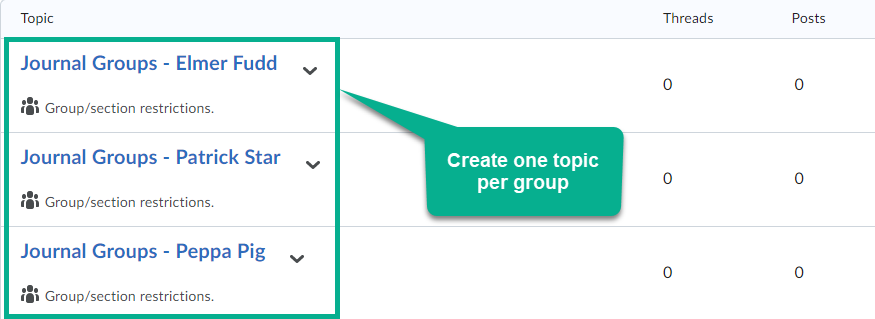
- When creating a topic, you can choose to either Create one topic per group or Create one topic with threads separated by group.
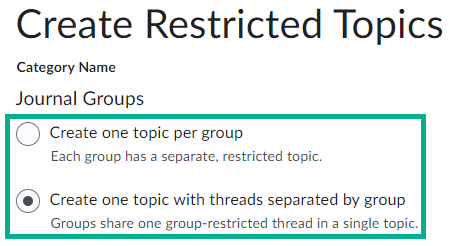
Each option does the following:
- Create one topic per group (not recommended if you plan on grading journals): This will create a topic for each student in the discussion forum. These topics will only be viewable to each individual student, and the instructor.
- Create one topic with threads separated by group (recommended if you plan on grading journals): This will make one topic in the discussion forum. Students can add a thread to the topic that will only be viewable to themselves, and the instructor.

Setting Up Journals as Graded Items
To make your students journals into a graded item, follow the steps in this article. Please note that if you want to grade journals, it's recommended that your journal topic be set up to Create one topic with threads separated by group.
Supported By
Customer Engagement and Support
Brightspace Support via SUNY Helpdesk
Phone: 1-844-673-6786