

Setting Release Conditions in Brightspace
A release condition keeps content or an activity locked until a student meets a requirement you choose, like taking the syllabus quiz before Week 1 opens. Create the prerequisite activity first; a condition points at something that already exists.
Set a Release Condition
- Click Content and open the module or topic you want to restrict
- Open its dates and restrictions area. On a module, it is under the module's title (2a); in an activity editor, it is the Availability Dates & Conditions panel (2b)
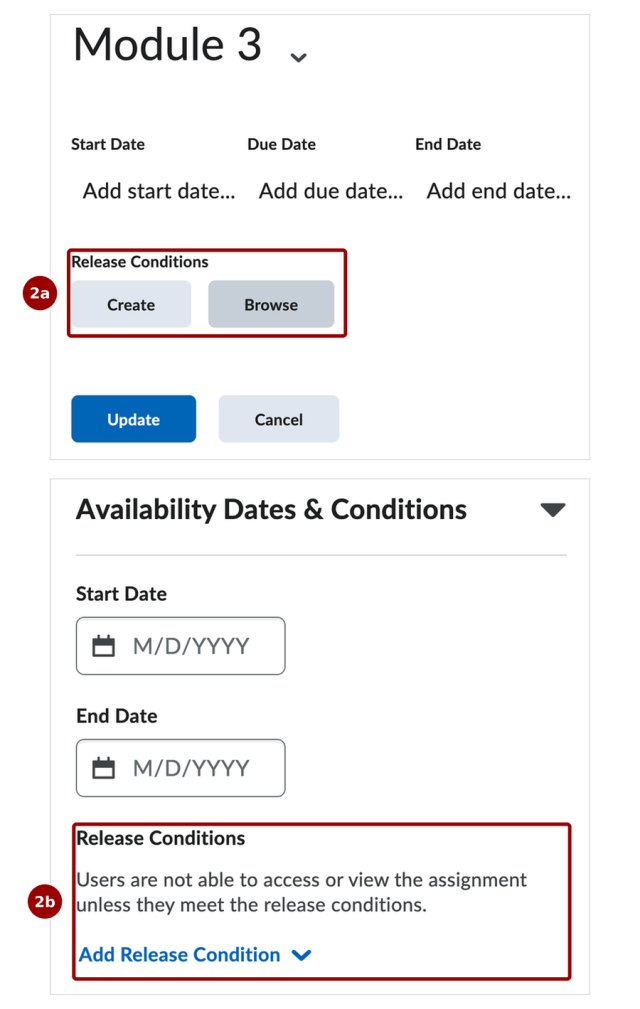
- Under Release Conditions, click Create to build a new condition, or Browse to reuse one from elsewhere in the course. In an activity editor, click Add Release Condition, then Create New
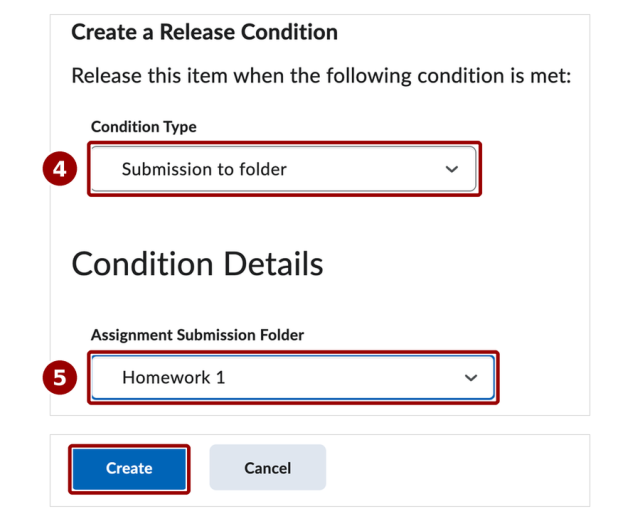
- Choose a Condition Type. The menu groups conditions by category: Assignments, Awards, Checklist, Classlist, Competencies, Completion Tracking, Content, Discussions, Grades, Quizzes, and Surveys
- Fill in Condition Details. The fields match the condition you chose: a submission condition asks which assignment, a rubric condition asks which rubric, a grade condition asks for the grade item and score.
- Click Update (or the item's save button) to save the module
How release conditions behave
- A student must meet ALL of the conditions on an item before it unlocks, and once met, a condition stays met.
- Restricting a module restricts everything inside it.
- If you delete the activity a condition points to, the content stays locked for everyone, so remove the condition first. Some conditions cannot be tested in Learner View
Contact
Academic Technology Services
(631) 632-9800