Protecting Microsoft Office Documents e.g. Word, Excel, PowerPoint files on a Windows Computer Using AIP
- Prior to protecting a document, familiarise yourself with the data Categories and examples found on the P302: SENSITIVE INFORMATION CLASSIFICATION POLICY. There are 3 levels or categories: Low Risk (Cat. 1), Medium Risk (Cat. 2), High Risk (Cat. 3)
- Once the Azure Information Protection plugin is downloaded and installed, open Word, Excel, or PowerPoint. You may be prompted to sign in the first time you install or use the plugin.
- Username: First.Last@stonybrook.edu
- Password: NetID Password
- Domain: sunysb.edu
- On the Home menu, you will see the Protect option with 3 categories in the Sensitivity bar..
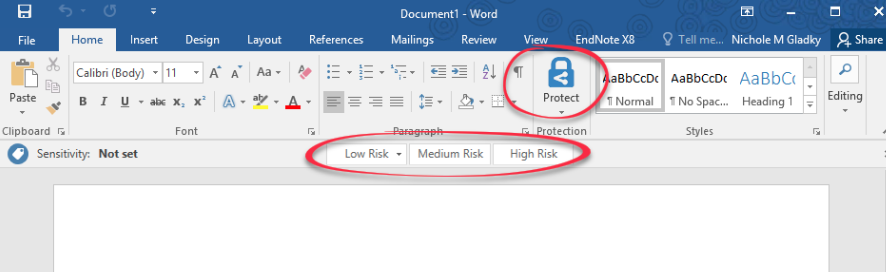
*If you do not see the Protect icon, check to see if you are signed into Microsoft at the top right of your screen. You will see your first and last name at the top right of your screen. - To protect a document before sending, choose from the categories:
- Low Risk:
- Anyone can open, edit, copy, print, save, etc. as long as they are signed in to a Microsoft account.
- All Employees can access. This restriction means that only @stonybrook.edu employees can access the document. Stony Brook Medicine users will not be able to access the document. If you would like @stonybrookmedicine users to access the document choose Low Risk - Anyone instead.
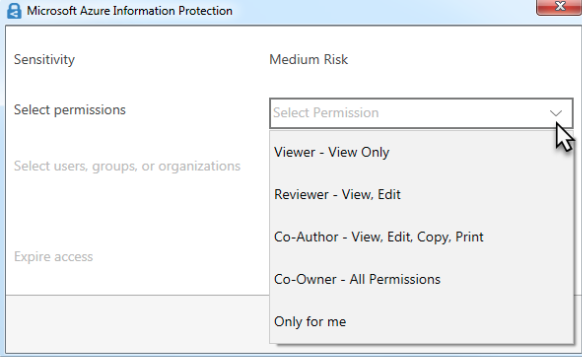
- Medium Risk and High Risk:
- You must designate who can access the document and what type of access they should have.
- Select permissions
- Enter in their email address. Be sure to type in the correct email address especially if there are others with the same first and last name on campus.
- If necessary, add a date to expire the access
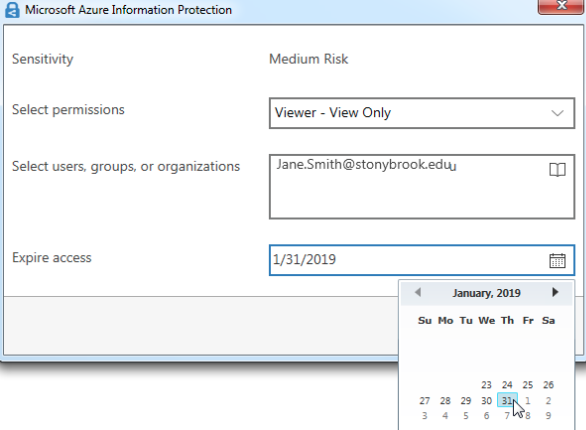
- Click Apply when finished.
- Select permissions
- You must designate who can access the document and what type of access they should have.
- Low Risk:
- Save your document as you normally would on your computer and then you can send it to your recipient(s).
*The best practice to ensure data security is to use a cover sheet and protect the document prior to saving anywhere on your computer (especially if you use a backup or syncing tool that backs up your files into a cloud storage).
Supported By
Customer Engagement and Support