Preventing Others from Editing the Wrong Cells in a Google Sheet
You can share Google spreadsheets, and allow other users to edit them; however, you might not want them to be able to edit everything. By protecting ranges in Google Sheets, you can limit what your collaborators can edit.
To prevent ranges of your spreadsheet from being accidently modified, protect the ranges. You must give another user permission to edit the whole spreadsheet before you can protect a range. For example, if you want someone to only be able to edit column B, you would need to first give them permission to edit the spreadsheet, and then follow the procedure below to protect all the other columns.
Difficultly Viewing Protected Ranges?
Protecting Ranges on Your Own Spreadsheets
- Go to your Stony Brook's Google drive and sign in with your NetID and NetID password
- Open the sheet you want to edit, or create a new one
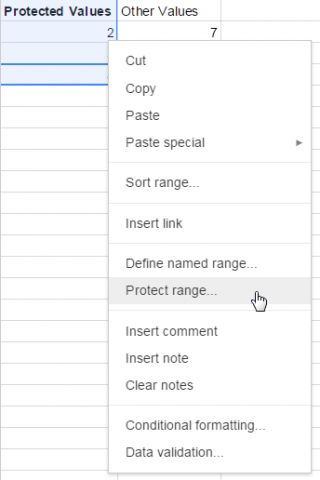
- Click on the first cell you want to protect, and while holding down shift, click on the final cell you want to protect (this will highlight the range you want to protect)
- Right click, select "Protect Range"
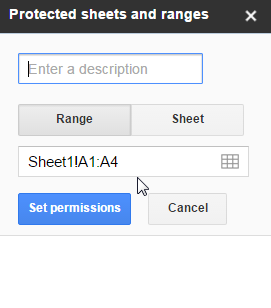
- In the window that opens, you can change the range of the protected data, enter a description, or set permissions. Click on set permissions, and choose which users can edit this data
Viewing a Spreadsheet with Protected Ranges
By default, protected ranges will look just like ranges you can edit; however, when you attempt to edit a cell that falls under a protected range, you will get this error message. 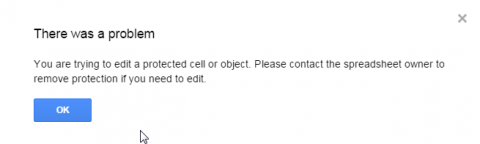
To highlight the ranges you can't edit, you can change the settings so that protected ranges look different from normal ones.
- Click View

- Click Protected Ranges so that a check appears next to Protected Ranges (the check indicates that the Protected Ranges will look different)
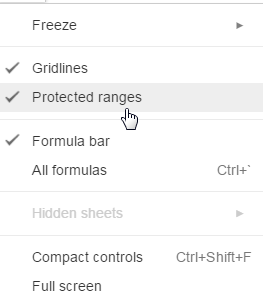
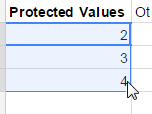
- Protected ranges will now have gray bars running across them, indicating you cannot edit those cells
For More Information Contact
Need Help? The fastest way to get support is by submitting a request through our ticketing system.
Get Help With Google Drive