

Mac OS - Get Connected to Eduroam
To properly configure your Mac device to connect to Eduroam, please follow the instructions below.
This will help you configure your device in such a way to ensure that you connect to Eduroam securely without needing to sign in every time.
About SecureW2
SecureW2 is the university's recommended tool for connecting to the official campus Wi-Fi network. Using SecureW2 ensures that the correct security certificates are installed on your device. For your protection, be wary of unexpected Wi-Fi certificate prompts that appear as pop-ups, as they may not be legitimate or approved by the university.
Requirements
Forget the WolfieNet-Secure and Eduroam network on your device to remove any outdated Wi-Fi profiles or certificates.
Once you have forgotten the necessary networks (and uninstalled the SecureW2 app, if necessary) please follow the setup instructions below.
Instructions
Please note: You can also start this process on your home Wi-Fi, and finish the connection once you arrive on campus. Enter eduroam.stonybrook.edu in your browser and then proceed to Step 3 and tap the JoinNow button.
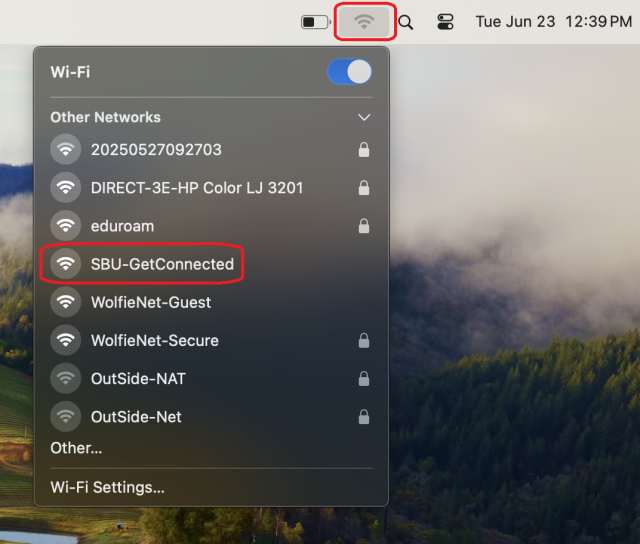
- Click on the Wi-Fi icon in the top right corner of your desktop screen. It should then show a list of available networks. Click on SBU-GetConnected to connect.
For East Campus users: Connect to SBMED-Guest instead. You should then be redirected to a captive portal in your browser. Click on the Student/Faculty/Employee button at the bottom of the page. Once you're on the next page, please click on the Configure for eduroam button or the corresponding link below the button. Continue following along with these instructions by skipping to Step 3.
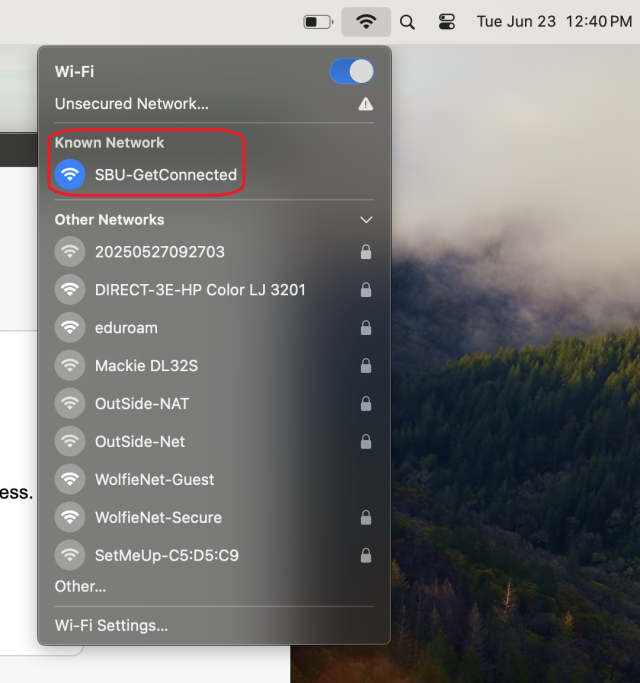
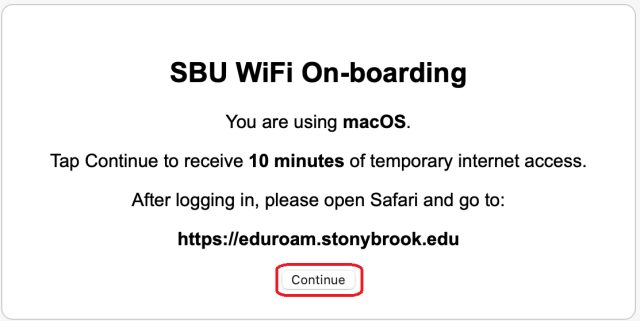
- The SBU WiFI On-boarding pop-up will appear on your screen. Click Continue.
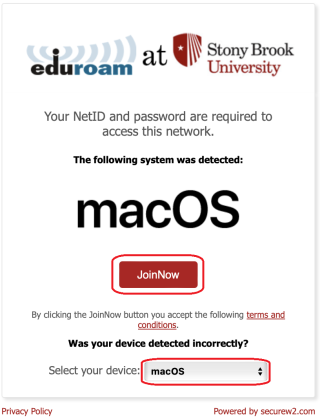
- Open eduroam.stonybrook.edu in Safari. Make sure your device has been correctly detected as macOS. If not, open the device selection dropdown and select the correct option. Click JoinNow.
- Click Allow to download the app if prompted.
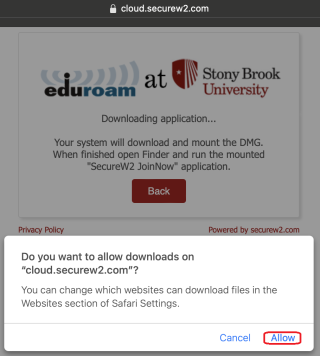
- The SecureW2 tool should then download from your browser. Click to open it in the top right corner of your browser (the Downloads icon) or by going to the Downloads folder in Finder.
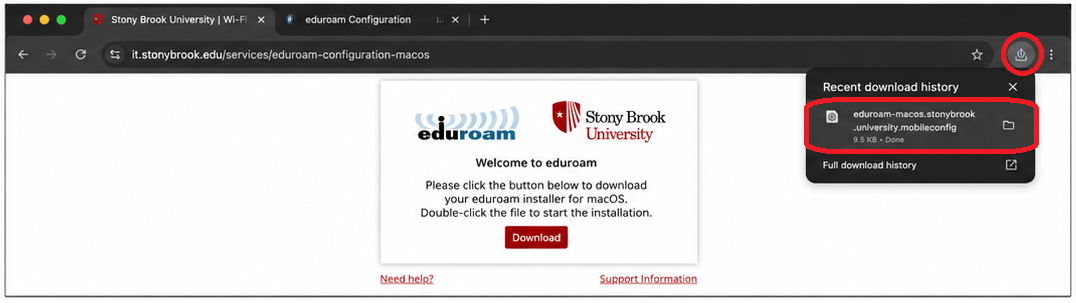
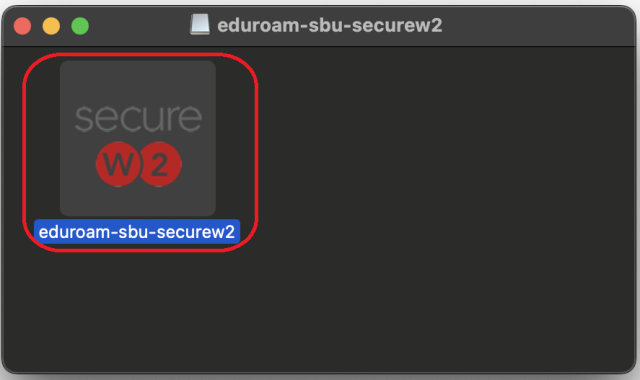
- The SecureW2 pop-up will then appear. Click the SecureW2 app to run the application.
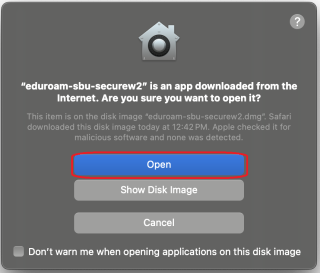
- Click Open to open the app if prompted.
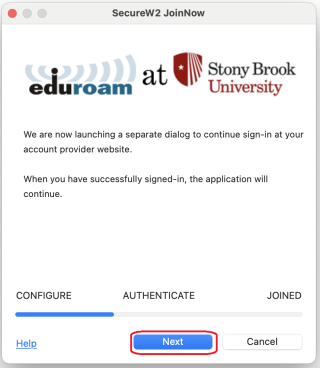
- You will arrive at the Eduroam at Stony Book University screen. Click Next.
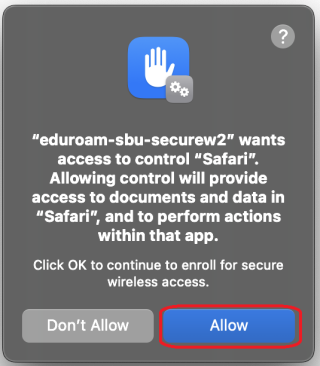
- Click Allow to open Safari if prompted.
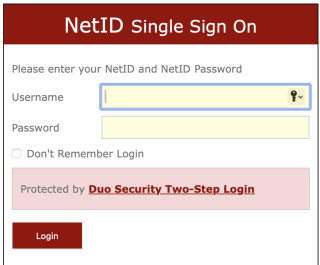
- You will be redirected to the NetID SSO page. Sign in with your NetID and NetID password, then click Login.
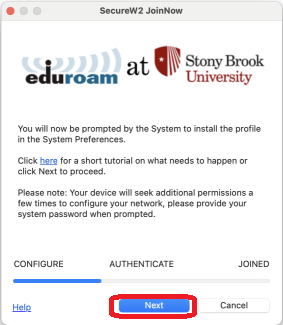
- The SecureW2 app will then begin the configuration process. Click Next to proceed. Input your device password if prompted.
- Upon completion, the app will prompt you to go to Settings to give permissions to install the necessary profiles. Click on Stony Brook University eduroam to open its permissions page.
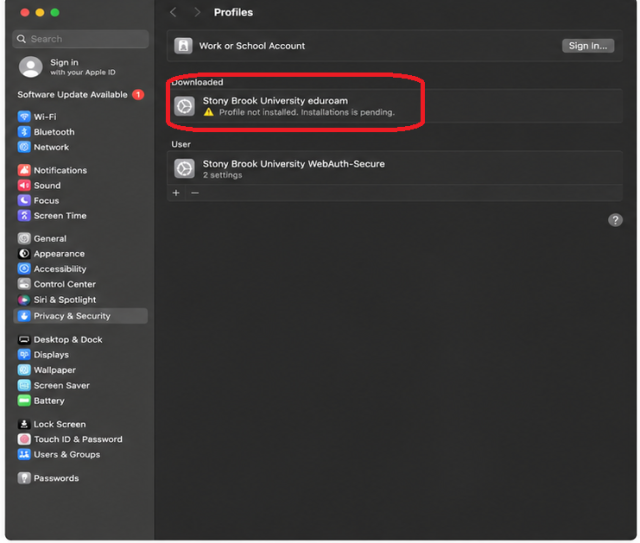
- Click on Install in the lower left left corner of the popup window.
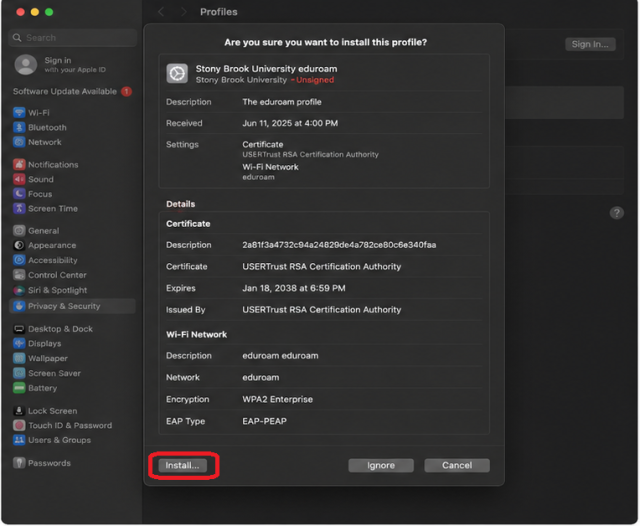
- Your device will prompt you to confirm the installation. Click on Install once more.

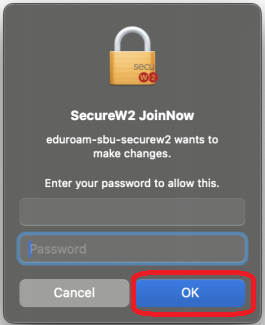
- It will ask for your device password again. Please enter it and then click OK.
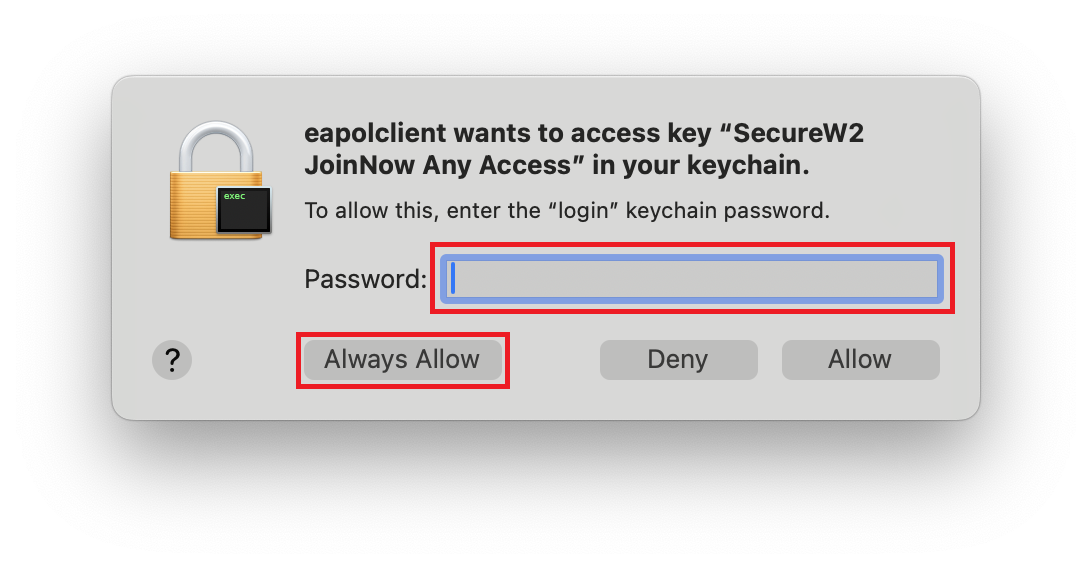
Please note that you may see a pop-up asking you to grant access to Keychain Access. The password for this should be the same as your login password. If not, try your Apple ID or old Mac passwords.
Please note: It may ask you to enter the password several times, as there could be multiple keychains to unlock. Make sure to click Always Allow so that it will not prompt you again if you need to install the certificate once more in the future.
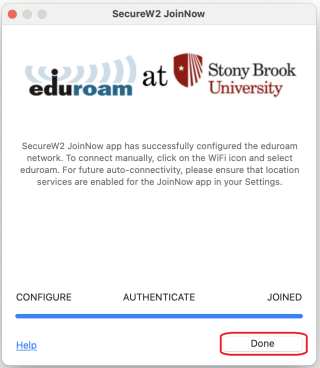
- The app will continue progressing through the configuration. Once the blue progress bar has reached Joined, click on Done. You will now be connected to the university's Eduroam network!
18. Finally, go back to your available Wi-Fi networks and forget/remove SBU-GetConnected. If you do not, SBU-GetConnected may interfere with reconnecting to Eduroam when moving around campus.
Configuring Your Wi-Fi Profile Before Arriving On Campus
If you are not on campus while setting up your Wi-Fi profile, you will not be connected to Eduroam upon getting to the success landing page. However, once you arrive on campus, you may select Eduroam as your Wi-Fi network in your device. It should then connect automatically as long as you have successfully followed the above steps before arrival.