iOS (iPhone/iPad) - Get Connected to WolfieNet Secure
To properly configure your device to connect to WolfieNet Secure, use the getwolfienet.com site. This will create your wifi profile with the correct, most updated certificate, SecureW2, so that you can connect again and again without having to go through the process of signing in every time.
About SecureW2
SecureW2 is an onboarding tool to help us get onto the campus' official wifi. To keep you and your devices cyber-safe, it is highly recommended that you connect using SecureW2 and to be wary of other wifi certificates that may appear as popups on your computers and devices as they may not be a vetted service.
Requirements
If you are coming back to campus after April 22, 2020, you'll need to
- Forget the Network to remove the old WolfieNet-Secure profile from your device before following the instructions below.
- be connected to the internet to access getwolfienet.com. For mobile devices, use your cell service. For computers, use WolfieNet-Guest.
If you are new to campus, you'll only need to be connected to the internet to access getwolfienet.com. For mobile devices, use your cell service. For computers, use WolfieNet-Guest.
Instructions
You will learn how to:
- Download the New Wifi Profile
- Install the Configuration Profile
- Connect the Wifi if the Automatic Connection Fails after Installation
Download the New Wifi Profile
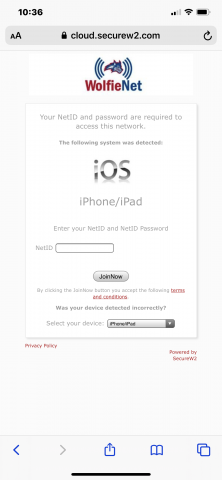
- Go to getwolfienet.com and select your device if necessary.
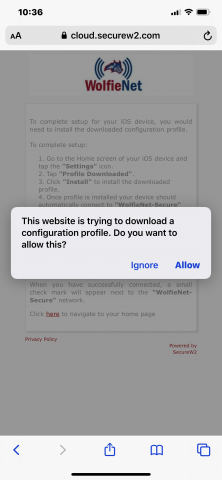
- Allow
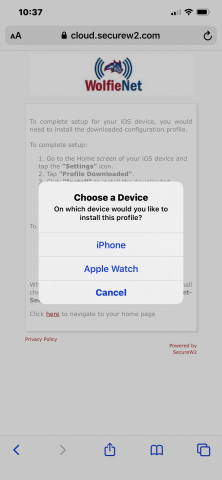
- Choose your device if necessary:
- Close
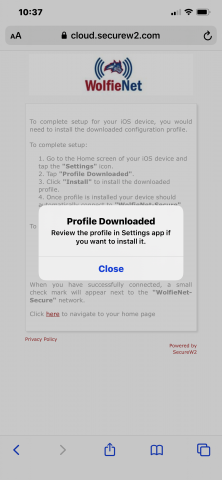
- You will see a screen with the following instructions to complete the setup for your iOS device and to install the downloaded configuration profile.
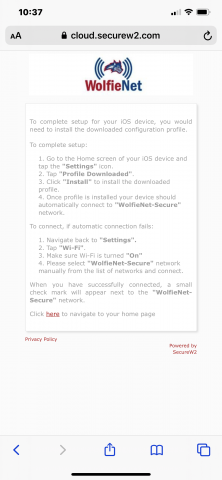
Install the Configuration Profile
- Go to the Home screen of your iOS device and tap the "Settings" icon.

- Tap "Profile Downloaded".
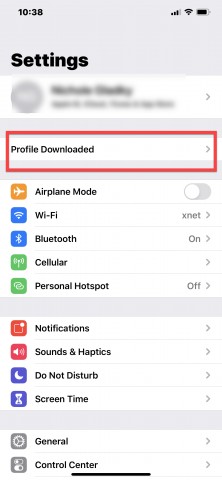
- Click "Install" to install the downloaded profile.
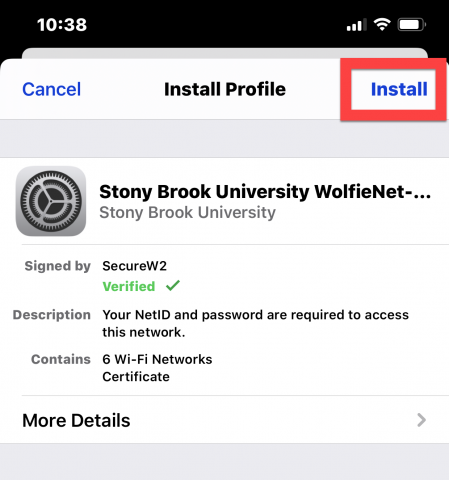
- You will be prompted to enter your passcode
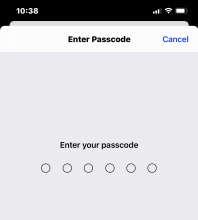
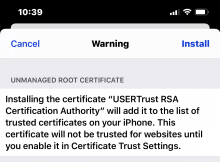
- Click Install at the Warning screen
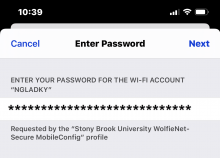
- Enter your password for the Wifi account. This is your NetID password. Click Next.
-
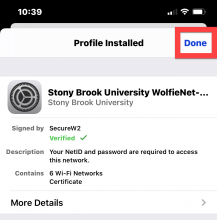
Click Done when the profile is installed.
- You will be prompted to enter your passcode
4. Once the profile is installed, your device should automatically connect to the "WolfieNet-Secure" network (WiFi).
* If you are not on campus while setting up your wifi profile, you will not be connected to Wolfienet-Secure upon success. Once you come to campus you may choose WolfieNet-Secure as your wifi.
To connect, if the automatic connection fails
1. Navigate back to "Settings".
2. Tap "Wi-Fi".
3. Make sure Wi-Fi is turned "On"
4. Please select "WolfieNet-Secure"
When you have successfully connected, a small checkmark will appear next to the "WolfieNet-Secure"
