Indexing Documents (Batch Processing) that are Scanned into OnBase Scan Queues from a Multi-Function Printer (MFP)
Scan to ECM
If your department has a Multi-Function Printer (MFP), and purchased the Hyland OnBase Unity Batch Scanning license, it can be configured to upload documents into a scan queue within OnBase. Your MFP will have a Scan to ECM button to initiate the scanning. Contact support call 631-632-9800 or create a ticket to set up your MFP.
Scan to Department Shared Folder
Another option that does not require the purchase of a license is to configure a button on the MFP that allows documents to be scanned into a department shared folder.
You can request this by creating a service ticket. To expedite your ticket, include the reference "CcScan" in the ticket and the shared folder path of where the scanned files should be saved. Once the documents are in the shared folder, a user can browse to the folder and locate the file to manually upload into OnBase. These files wouldn’t appear in the above mentioned Scan Queue method.
Batch Processing in OnBase
Instructions on Batch Processing
- Scan your documents into the OnBase queue by placing your documents in your MFP and pressing the Scan to ECM button.
- Log into OnBase and click Batch Processing:

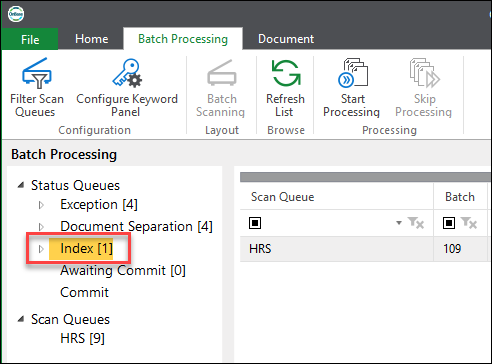
- Click Index to see what items in the queue need to be indexed (processed after scanning).
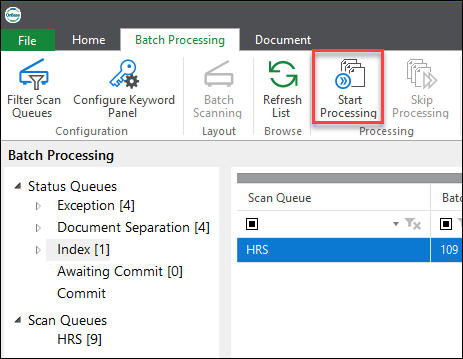
- Select an item in the Scan Queue and click Start Processing
or right-click on the document and click Index Documents.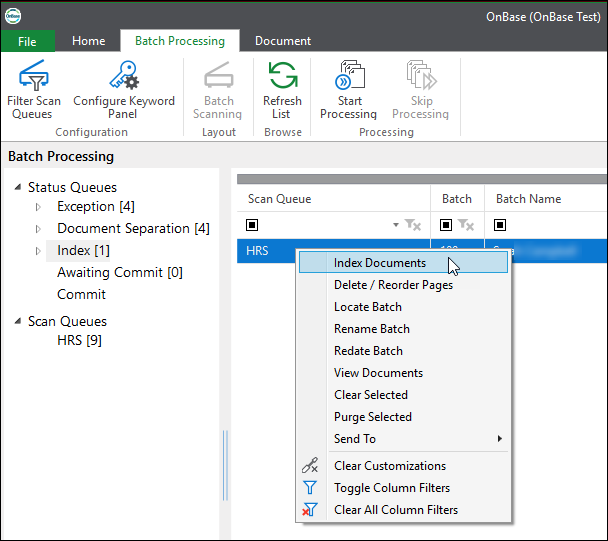
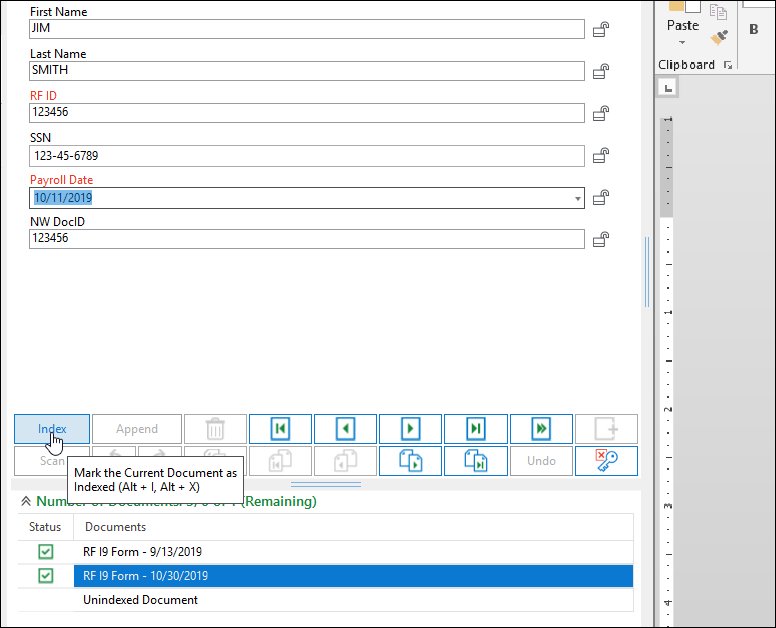
- Now you may Index your document by specifying the document type and keywords. When finished, mark the document as indexed by clicking on the Index button.
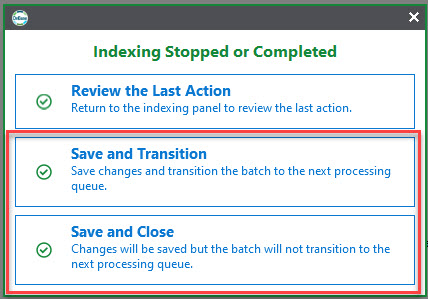
- Finish indexing all documents in the batch or click Stop Batch Processing to end this task.

- Click Save and Transition to the next batch queue OR Save and Close if you are done indexing batches.
More Tools in Batch Processing
When buttons are available you can hover over each one for a description.

First Icon Row
The Append button will attach the document to the previous document.
The Trash can button will delete the document you are viewing.
Next, 4 buttons will navigate through the list of documents:
|◄ Navigates to the first document in the list.
◄ Navigates to the previous document.
► Navigates to the next document.
►| Navigates to the last document.
The double arrow will navigate to the next document or batch.
The last button in the top row will make a copy of a document and add it to the list of documents.
Second Icon Row
Scan will add pages from a scanner.
Next 2 are the rotate a page counter-clockwise and clockwise.
The button under the Trash can will delete the page in you are viewing from the doucment.
The next for will navigate throught a document with multiple pages:
|◄ First page
◄ Previous page
► Next page
►| Last page
The last button with stop the batch processing. You will be prompted to Save and Transition or Save and Close.
Finally to get out of the Batch Processing window click on Home > Personal page.