Lecture Hall & Large Classroom Media Systems
This is a general help guide for all classrooms with this style touch panel. While the steps and location of buttons are the same regardless of which style room you are in, there may be slight discrepancies in font, color, options and icons, dependent on the slight differences in hardware.
For specific details about your classroom, please refer to the Installed Classroom Equipment Guide or contact Classroom Technology & Support Solutions.
Getting Started
Step 1: Power on the media system.
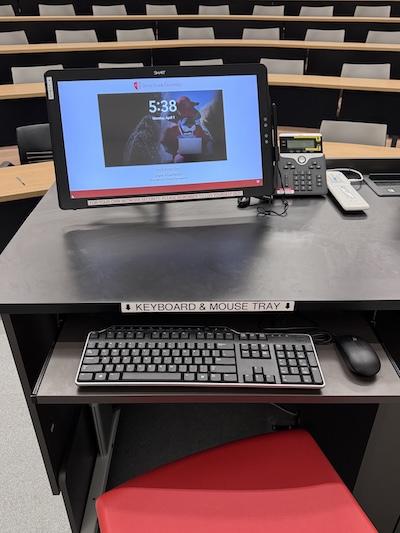
Locate the touch panel mounted on the lectern.
Depending on the lectern, this will be a large screen on the top of the lectern or a smaller screen mounted to one of the faces.
- Power on the system by quickly tapping on a source along the top row of options ("Quick Launch"). You can also tap the power button in the lower left corner of the touch panel.
- Please allow up to 20 seconds for the system to power on. During this time, you will not be able to touch other buttons on the touch panel.
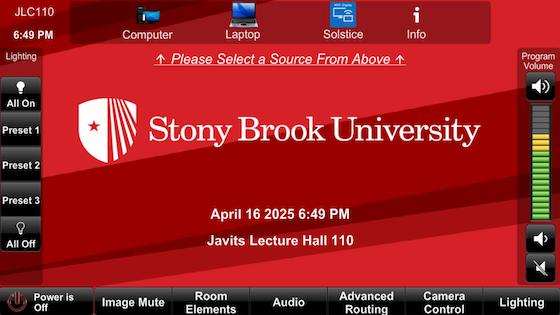
Source options can vary depending on the classroom, but they will always minimally include “Computer” and “Laptop”.
Step 2: Log into the computer or connect your device.
If using the installed computer, move the mouse or tap the space bar to wake up the computer.
If using your own device, plug it into the HDMI port using the necessary cables.
- In a classroom of this style, the input panel is located on top of the lectern.
- Select HDMI or Laptop on the touch panel to have the projector display your device.
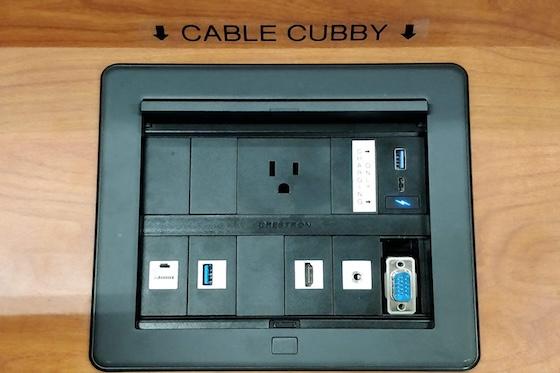
Please provide your own adapters. Standard cables can be borrowed from the Support Office in the Javits Lecture Center.
Lecture Halls with safes have a standard HDMI cable inside. Please email classrooms@stonybrook.edu to request the safe code which changes every semester.
Step 3: Powering Off
Locate the power button in the lower left corner of the touch panel to turn off the media system.
- Tap once to bring up a screen confirming you wish to power off the media system.
- Select “Yes” to begin powering down. This process can take up to 20 seconds.
Additional Controls and Options
Adjusting the volume
The volume of the classroom speakers can be adjusted no matter which screen you are viewing on the touch panel.
- Tap or press and hold either speaker icon at the top and bottom of the “Program Volume” slider to raise or lower the volume, respectively.
- You can also tap on the bar itself.
- “Program Volume” is available on every page of the touch panel, not just Audio.

Please note that adjusting the “Program Volume” only affects how loud the audio comes through the speakers installed in the classroom. It does not affect the volume of the YouTube video player, the computer or laptop volume, etc. Please check the individual volume levels for each one.
To adjust microphone volume, or mute a microphone entirely, press the relevant buttons on the slider that is labeled for that microphone. The mic will have a label on the handle (for a hand held) or the body pack (for a lavalier).
Hiding the Projected Image
To hide what the projector is displaying, without the need to turn off the system, tap the Image Mute button.
- This will hide what is being displayed on the projector until you disable it.
- The button will flash while it is active.

Wireless Presentation
Some rooms are equipped with Wireless Presentation capabilities. If equipped, it will be shown as Screen Share or Wireless Presentation in the top right corner of the touch panel.
To use Wireless Presentation, your device must be connected to the WolfieNet-Secure Wi-Fi network.
- Follow the on-screen instructions to use this feature. For more details on how to use this feature, please visit our Solstice Service Page.
Camera Control
This allows you to select from presets for the lecture capture camera to record.
- The Instructor Camera has options for pointing towards the primary teaching area.
- The Student Camera (where available) has options for pointing towards the student seating area.
The screen in the center will show a preview image of what each preset focuses on.
Attention Lecture Capture Users (Echo 360)
- Best Practice recommends that you check the camera preset at the start of each session.
If you have any issues or would like to schedule one-on-one training with a member of our staff, please do not hesitate to reach out to us. Our contact information can be found below.