Creating Groups in Brightspace
Please note that students will not be able to access the groups tool unless you make it available to them in the Navbar. To do so, check out this article.
In Brightspace, instructors have the ability to create groups to facilitate collaboration among their students. Once groups are created, instructors can use the groups for various purposes. Examples include assignments, discussions, and file sharing among group members.
Instructors can
OR
- Create a spreadsheet of which students go in which groups for our Admins to populate the groups
Instructor Create and Populate Groups
The Groups Tool/Basic Settings
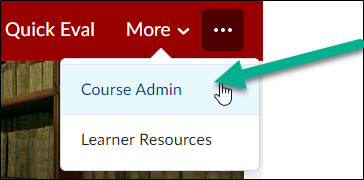
- From the Navbar, select Course Admin
- Choose the Groups tool from the Course Admin menu
![]()
- Select the New Category button in the Manage Groups menu
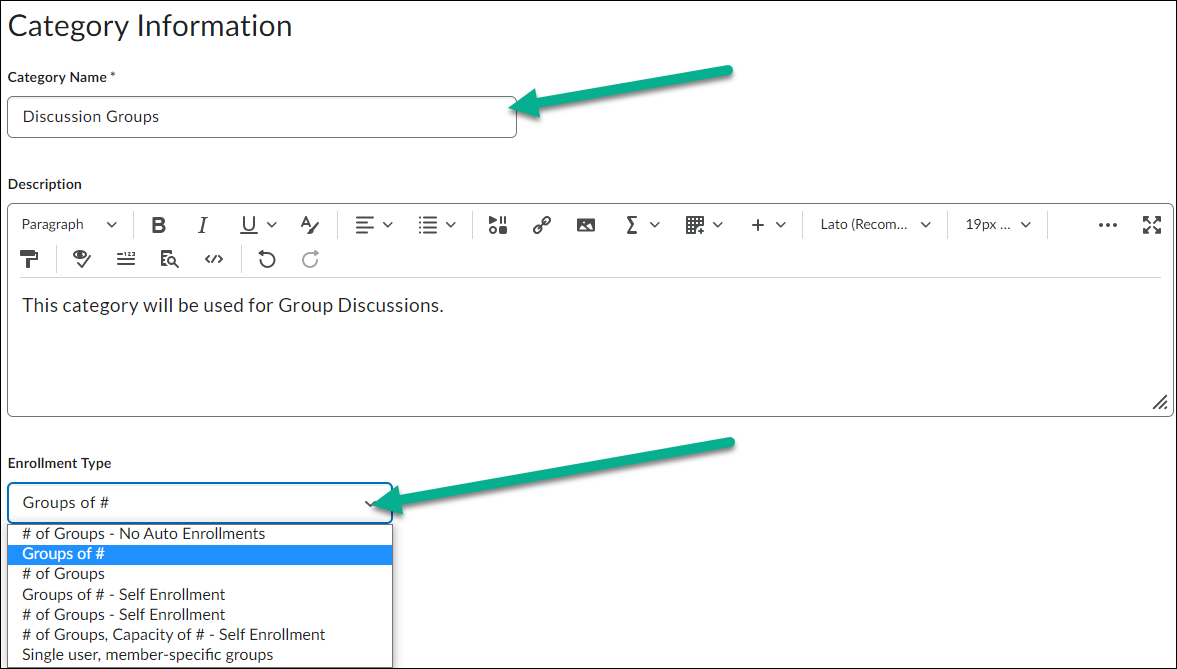
- Type in the Category Name for your group. You can also optionally type in a description of this group below the Category Name.
- Choose the Enrollment Type, see below for each option:
- # of Groups - No Auto Enrollments: Selecting this option creates a specified number of groups, for which you can add any number of users using the Enroll Users page
- Groups of #: Selecting this option creates the minimum number of groups needed to place users in groups of a specified maximum size. If this option is selected, you have the ability to decide if you would like to auto enroll users into groups, or randomize users in groups.
- # of Groups: Selecting this option creates a specified number of groups. If this option is selected, you have the ability to decide if you would like to auto enroll users into groups, or randomize users in groups.
- Groups of # - Self Enrollment: Selecting this option creates the minimum number of groups needed to accommodate users in groups of a specified maximum size automatically. Users choose the group they want to enroll in from the Groups page.
- # of Groups - Self Enrollment: Selecting this option creates a specified number of groups, which users enroll in from the Groups page.
- # of Groups, Capacity of # - Self Enrollment: Selecting this option creates a specified number of groups with a specified number of enrollments per group. Users choose the group they want to enroll in from the Groups page.
- Single user, member specific groups: Using this option creates a group with a single user where the first name and last name of the learner is the name of the group. When a new learner is enrolled in the course, a group is automatically created for them.
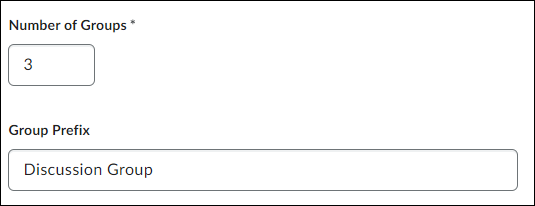
- Depending on which Enrollment Type you chose, you will be prompted to type in either the Number of Groups, or Number of Users (or both).
- Optionally, you can type a Group Prefix which will name your groups something specific. IE: A prefix that says "Discussion Group" will make groups that say "Discussion Group 1", "Discussion Group 2", etc.
- Select Save to finish
Advanced Settings
Depending on which Enrollment Type you selected, you have access to the following advanced settings:
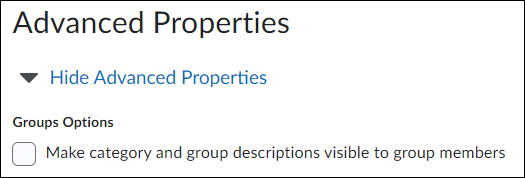
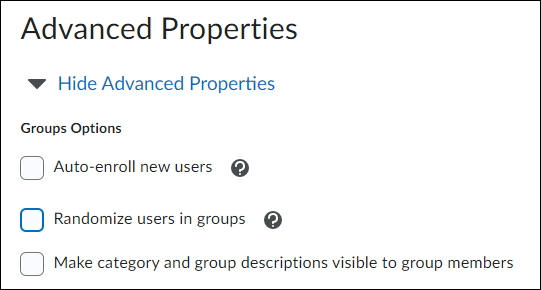
If you chose # of Groups - No Auto Enrollments or Single User, Member-Specific Groups
- You have the option available to you to make category and group descriptions visible to group members.
If you chose Groups of # or # of Groups
You are able to:
- Auto-enroll new users into groups
- Randomize existing users in groups
- Make category and group descriptions visible to group members
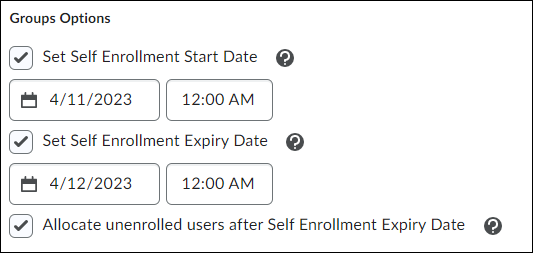
If you chose any Self Enrollment options
You are able to:
- Set start dates to allow students to begin self enrolling
- Set expiration dates that students have to enroll by
- Allocate unenrolled users after self enrollment expiration date (auto enroll users to did not enroll by the expiration date)
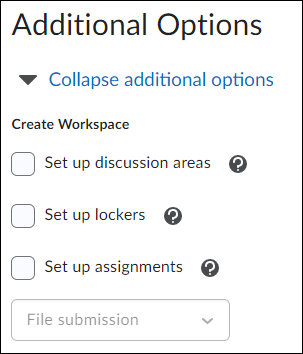
Additional Options
When creating or editing your groups, you can do any of the following:
- Set up discussion areas. This allows instructors to create a new discussion topic, or link to an existing discussion topic, making it a group discussion directly from the groups tool.
- Set up lockers. Lockers allow group members to share files with each other within the groups tool. These files are only available to those enrolled in the group, and the instructor.
- Set up assignments. This allows you to create an assignment for the group to complete directly from the groups tool.
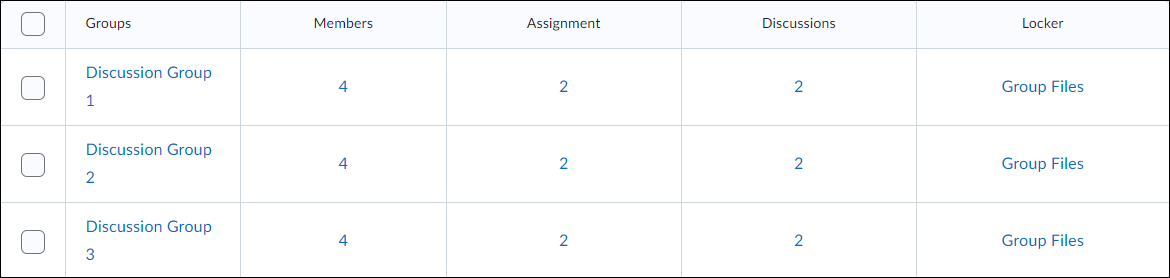
Locating Groups
Once your groups have been created, you can view them in the Manage Groups menu. Here you can see a table with the following information:
- The name of each group
- The amount of members in each group (clicking on this number will show the individual students assigned to the group)
- The amount of assignments assigned to each group (clicking on this number will show the names of each group assignment)
- The amount of discussions assigned to each group (clicking on this number will show the names of each group discussion)
- A link to each groups locker (clicking on the link that says Group Files will show the files uploaded to the locker by each team member)
Populate Groups by Spreadsheet
I. Create the groups
- In your course Navbar, select Course Admin (or select More and then Course Admin), select Groups and select New Category
- For Category name, type whatever name will help you know the group category
- For Enrollment type, select # of Groups - No Auto Enrollment
- For Number of Groups select whatever number of groups you need
- For Restrict Enrollment to select No restrictions
- For Group Prefix, choose what you want each group name to begin with (e.g., Subgroup)
- click Save

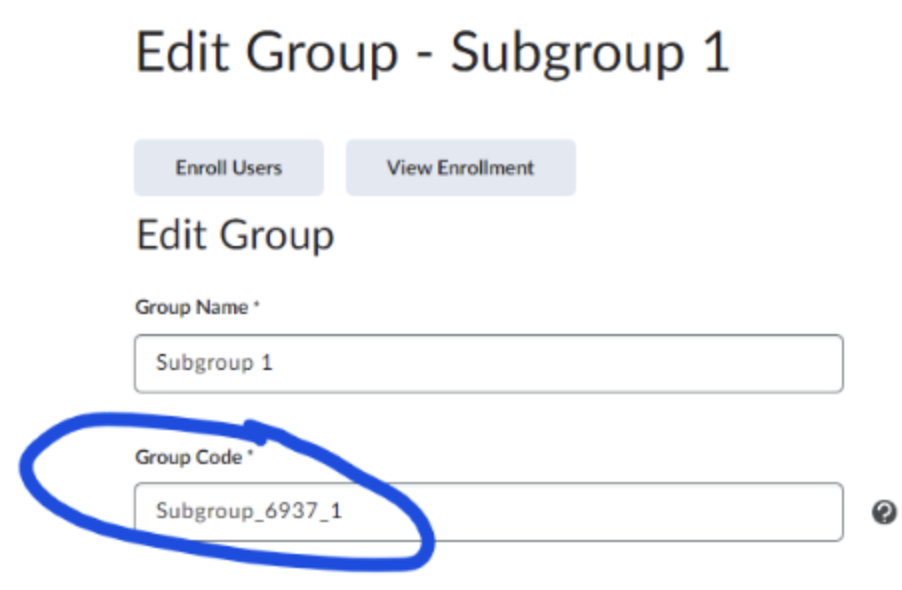
II. Find the Group Code
- Click on the first group within the category (e.g., Subgroup 1) to see edit view for the group
- Find the Group Code field - write down/copy out the Group Code
For example, for Subgroup_6937_1, '6937' is the org unit ID for the course; Groups IDs therefore follow a pattern, in this case:
Subgroup_6937_1
Subgroup_6937_2
Subgroup_6937_3
Subgroup_6937_4
...
- Keep the noted Group ID -you'll need it for the spreadsheet (you don't need to copy every one out as they follow the above pattern)
III Create csv file
- Create a csv file with 5 columns (no headings) for
Enroll, NetID, Stony Brook ID (aka OrgDefined ID), Learner, GroupID - Be sure the list is only Learners (no Instructors or Teaching Assistants, for example)
- In the column for GroupID, paste in the group name using the GroupID format described above (e.g., subgroup_6769_1, subgroup_6769_2, subgroup_6769_3,)
It'll look something like this: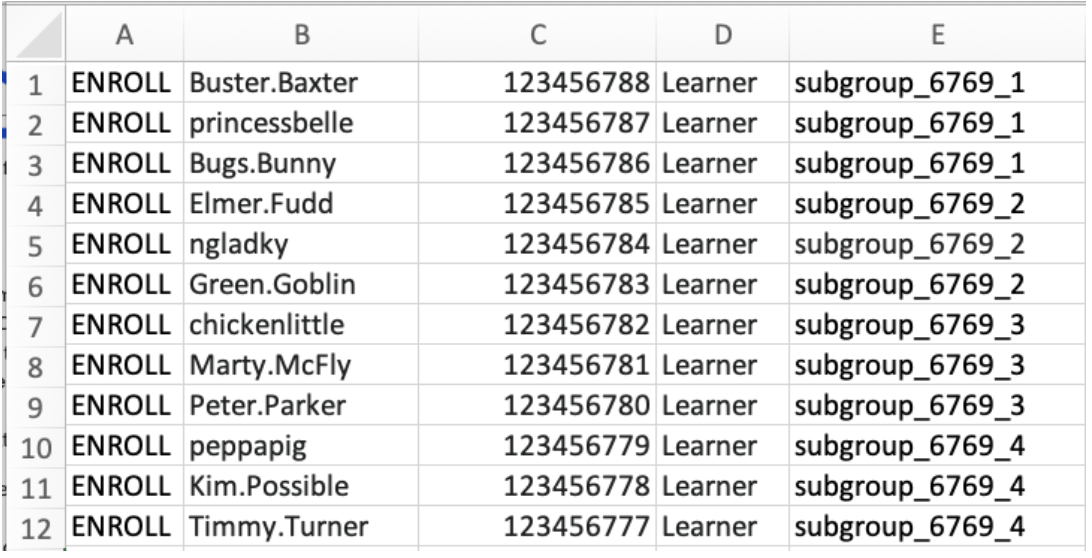
- Save the file as a .csv file
- Create a help ticket requesting we populate your groups and attach the csv. Be sure to specify which course the groups are in