BYOD Style Rooms

This is a general help guide for all classrooms with this style touch panel. While the steps and location of buttons are the same regardless of which style room you are in, there may be slight discrepancies in font, color, options and icons, dependent on the slight differences in hardware.

For specific details about your classroom, please refer to the Installed Classroom Equipment Guide or contact Classroom Technology & Support Solutions.

Audience: Faculty, Staff and Teaching Assistants

This KB Article References: Classroom Technology and Support Solutions
This Information is Intended for: Faculty, Staff, Teaching Assistants
Last Updated: June 22, 2021
Average Rating: Not Rated
Your feedback is important to us, help us by logging in to rate this article and provide feedback.

Step 1:  Power on and connect your device to the wall plate.
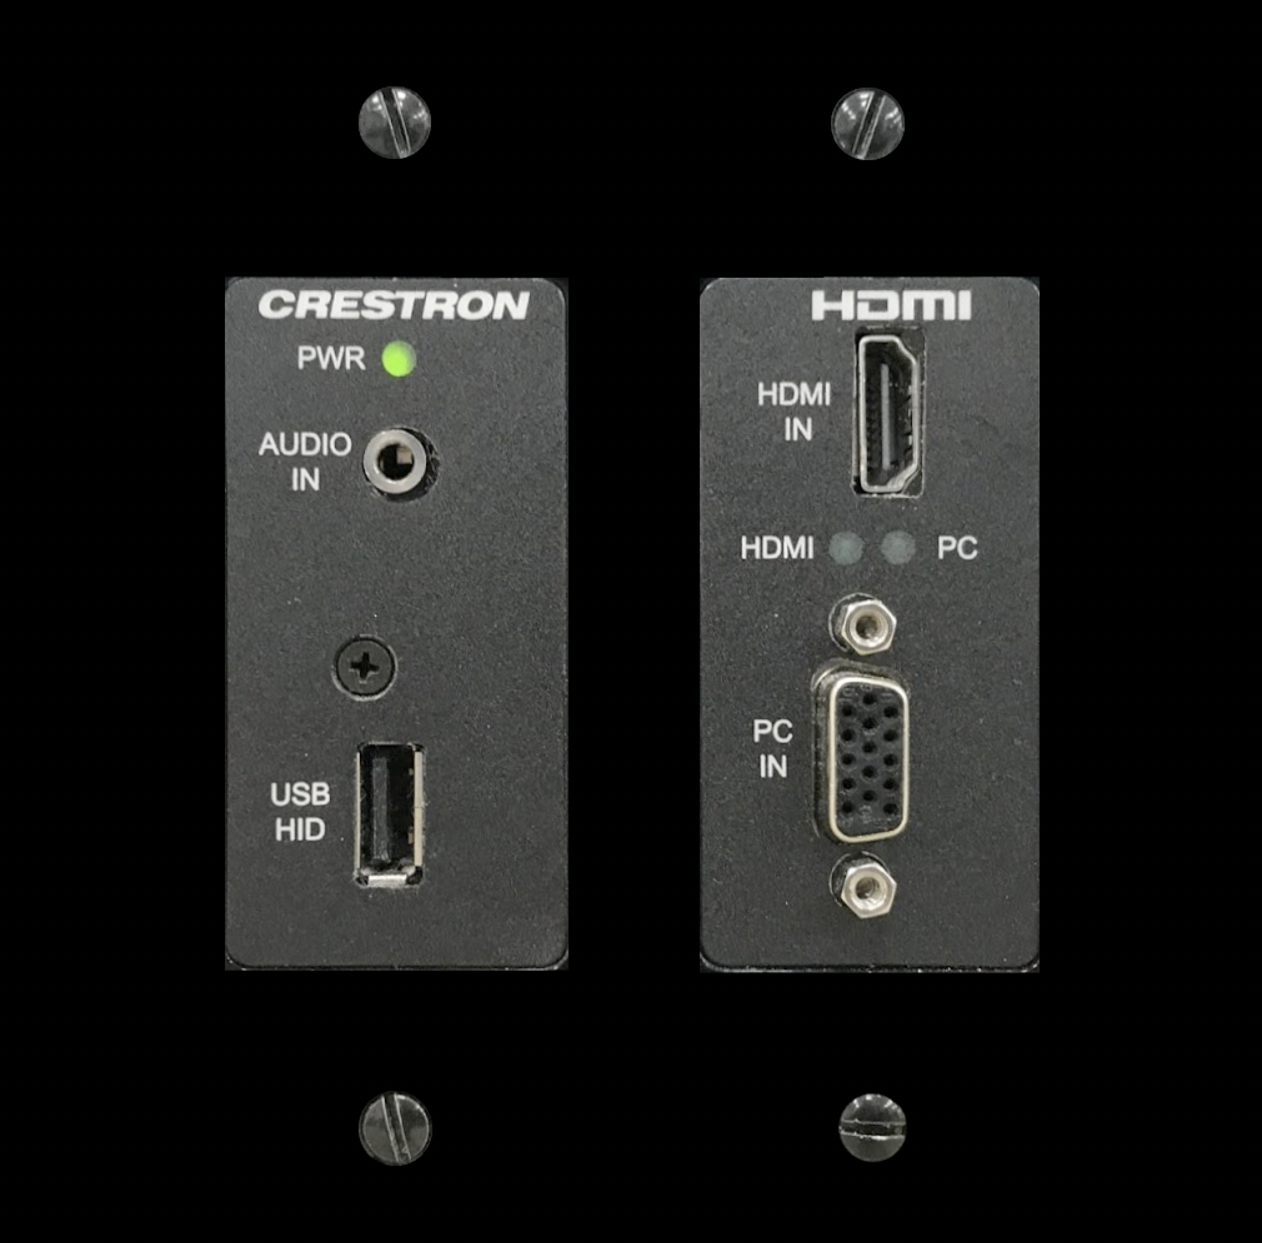
  • Connect a VGA or HDMI cable to the input plate on the wall. It may be the same height as the electrical outlets

  • Connect the other end of the cable to your laptop or device.


Step 2: Turn on the Projector by tapping the Power Button on the contol panel.
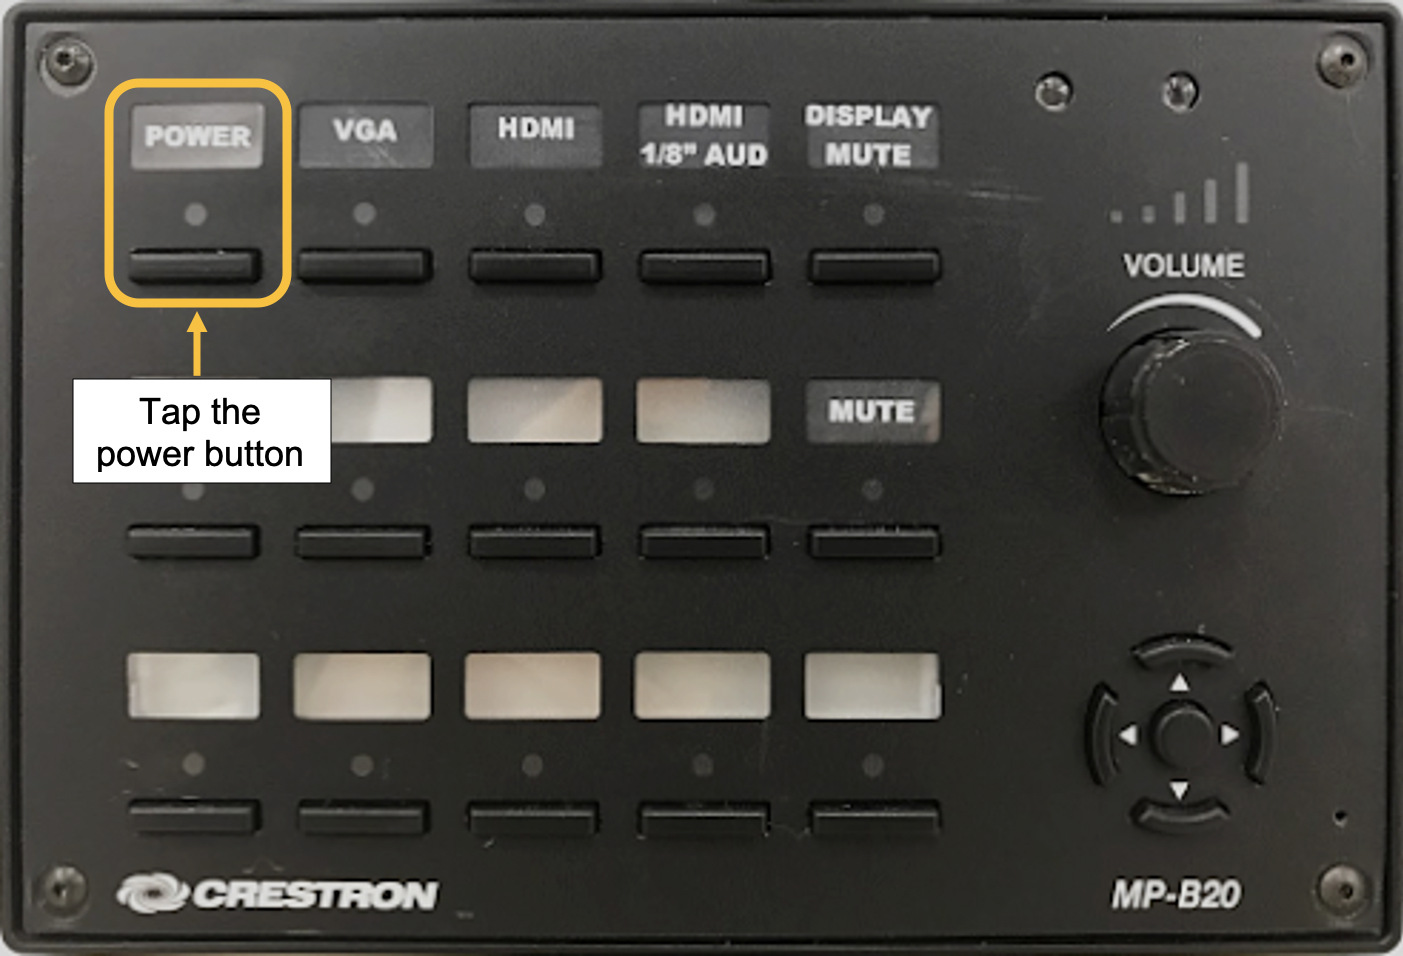
  • Press the top left button labelled "Power" to turn on the projector

  • You may hear an audible "beep" from the projector.

  • The LED indicator on the control panel may start flashing to indicate the projector is warming up.


Step 2a: The Power Button LED indicator will now be red.
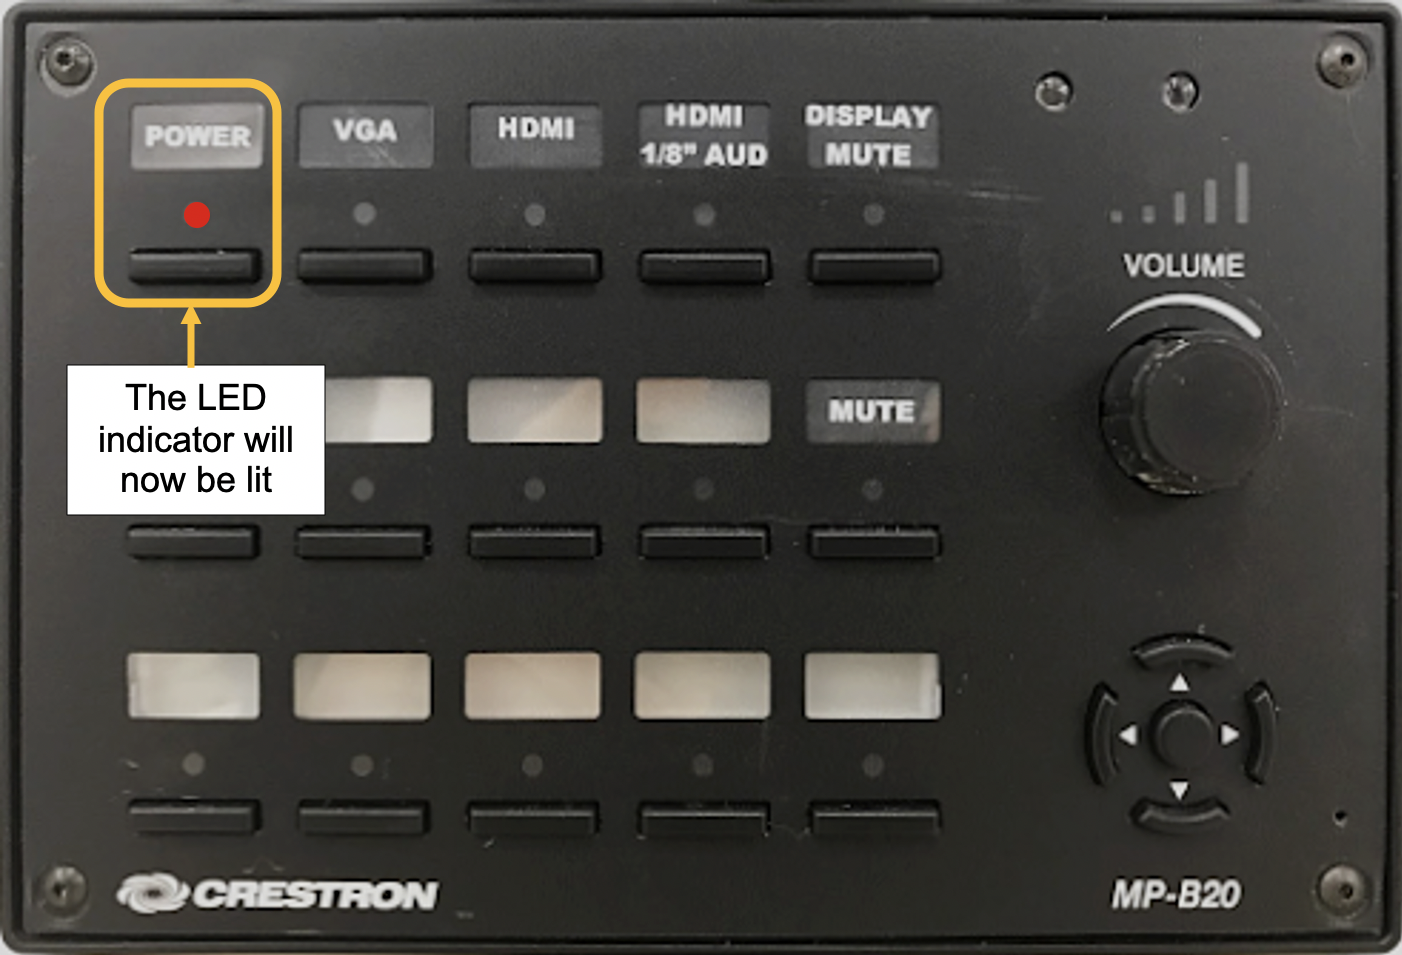
 

Step 3: Select a source
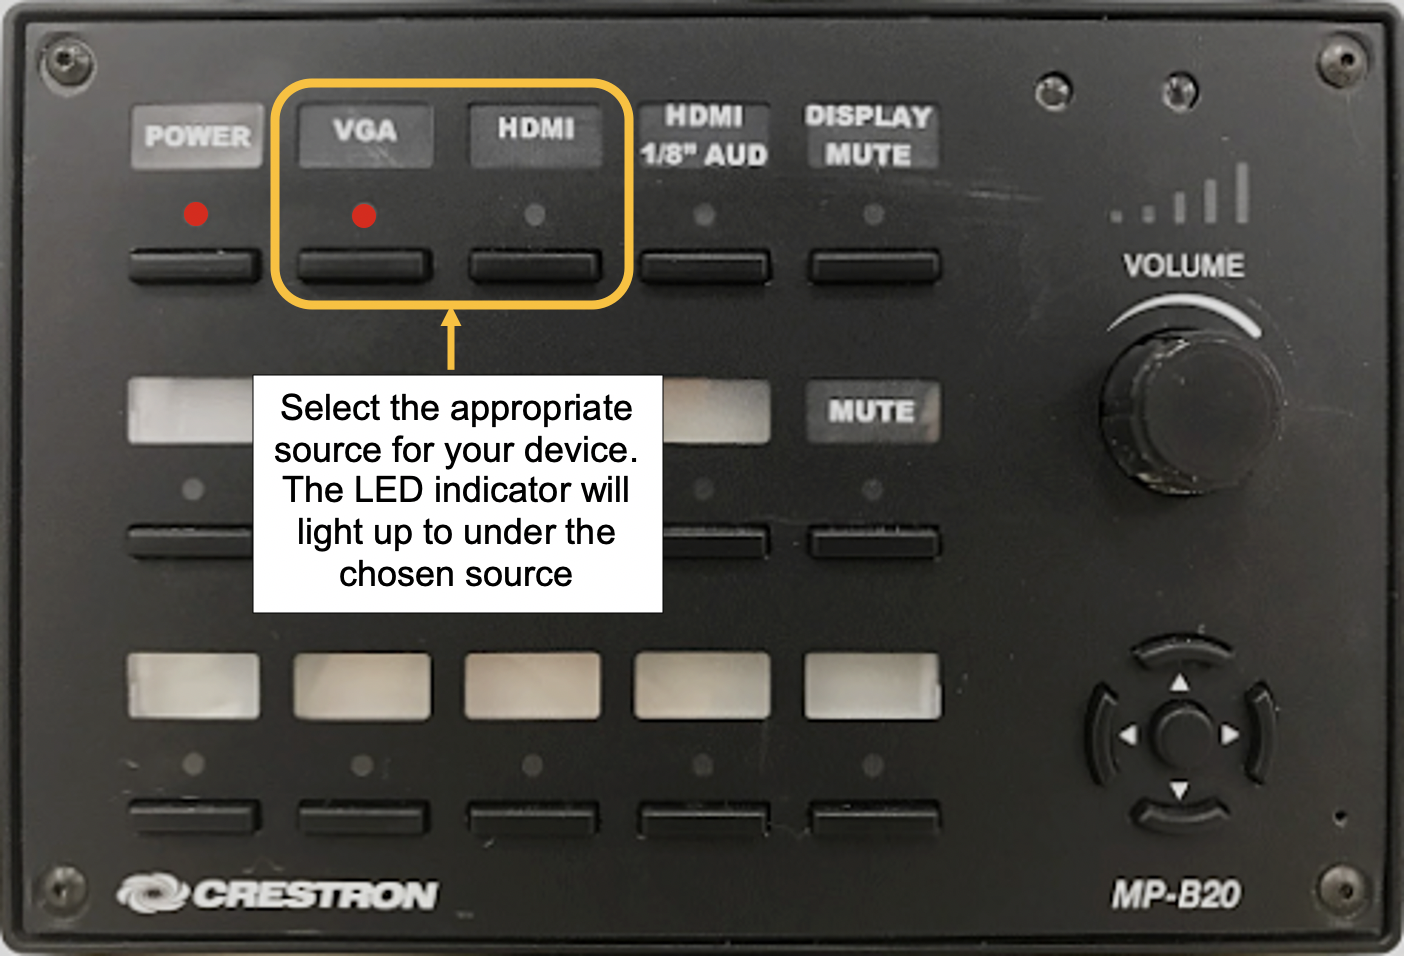

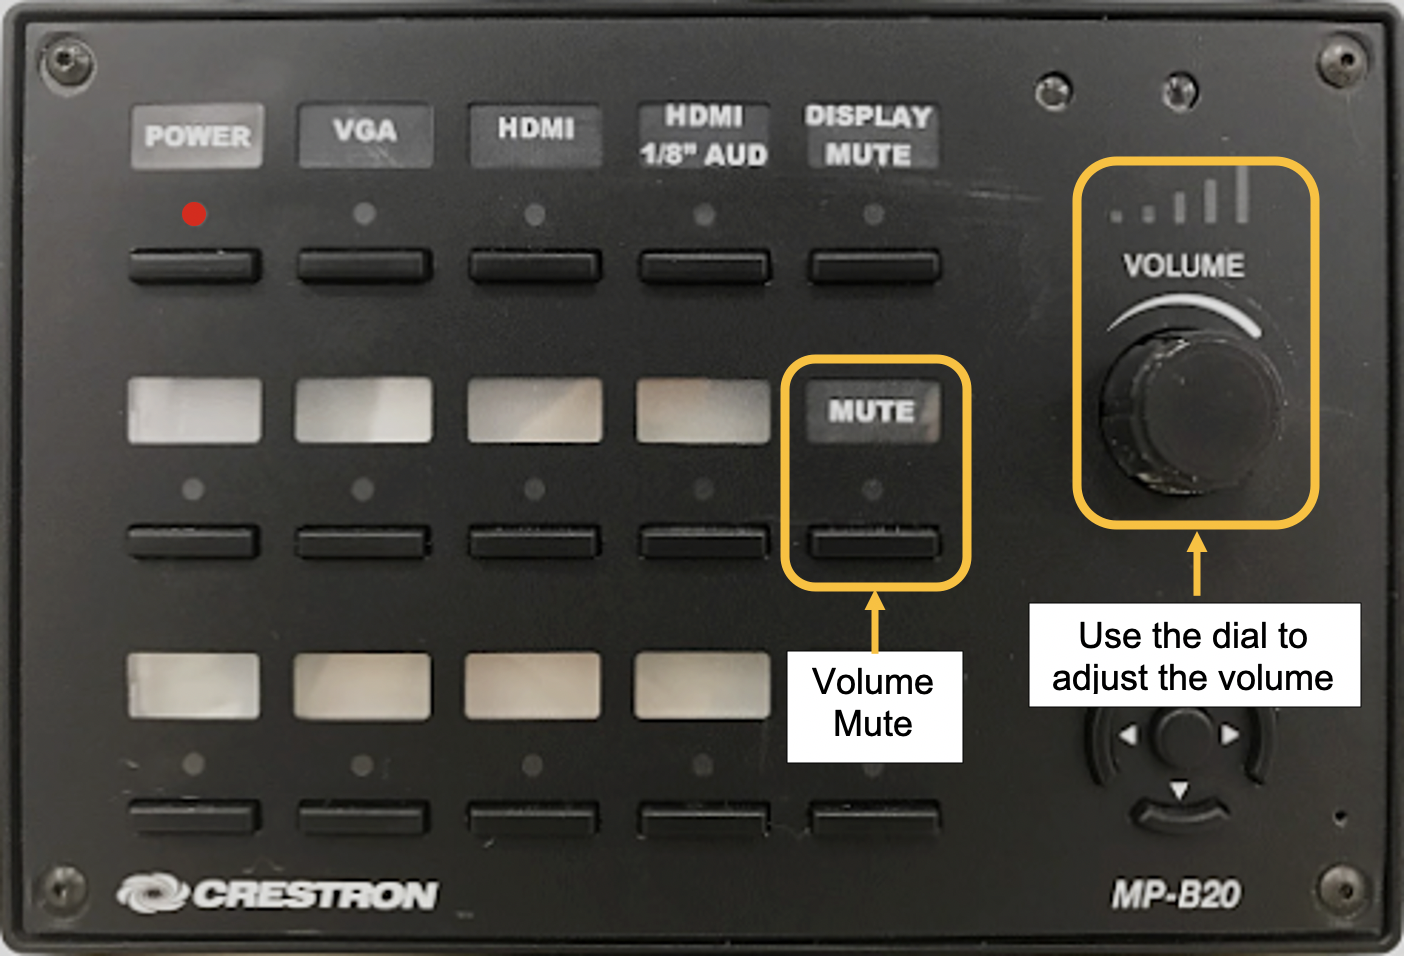
Optional Steps to navigate system controls:

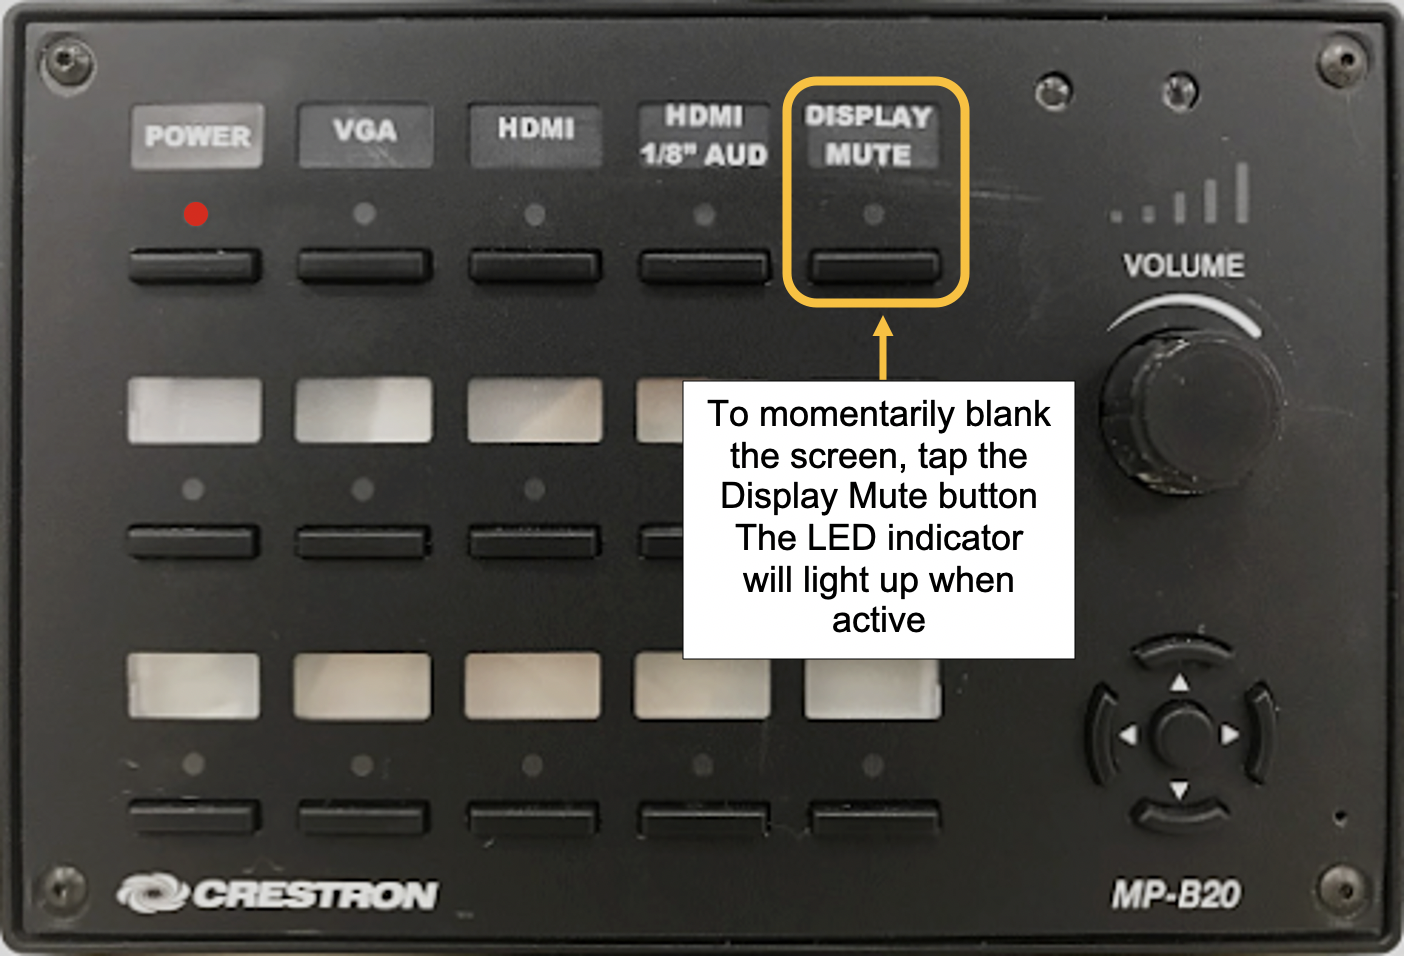
  • Image Mute:


  • Adjust Volume with the dial on the right

Step 4: To power off the system, press and hold the power button for  3 seconds.
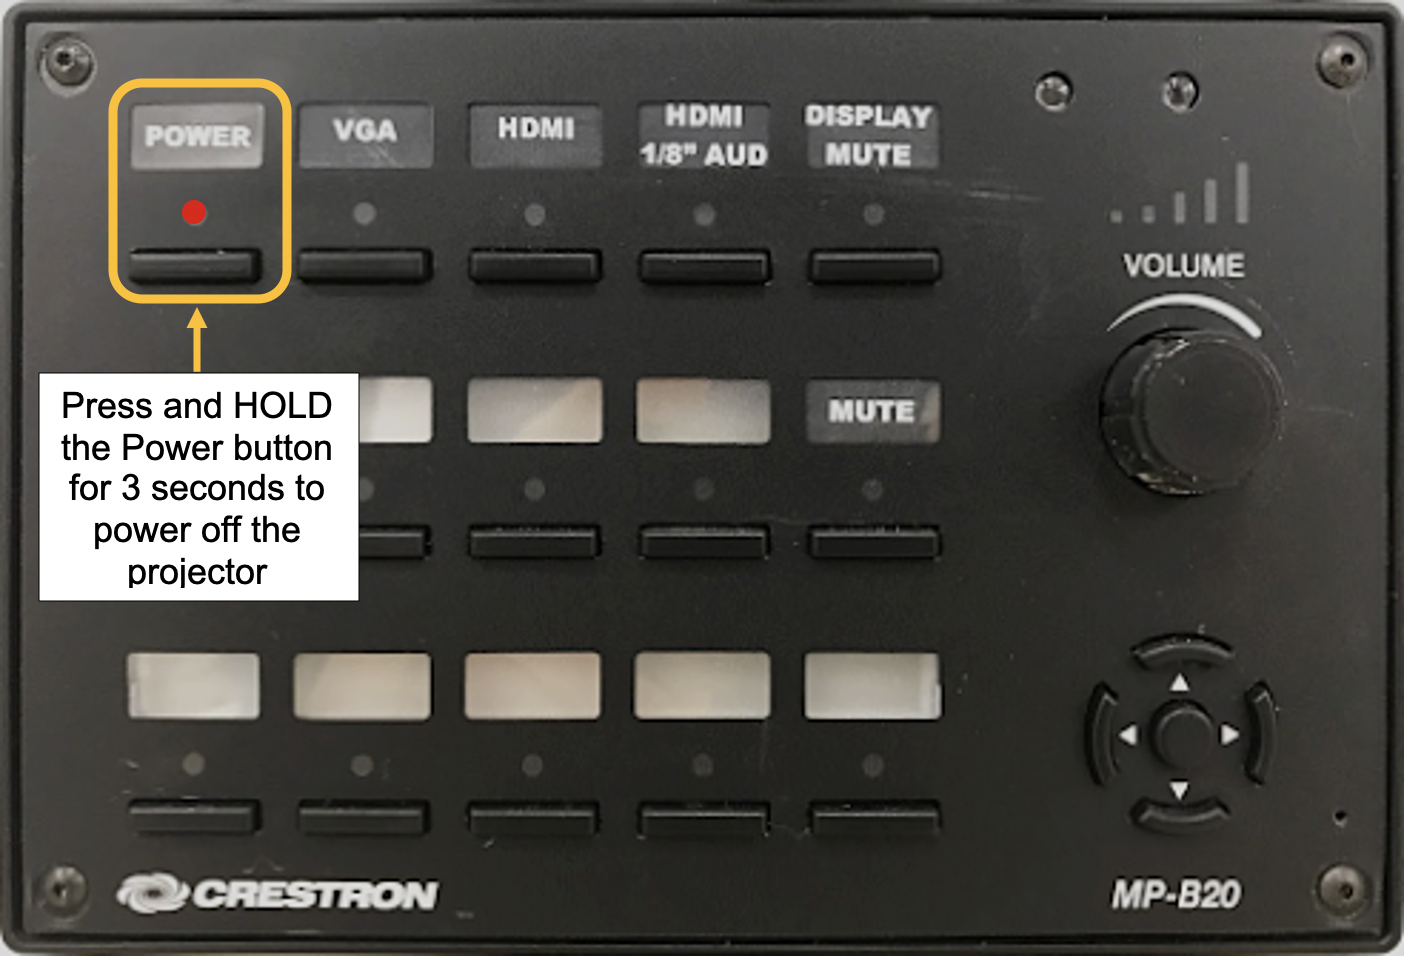
  • You may hear an audible "beep" from the projector.

  • The LED indicators on the control panel may start flashing to indicate the projector is cooling down.

Additional Information


There are no additional resources available for this article.

Provide Feedback


Your feedback is important to us, help us by logging in to rate this article and provide feedback.

Sign in with NetID

Getting Help


The Division of Information Technology provides support on all of our services. If you require assistance please submit a support ticket through the IT Service Management system.

Submit A Quick Ticket

Supported By


Classroom Technology & Support Solutions West Campus