Building Your Course in Brightspace
You can use Brightspace Course Builder to add content to your course or use Brightspace tools to create content directly in Brightspace.
Hierarchy of Content in Brightspace
Brightspace content can be organized into Modules, which are like folders. Modules contain Topics, which can be created/linked to from Brightspace or uploaded from your computer.
Before adding or creating Topics, first create your modules (e.g., module 1, module 2). An easy way to do this is using Course Builder.
Tip: Your content from recent Blackboard courses is already in a Brightspace conversion course; use Brightspace Course Copy to bring content from them into your new Brightspace courses.
Create Modules
- On the navbar, select Course Admin (or, if you don't see Course Admin, you may need to first select More or Course Tools)
- Select Course Builder
- From the Build Outline section of the toolbox,
- Click and drag the module icon
 and drop it on the top of the course tree (on the course name, e.g., Julie Test Course)
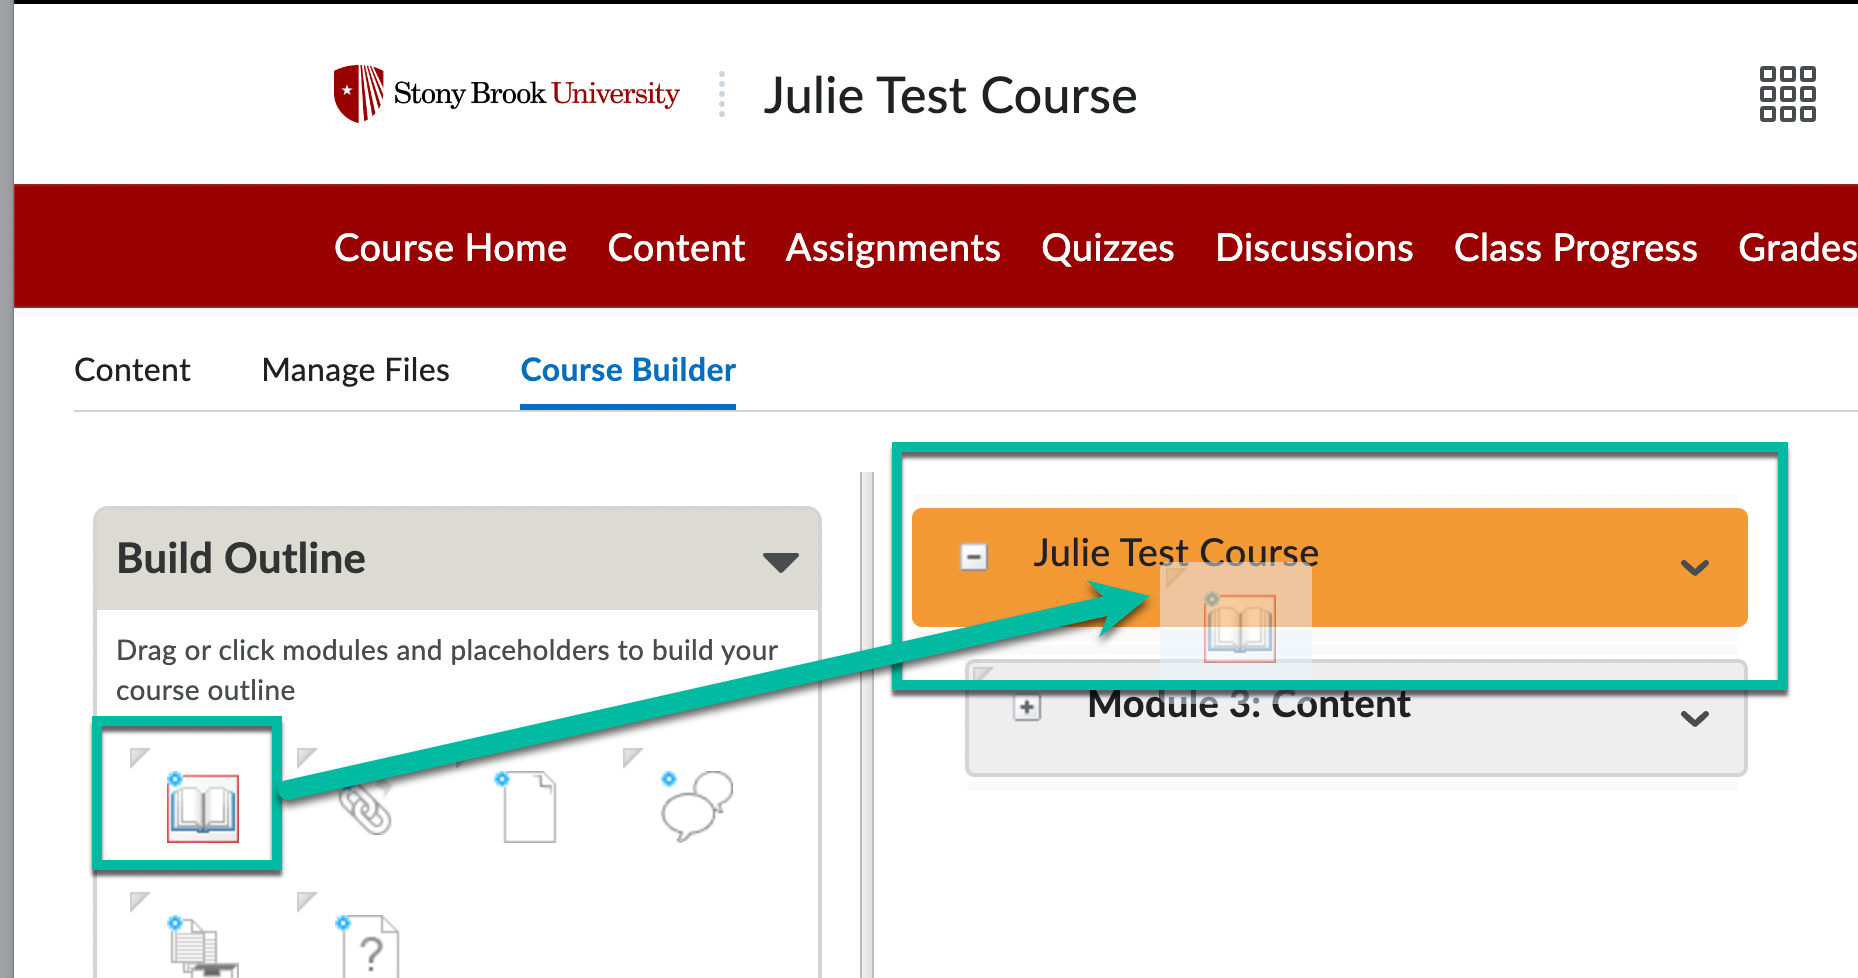
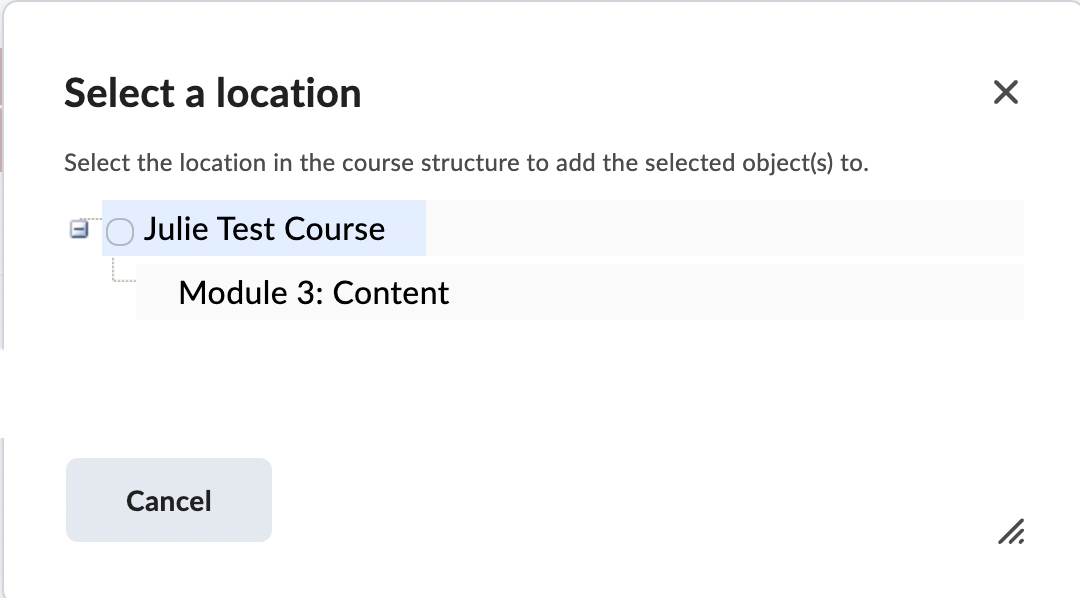
- Or single-click on the module icon and select the top-most location from the list (e.g., Julie Test Course)
- Click and drag the module icon
- Complete the module details
- Click Create
Tip: At the top of your course (above Module 1), add another Module called Syllabus for your syllabus
Add Topics as Content Or Create Placeholders
Once you have added Modules in Course Builder, you can add your syllabus, placeholders, and content.
- On the navbar, select Course Admin (or, if you don't see Course Admin, you may need tofirst select More or Course Tools)
- Select Course Builder
Add your Syllabus
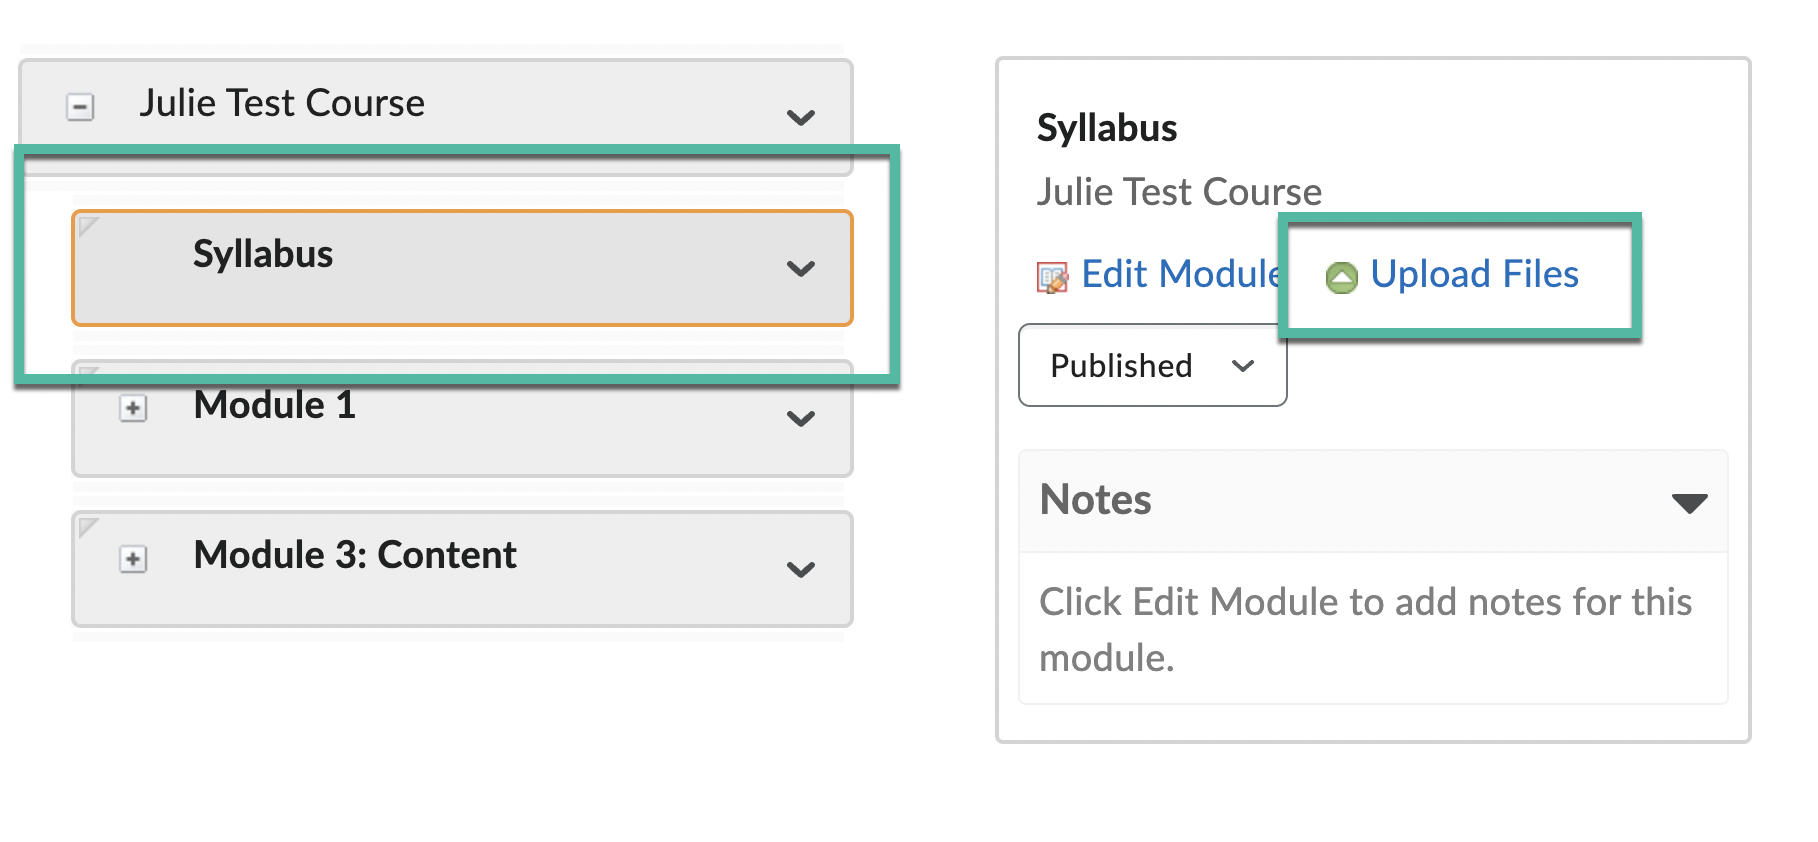
- In the Course tree, select the Syllabus module (it will be outlined in orange once selected)
- While it's selected, upload the file from your computer: To the right, select Upload Files, select Choose File, navigate to and select the file from your computer, and select Upload
Add Placeholders
- Add placeholders to create the structure for your course that you can later fill in with content
This is helpful especially if you structure each module similarly (e.g., two readings, one quiz, one discussion, one assignment) because you can create that module and structure once and copy it to create your other modules, and then rename/modify them as needed:From the Build Outline section of the toolbox, click and drag a placeholder icon (link, file, discussion, assignment, quiz;) and drop it into the module/location where you want it (e.g., Module 1). Or single-click a placeholder icon and select the where you want it to go (e.g., Module 1)
Tip: hover over the icons for more information about them
- Repeat to add other placeholders
- Copy Module Structure
- When you've set up one module with the complete structure, to copy that structure and create another module with the same structure, in the course tree, click the down-pointing arrow ˅ to the right of the module name and select Copy Structure.
- Click the down-pointing arrow ˅ to the right of the module and select Paste > Paste After to add a copy of the module directly below it
- Select the new Module (it will have the same name as the Module you copied the structure of), and to the right select Edit Module (if you don't see the Edit Module option on the right, refresh your browser page ⟳ and try again) and re-name the Module (e.g., Module 2)

- Continue Copying Structure and Pasting After to create all your Modules, and then editing them as needed to rename them and/or add other placeholders
Add content to Modules
- Once you have your Modules created and structured with placeholders, you can add the actual content you want
- Use Browse Tools to add content you've already created
Tip: It is easiest to first create assignments/quizzes/discussions in each respective area in Brightspace, and then add those to the placeholders in Course builder- For the content type you want to add, click the right-pointing carrot ͐ for the content type (e.g., to add a quizzes to a quiz placeholder, click the ͐ next to Quizzes)
- Select the content and drag/drop it in the desired location OR click Add to Course and then click the + next to Modules to expand them and select the Module or Placeholder where you want it to go
- Use Add Content to create new content from Course Builder
- From the Add Content section of the toolbox, click and drag a content type (Create a link, HTML file, discussion, assignment, quiz, grade item) to a matching placeholder in the desired Module (e.g., to add content to a Discussion placeholder, click Create a discussion in the Add Content area)