Brightspace: New Discussion Experience
D2L has introduced a new Discussion Experience designed to improve usability, streamline the interface, and make it easier to participate in course discussions. This guide explains the key changes and what you can expect from the updated layout.
As of May 18th, 2023, we have transitioned to the New Discussion Experience in Brightspace. This new experience has changed the appearance of the Discussion creation area to be uniform with the area to create an Assignment. While this Discussion creation area may look different, this new experience will not effect the following:
- Discussion Settings
- Replying to Discussions
- Grading Discussions
- Creating Forums from the main Discussion menu.
Overview:
- The Design
- Creating a Forum in a Discussion Topic
- Creating a Grade Item
- Categorizing a Grade Item
- Linking a Topic to an Existing Grade Item
- Hiding Discussion Topics
What Has Changed?
The Design
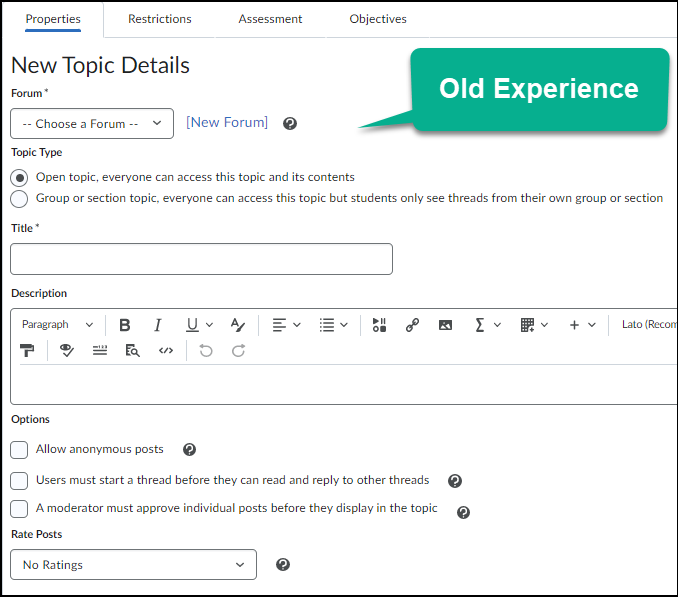
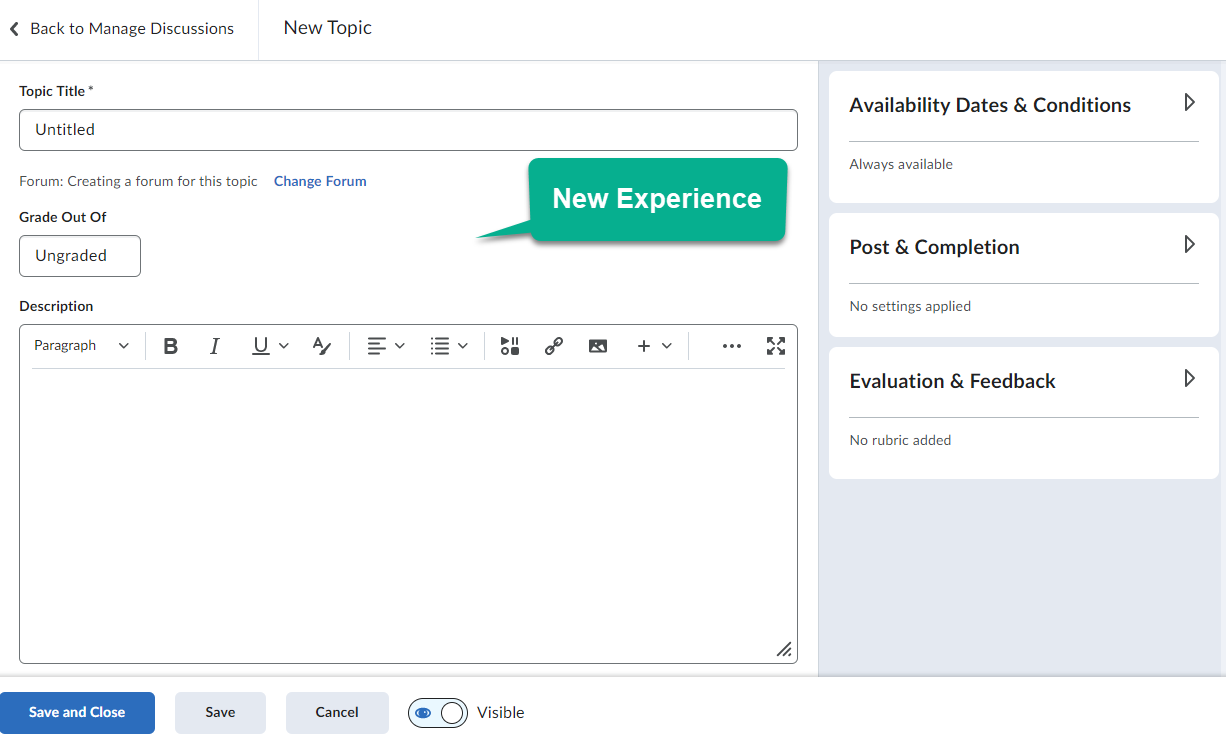
When creating a Discussion, the creation area will now resemble how it appears when creating an Assignment in Brightspace. The old experience had various tabs at the top of the screen that would allow instructors to customize their Discussions; these have now moved to the right of the screen in the new experience and they are given new titles.
Creating a Forum in a Discussion Topic
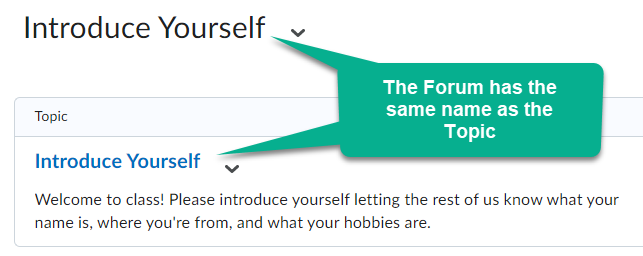
In the old experience, when creating a Discussion Topic you had to either assign the topic to an existing forum, or create a new forum in the Discussion creation area. In the new experience, by default, a forum will be created automatically. This forum will have the same name as the topic.
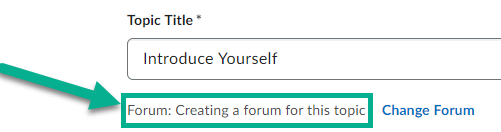
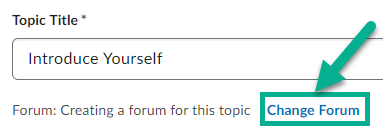
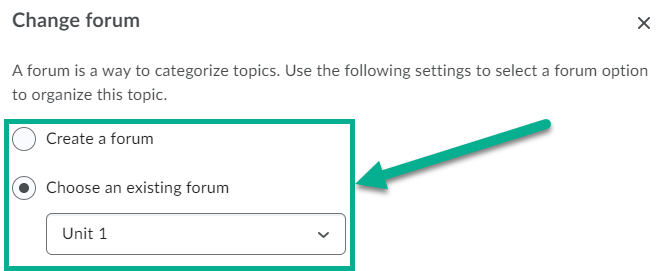
To assign a topic to a specific forum, select the Change Forum link, then choose to either Create a Forum or Choose an Existing Forum to assign the topic to a forum that was already created.
Creating a Grade Item
In the old experience, when creating a topic, you would have to go to the Assessment tab and either link the Discussion to an existing grade item, or click a link to create a new grade item. In the new experience, this works differently. Instead of going to a separate tab, you will have access to a box that says Grade Out Of from the main topic creation area.
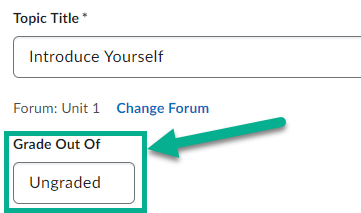
This area will allow you to type a value to score a discussion topic out of. Once a number is typed, it will automatically create a grade item for this discussion in Grades. Please note that this grade item will not be categorized. If you have a weighted gradebook, you will not be able to set the weight of the grade item from here, this must be done in Grades. 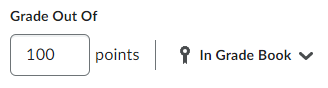
Categorizing a Grade Item
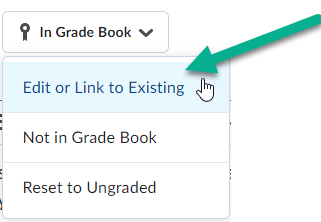
To assign a Grade Item you created from the Discussion Topic creation area to a Grade Category, select the button that says In Grade Book, and then choose Edit or Link to Existing.
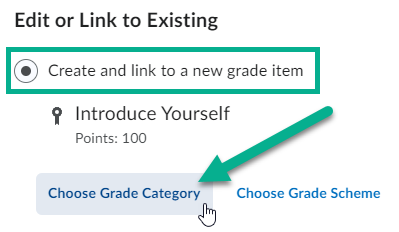
Once clicked, make sure you have the option Create and Link to a New Grade Item selected, and then you can then click a button titled Choose Grade Category.
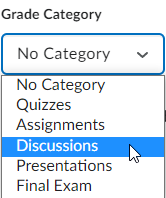
Once selected, you can choose the applicable category to assign this grade item to.
Linking a Topic to an Existing Grade Item
In the new Discussion experience, if you would like to link your topic to an existing Grade Item, you can do so by selecting the In Grade Book button, and then choose Edit or Link to Existing.
Once clicked, you can choose the option titled Link to an Existing Grade Item. Then choose the drop down selector to find the grade item you wish to link the topic to.

Hiding Discussion Topics
When creating or editing a topic, you are now able to hide the topic from learners at the bottom of the screen by selecting the eye icon.
![]()
What Has Moved?
All customization options that existed in the old Discussion experience still exist in the new one. These features have been moved to three new areas in the topic creation screen:
- Availability Dates & Conditions
- Post & Completion
- Evaluation & Feedback
Availability Dates & Conditions
In the Availability Dates & Conditions section, you can find the following:
- The option to include the start or end dates for a Discussion Topic
- Release Conditions
- Group and Section Restrictions for the Topic
These options were previously available in the restrictions tab of the old experience.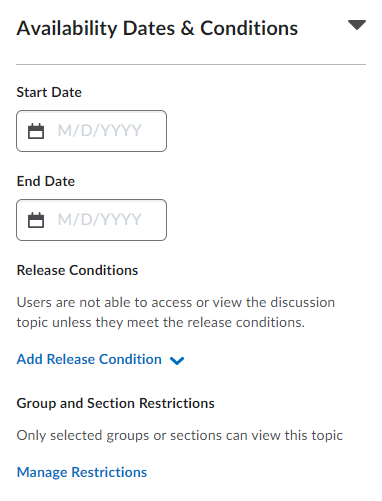
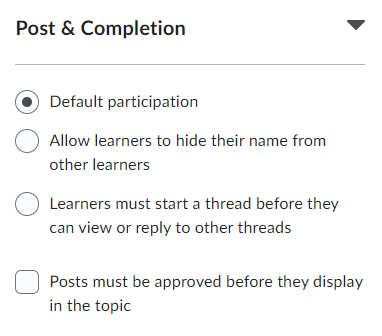
Post & Completion
In the Post & Completion section, you can find the following options:
- Default participation (default discussion setting)
- Allow learners to hide their name from other learners (previously titled: allow anonymous posts)
- Learners must start a thread before they can view or reply to other threads
- Posts must be approved before they display in the topic
These options were previously available in the properties tab in the old experience.
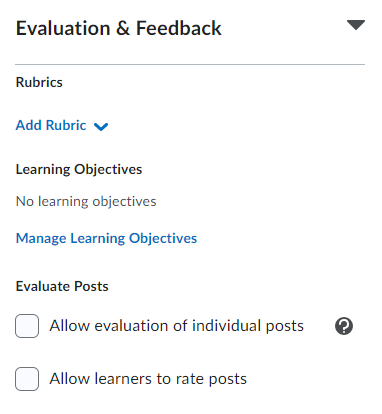
Evaluation & Feedback
In the Evaluation & Feedback section, you can find the following options which were located in several different areas of the old experience:
- Adding a rubric (formally in the assessment tab)
- Allow evaluation of individual posts (formally in the assessment tab)
- Mange learning objectives (formally in the objectives tab)
- Allow learners to rate posts (formally found in the properties tab)