Adding and Removing Links in the Navbar in Brightspace
Learn all about adding and removing links in the main navigation bar (red bar) in your Brightspace course.
The "Navbar" is the navigation of a Brightspace course site. Instructors and students use it to add content, access course materials, and provide/view grades.
Instructor view of the Navbar:
Students will have a similar view without the tools: Quick Eval and Course Admin. To see what a student or Learner sees, view the course as a Learner.
In this article you will learn about:
- Editing the Navbar
- Adding Links to the Navbar (adding the Groups tool; re-adding the Course Admin tool back to the Navbar)
- Removing Links from the Navbar
- Reordering Links on the Navbar
- I added a Link to my Navbar but it is missing!
To view this information, see the summary video below:
Editing the Navbar
You can add and remove tools from the Navbar. One tool you may want to add is Groups if the course work requires group projects. Adding Groups to the Navbar is currently the only way to make the Groups tool accessible to students.
- To edit the Navbar, click on the 3-dots that appear when you hover your mouse near More

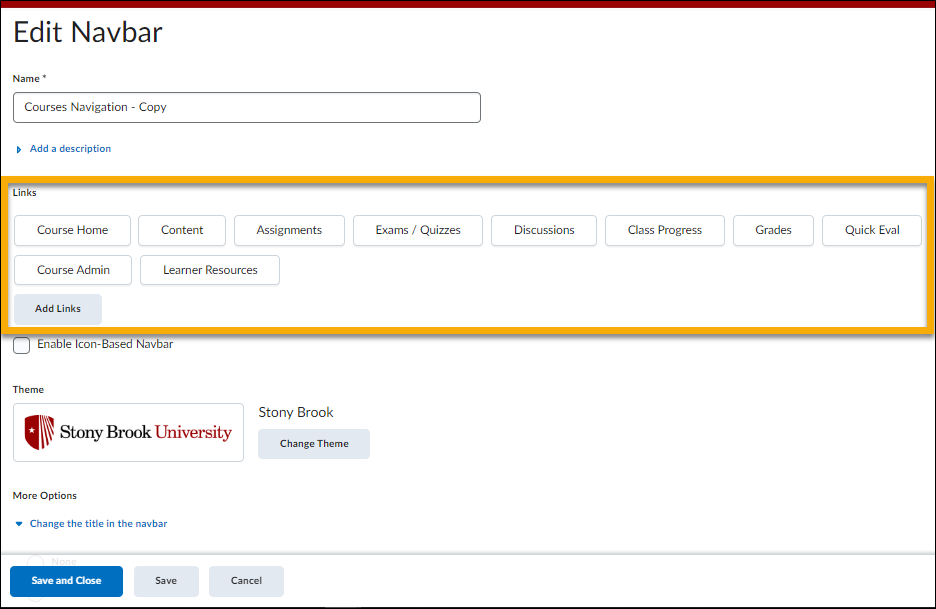
and click Edit This Navbar or Customize This Navbar - Go to the Links section.

Adding Links to the Navbar
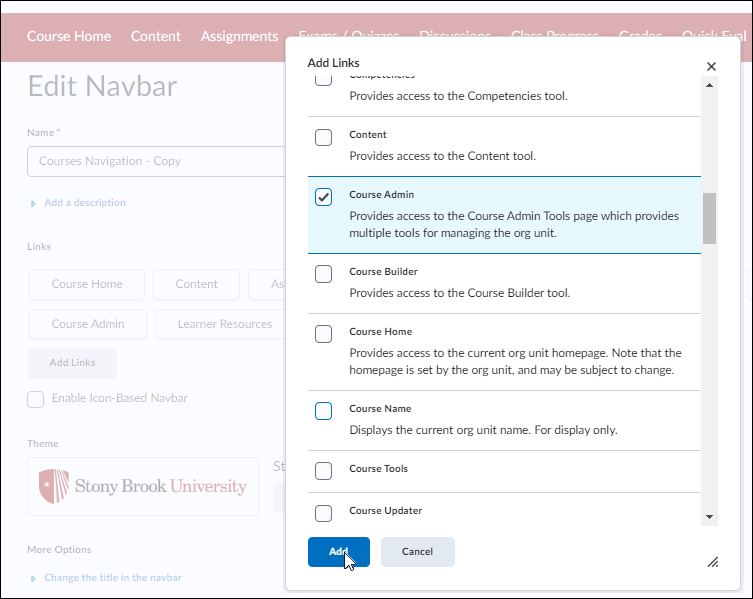
- To add a tool to the Navbar like Groups or the Course Admin, click the Add Links button and check off the tool you want to add. Click the Add button. And then click Save and close on the next screen.

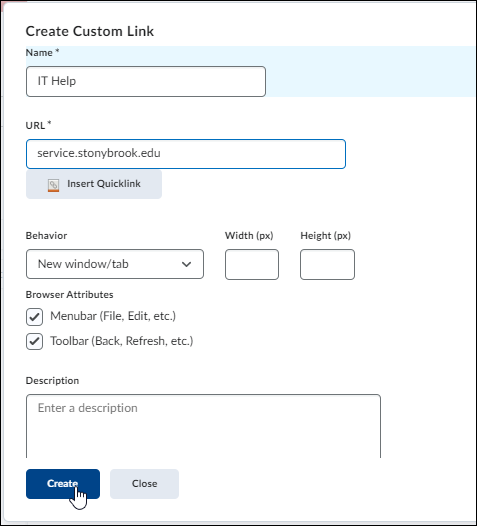
- To create a custom link (a link to a website), click the Create Custom Link button

- Add the Name
- Enter the URL
- Click Create
- Click the Create button. Then click Save and Close on the next screen.

Removing Links from the Navbar
You can remove links from the Navbar by clicking on the X when you hover over a link:
Reordering Links on the Navbar
You can reorganize links on the navbar by dragging and dropping them.
I added a Link to my Navbar but it is Missing!
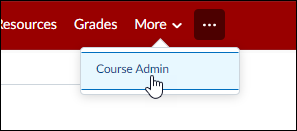
Check under More
