Adding a Google Apps Account to Apple Mail, iCal, and iChat
You can add a Google Apps account to Apple Mail, iCal, and iChat using the instructions on this page.
This KB Article References:
This Information is Intended for:
Instructors,
Staff,
Students
I. Before You Start
Important! In order to access Stony Brook's Google Apps in your Mac apps you will have to first change your NetID password in the SOLAR System.
Log in to SOLAR and click on the NetID Maintenance link to change your NetID password. It takes 10-15 minutes for the new password to take effect. Please note, if your NetID password is not immediately accepted while following the below steps, it may be because your password is not yet synchronized with Google's servers. Normally, after some time, the password will sync up and allow you to connect.
II. Enable IMAP
- Log into your Gmail account using your NetID and NetID password.
- In the top-right corner of mail, click on the gear icon and select Settings
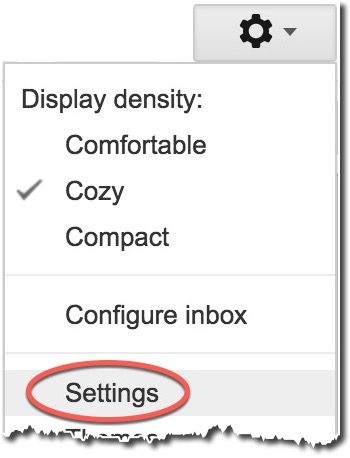
- Select Forwarding and POP/IMAP

- Make sure that IMAP is enabled by selecting the Enable IMAP button. Also select Auto-Expunge On and Do not limit the number of messages in an IMAP Folder depending on your preferences. Click Save Changes.
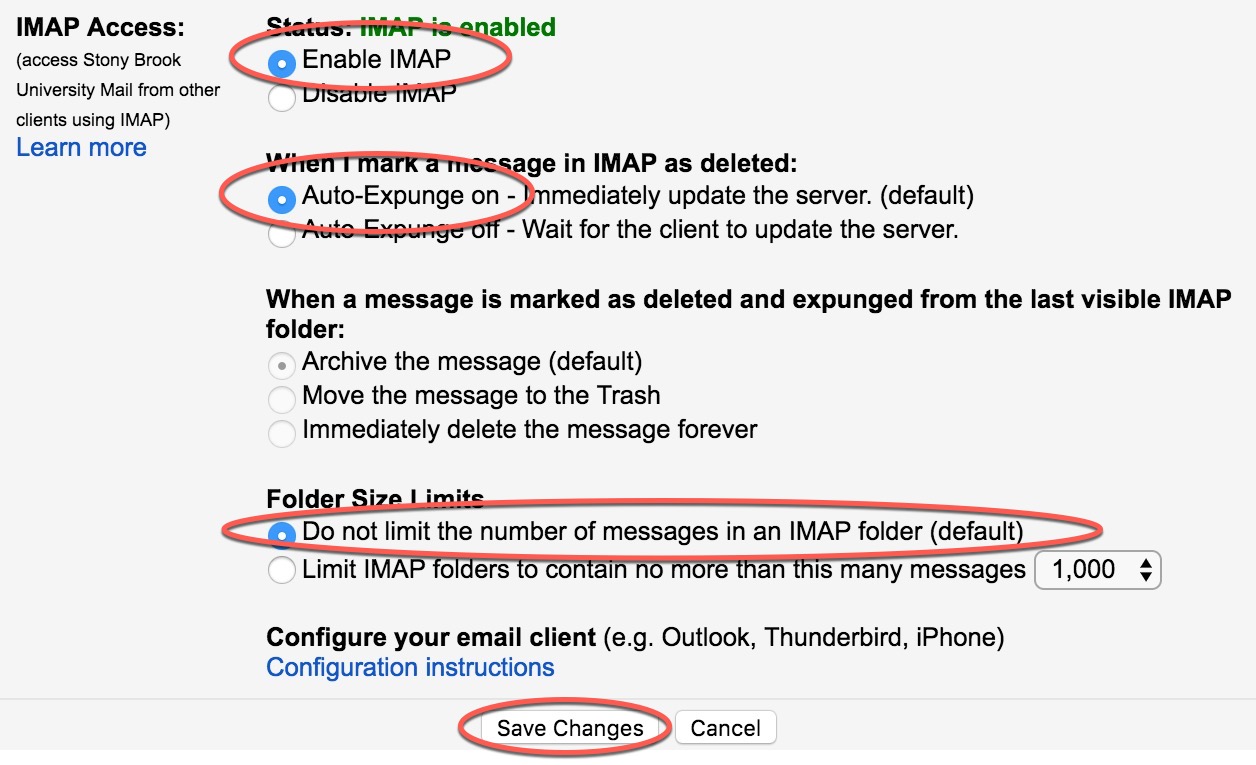
- You have now succesfully pre-configured your Google Apps for Education account for use with Apple Mail. Now follow the steps below for setting up Apple Mail, iCal, Contacts, iChat/iMessages
III. Set Up Apple Mail, iCal, Contacts, iChat/iMessages
You can set up several apps (Apple Mail, iCal, iMessages, etc.) or just one.
Different versions of Mac OS/OS X may work slightly differently. If you have any issues during setup, contact the support group for assistance.
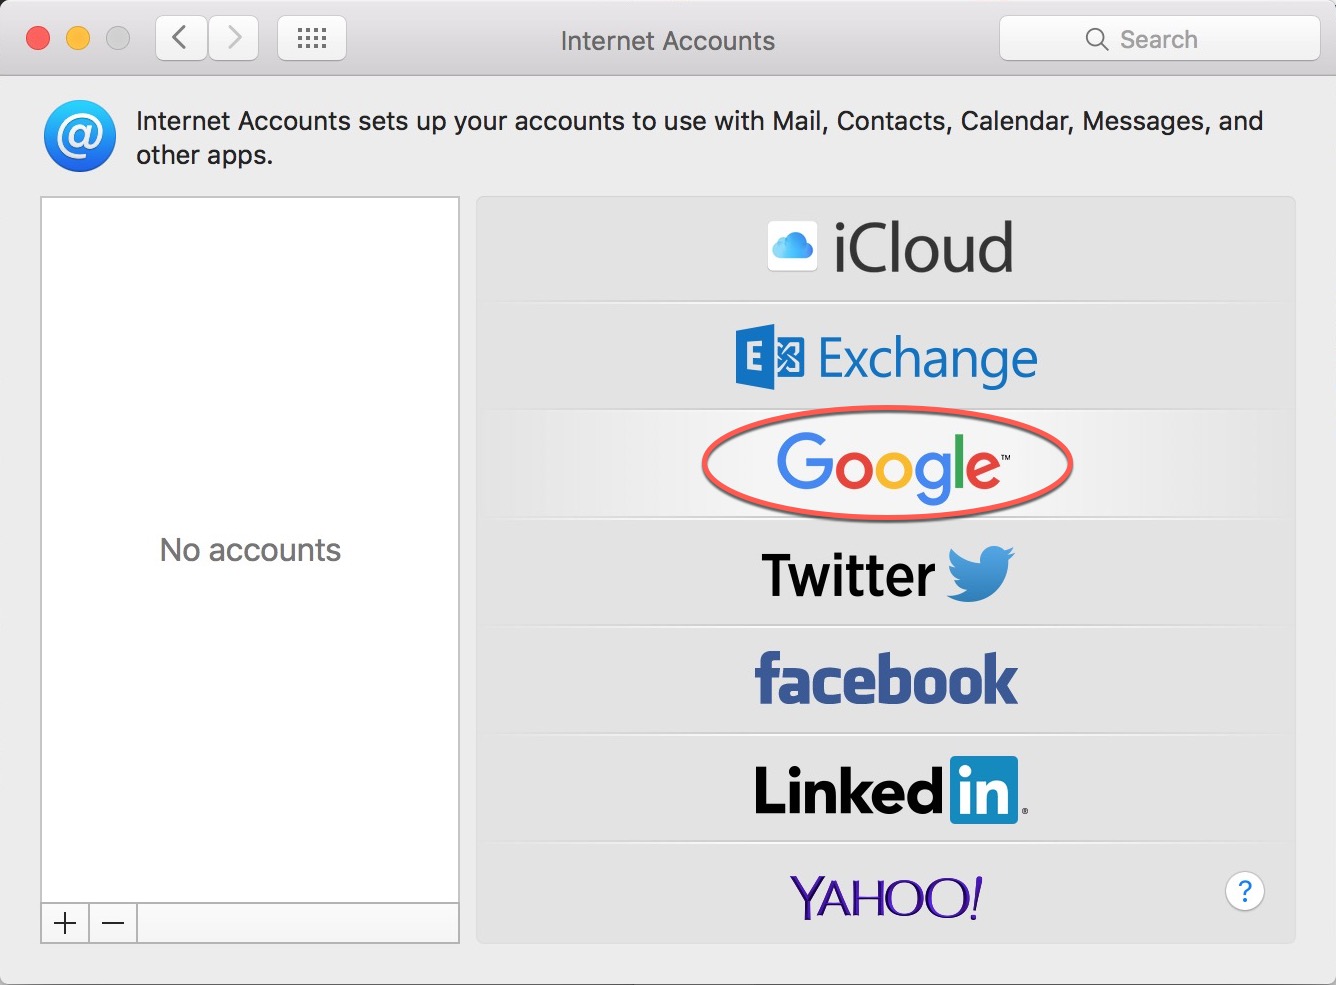
- Click the apple icon in the top-left corner and select System Preferences and then Internet Accounts (on older versions of the OS, select Mail, Contacts, & Calendars)
- Select Google
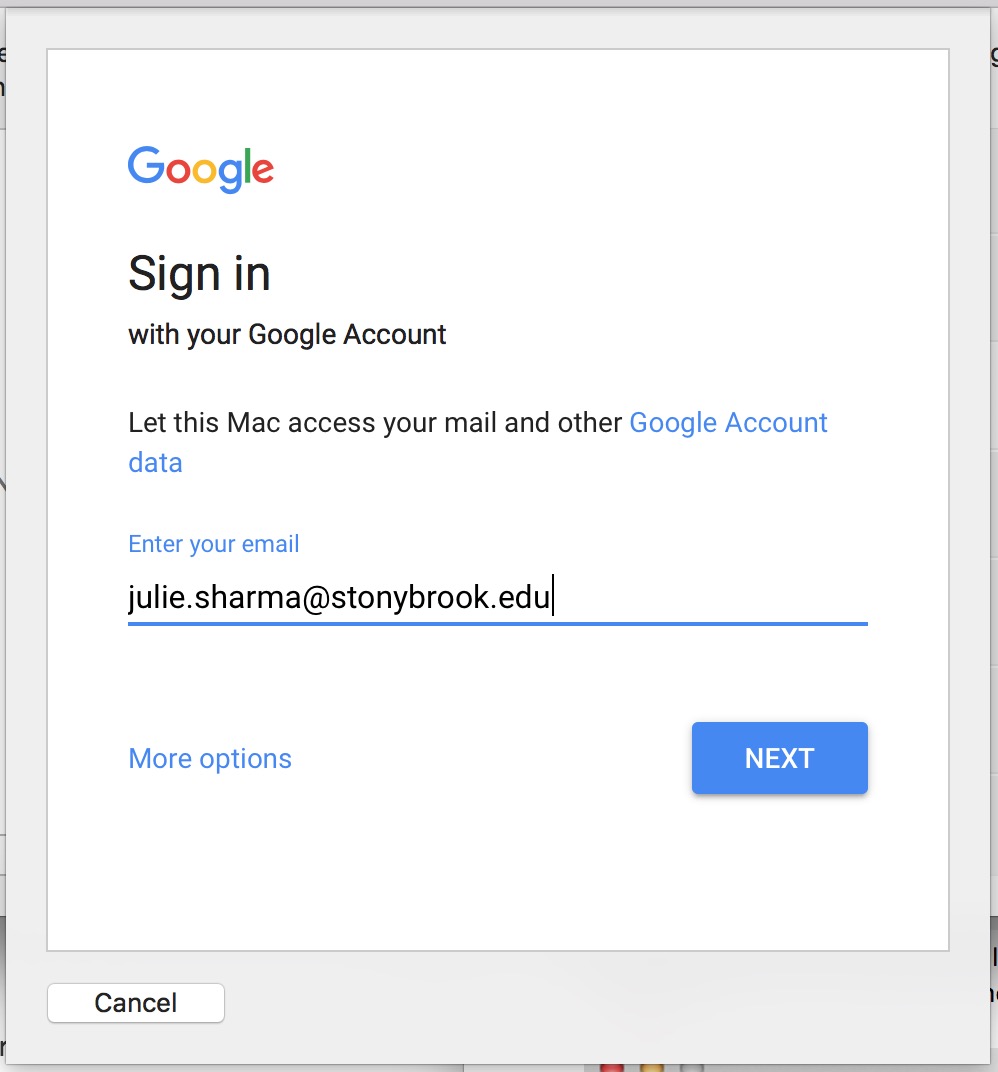
- In the Sign in window, enter your first.last@stonybrook.edu email address and click Next. Then authenticate with your NetID and NetID Password
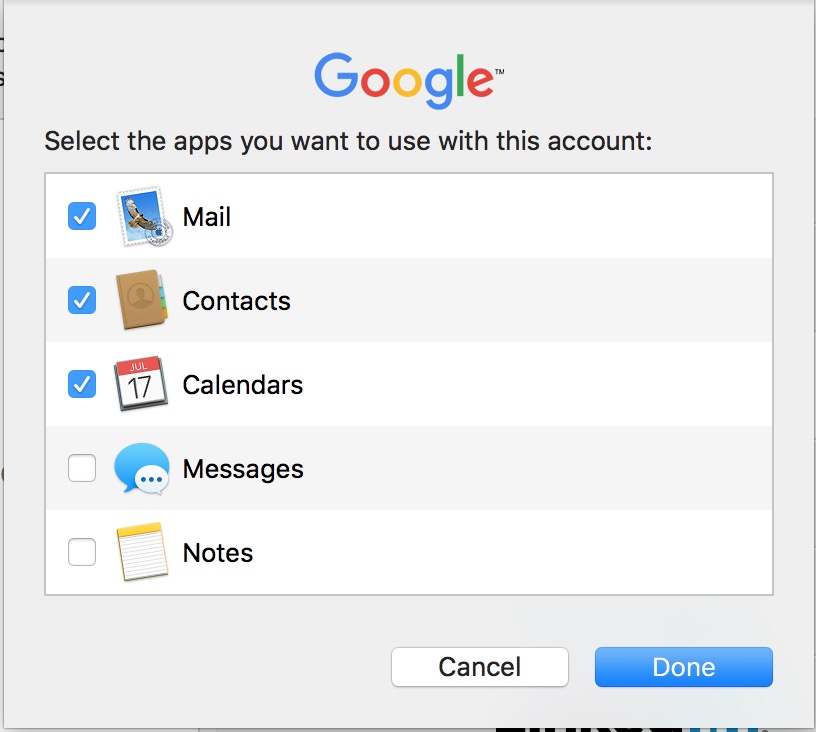
- Select which apps to use with the account (or unselect any you don't want to use) and click Done
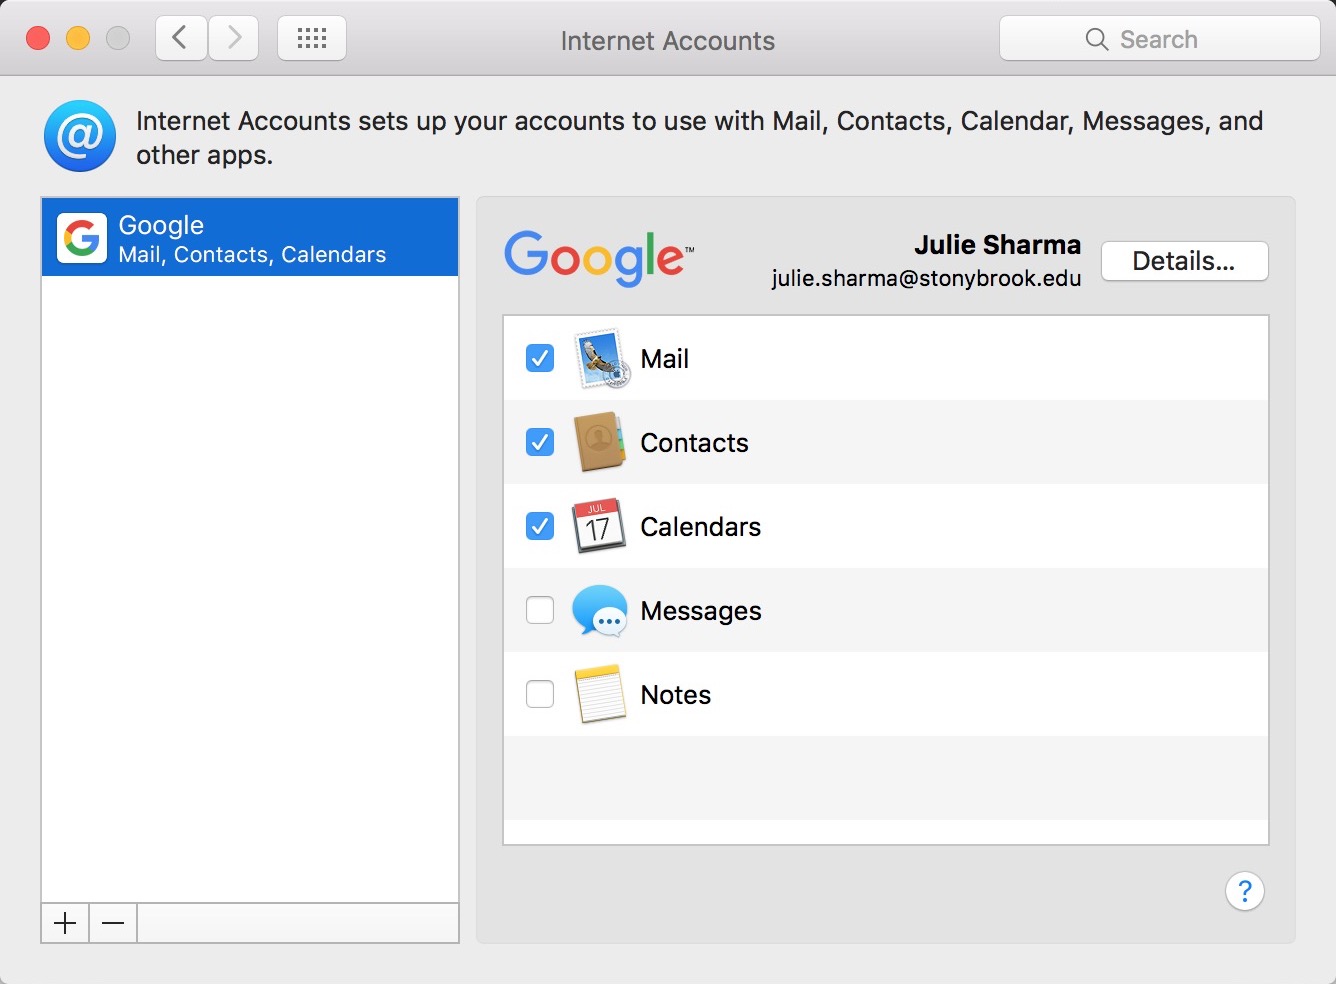
- The account is added to the list of accounts. Open an app you chose to use (e.g., Apple Mail or iCal) and content will begin populating
This Content Last Updated:
11/17/2025
Supported By
Customer Engagement and Support
Need Help? The fastest way to get support is by submitting a request through our ticketing system.
Get Help With Google Mail