Enabling Live Transcription Service in Zoom during a Zoom meeting
You can enable live transcription in Zoom during a meeting using the steps provided on this page.
Hosts can enable the Live Transcript to show closed captioning either on the bottom of the screen or in a side panel.
If you do not see the Live Transcript button below, you can find it under the More menu or you may need to turn it on in the Zoom Web Portal.
Note: to use this service both host and participants must be signed into the Zoom Desktop Client.

Follow these instructions to turn on the Live Transcription service and learn how to use it.
- Make sure the Live Transcription service is turned on in the Zoom Web Portal.
Click Settings > Closed Captioning > check off "Enable live transcription service to show transcript on the side panel in meetings"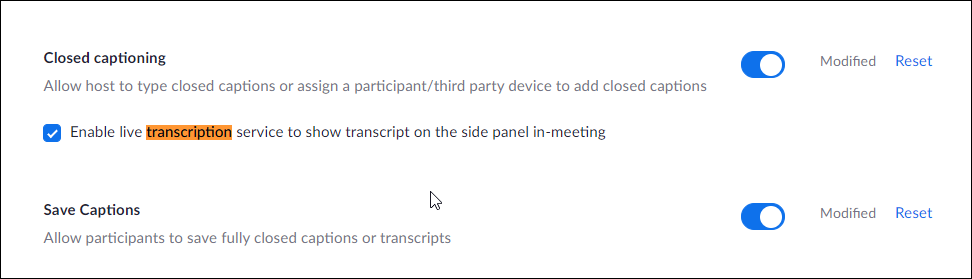
- Before starting your meeting make sure you are signed into the Zoom Desktop Client otherwise your participants will NOT see the CC button to request live transcript.
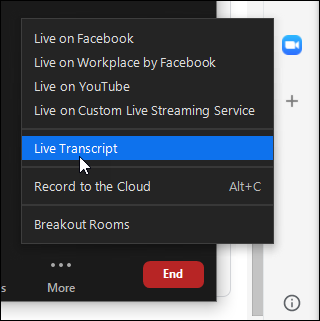
- Then in your session click on the Live Transcript button at the bottom. If you do not see it click on More > Live Transcript
- Then enable it for participants by clicking on Enable Auto-Transcription
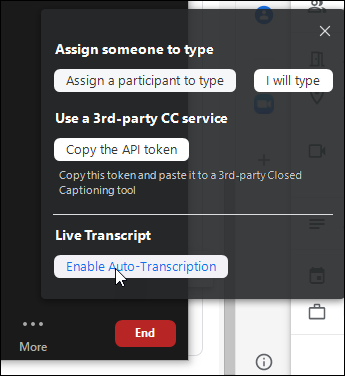
- You will get a few more option when you enable this in the More options.
If you Hide Subtitle a participant can still go to More > Show full transcript to see it in full view on the side. And they can close it by click on Close Full Transcript (show below).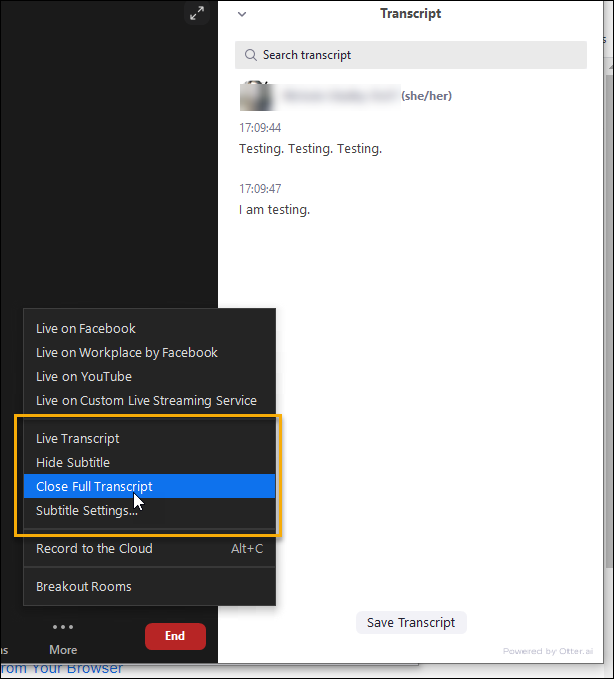
Supported By
Customer Engagement and Support