Staller Music Classrooms 2314 & 2322
This help guide is designed to supplement information provided in classrooms 2314 & 2322 in Staller Music by providing more explanation of the capabilities of these rooms.
For specific details about your classroom, please refer to the Installed Classroom Equipment Guide or contact Classroom Technology Support & Solutions.
Getting Started
Step 1: Power on the media system.
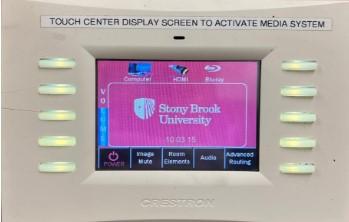
Locate the touch panel. This is found at the lectern.
- Power on the system by quickly tapping the power button in the lower left corner of the touch panel.
- Please allow up to 20 seconds for the system to power on. During this time you will not be able to touch other buttons on the touch panel.
Step 2: Log into the computer or connect your device.
If using the installed computer, move the mouse or tap the spacebar to wake up the computer.

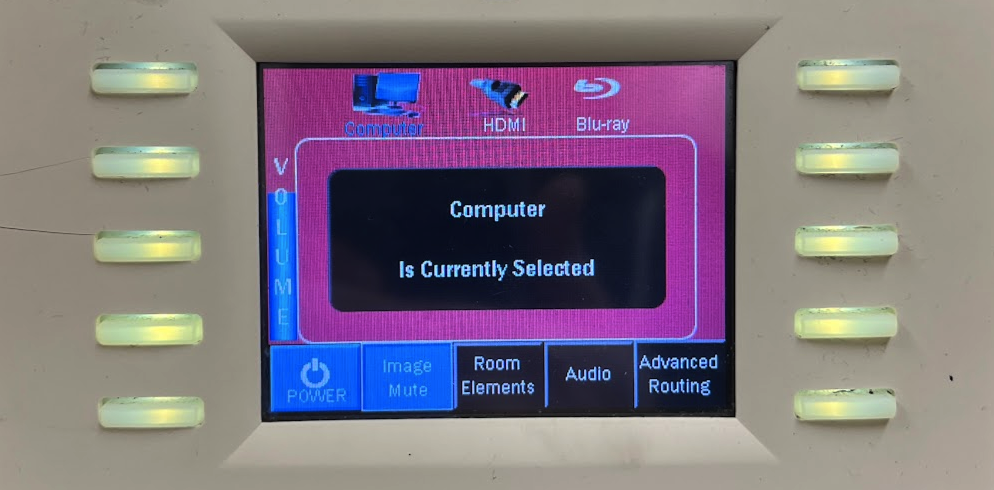
If using your own device, plug it into the HDMI port using the necessary cables.
- The input panel is located on the side of the lectern.
- Select HDMI on the touch panel to have the projector display your device.

Please provide your own adapters. Standard cables can be borrowed from the Support Office in the Javits Lecture Center.
Step 3: Powering Off
Locate the power button in the lower right corner of the touch panel to turn off the media system.
- Tap the power button once to begin powering down the media system.
- A confirmation screen will appear. Tap “Yes” to confirm powering down. This process can take up to 20 seconds.
Additional Controls and Options
Adjusting the volume
Tap anywhere along the volume slider on the left side of the touch panel to change the volume of audio coming from the installed speakers.
Physical buttons around the outside of the touch panel will also allow you to adjust the volume. These are appropriately labeled.
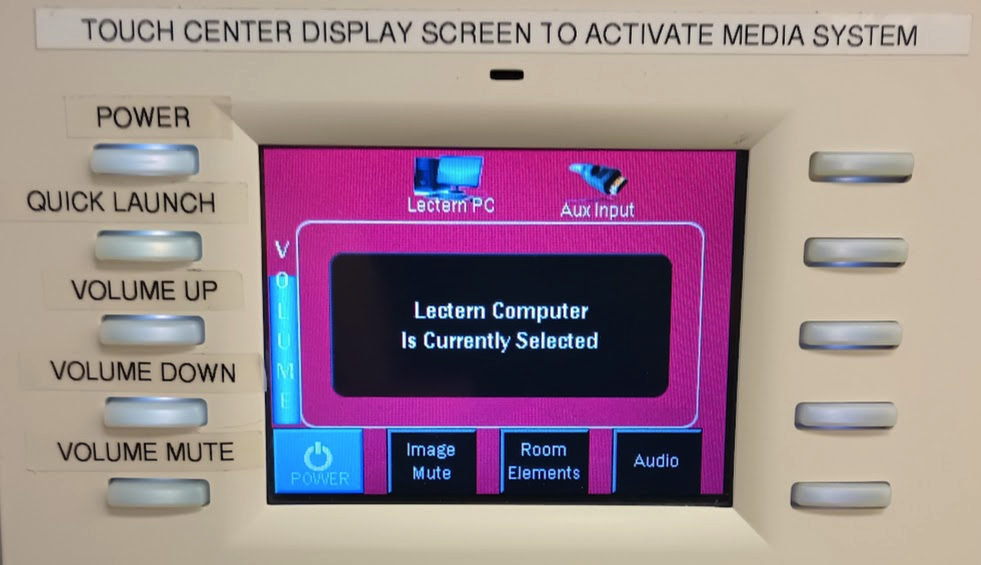
Hiding the projected image
To hide what the projector is displaying, without the need to turn off the system, tap the Image Mute button.
- This will hide what is being displayed on the projector until you disable it.
- The button will flash while it is active.
Advanced audio controls
These rooms feature an assortment of audio connection options. To access them, select "Audio" on the touch panel.
- Connection options include: 3.5mm, 1/4", RCA, and XLR.
- Standard cables can be borrowed from the Classroom Technology Support Office in the Javits Lecture Center room 104.

If you have any issues or would like to schedule one-on-one training with a member of our staff, please do not hesitate to reach out to us. Our contact information can be found below.