Instructions for disconnecting managed personal device from Stony Brook
If you were redirected to this webpage, your personal device may be unintentionally managed by Stony Brook University.
How to confirm your device is managed by Stony Brook University and disconnect:
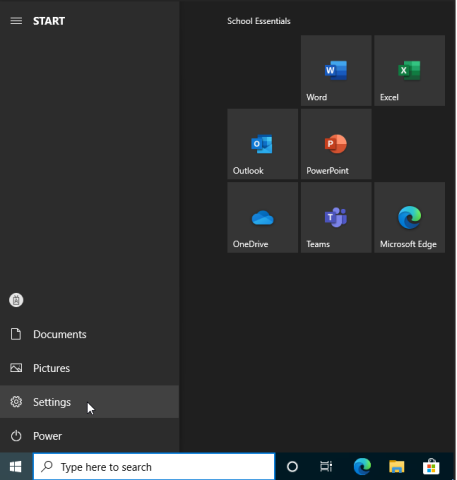
- Click Start, then go to Settings (gear icon)
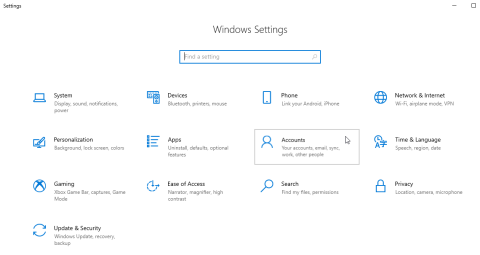
- Select Accounts
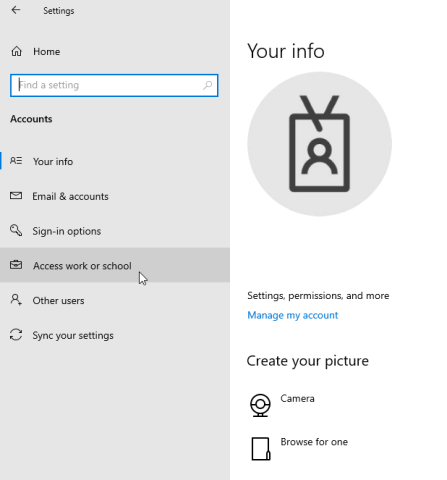
- Select Access work or school
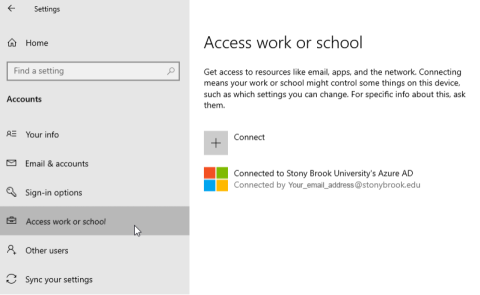
- If you see Stony Brook University listed, your computer is being managed by Stony Brook University. If you do not see anything Stony Brook related in the list, you can disregard the rest of these instructions.
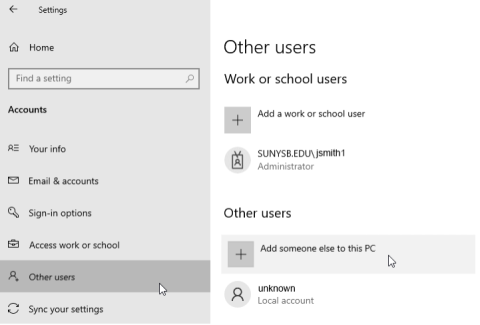
- Before we disconnect from Stony Brook, we need to create a local account on your device if you do not already have one. Select Other Users on the left pane. If you do not have any users listed under "Other users", or do not remember the password to the account, you can create a new one by selecting “Add someone else to this PC”.
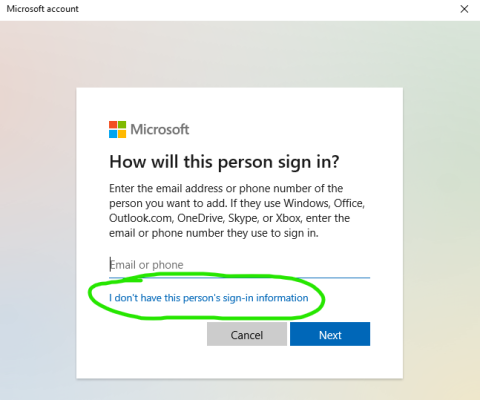
- You may use another Microsoft Account if you have one (as long as it is not tied to your Stony Brook email address), otherwise you can select "I don't have this person's sign-in information" to create a Microsoft Account or a local account.
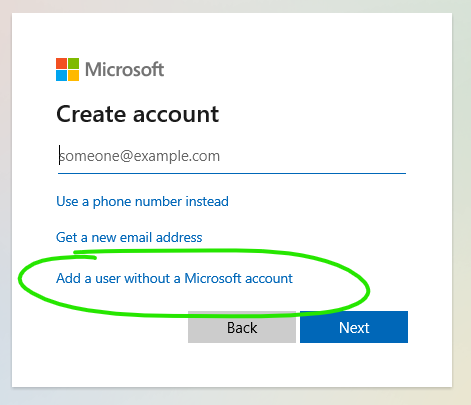
- For local accounts, type in a name and password you can remember:

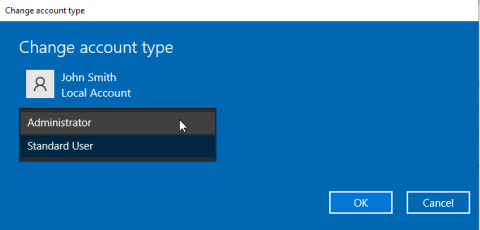
- Now that your account has been created, we need to make sure it has administrator privileges. Click on the new account you created and select "Change account type":
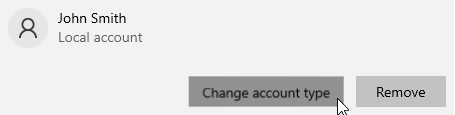
- Change the account from Standard User to Administrator and click OK.
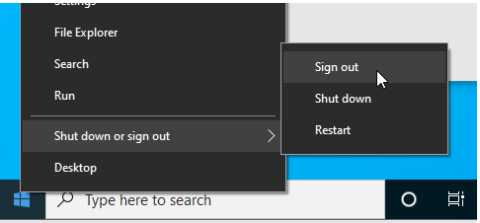
- To start using that new account, right-click the start button and select Shut down or sign out and then Sign out:
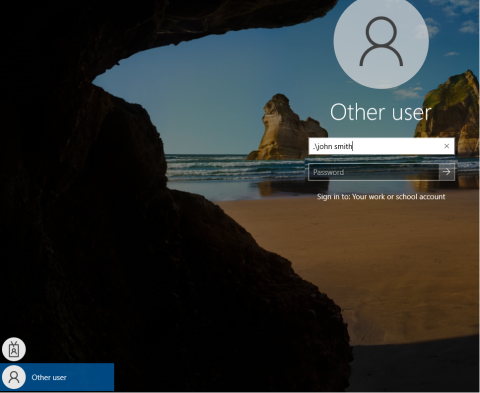
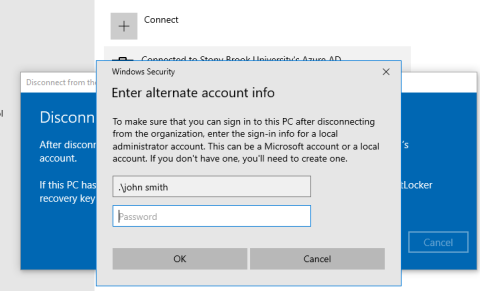
- At the Windows Login screen, select Other user on the bottom left and type in your new user account name. If it is a local account, you may need to type a period and backslash before your user name. For example, ".\john smith" (without quotes).
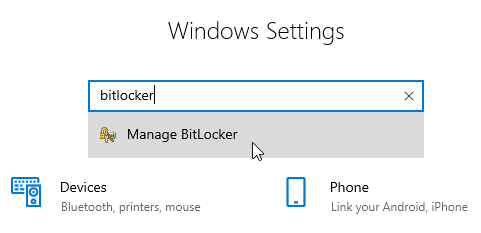
- Next we need to make sure Bitlocker is disabled (it can be re-enabled if you choose to after our new account has been set up). Go to Windows Settings and type BitLocker in the search box. Manage BitLocker should come up as an option, then select it.
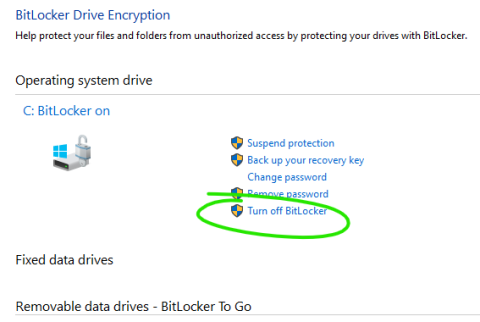
- If any drives have Bitlocker enabled, they will be listed here. You can choose Turn off BitLocker to disable it. If no drive has BitLocker enabled it will say "BitLocker Off" and you can skip to Step 15.
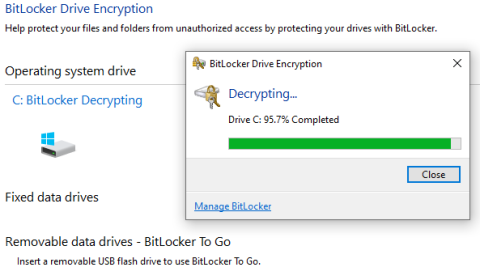
- Wait until the decryption process has finished before proceeding.
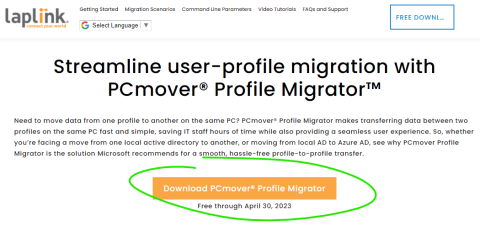
- An easy way to copy your profile, settings, and files from your other account to this one is to use a free program called "Laplink PCmover Profile Migrator". Download it from the Laplink PCmover Profile Migrator website. If you wish to not use this program, you can still copy your files manually and skip to Step 18.
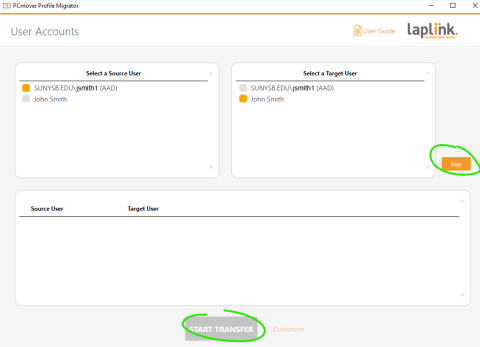
- Install and run PCmover
- After the transfer is complete, uncheck the option for "Upload non-identifiable data to help improve PCmover" and restart your computer.
- Once logged back into your new local account, any files you forget to copy over will still be C:\Users\<stonybrook username> which you can still access. You can also log in back and forth from your old account to make sure all of your files are copied over and settings are the way you want.

- Once you are comfortable that your new account is ready. You can now disconnect your device from Stony Brook. Go to Settings -> Accounts -> Access work or school once again and select your Stony Brook account. Select Disconnect.
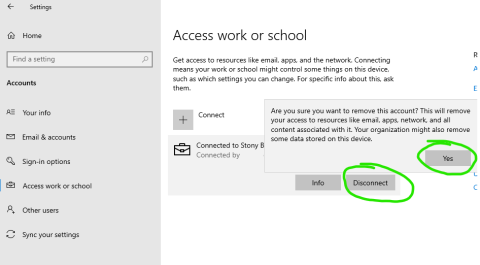
- You will receive a warning message and a prompt to enter an account that exists on your computer to make sure you don't lose access to your own computer. Enter the new account information and press OK.
- When prompted, restart your computer.
- Once your computer restarts, you will no longer be able to log in with your Stony Brook email address. Please continue to use the new account you created.