Creating and Managing Groups in SharePoint Online
Rather than sharing documents and sites with individual users, you can put users into groups and then share items with the group. Every site you create in SharePoint Online will generate at least 3 groups automatically:
- [Site Name] Owners
- [Site Name] Members
- [Site Name] Visitors
Generally, Visitors can view the site by logging in, Members can contribute documents to the site, and Owners can add and delete more components to the site. You can choose to put users into these groups or create your own. There is also another group of users that has full control of the entire site collection. *They are the Site Collection Administrators (see below).
Viewing Groups
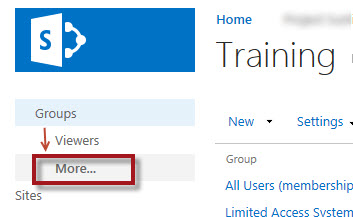
To view all the groups in your SharePoint site, click on the gear  > Site Settings > People and groups
Then click on More... under the Groups section.
Viewing Users
To see users within a group, click on the group name.
Adding Users to a Group
To add users, click on the group name and then click New.
Removing Users from a Group
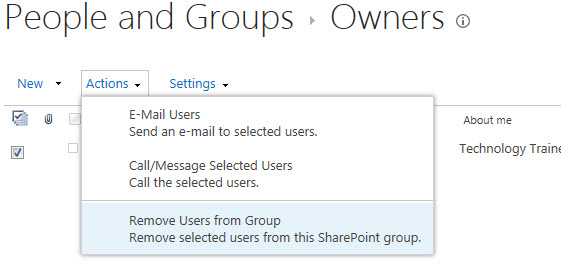
To remove users from a group, click on the name of the group to list its users. Put a check next to the user(s) name, then click Actions > Remove users from Group
Creating a New Group
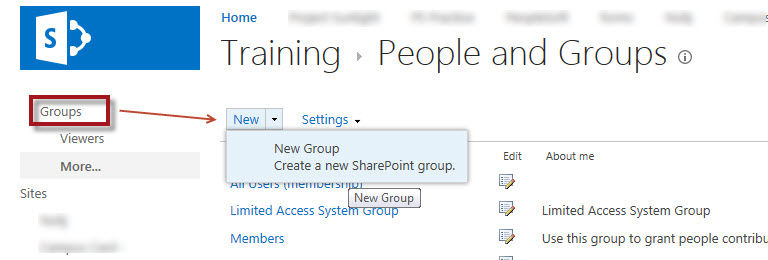
To create a new group, click Groups on the left to show all of your site collection groups and then click New.
How come I don't see my name in the Owners group?
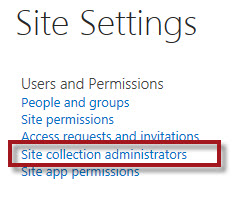
There is another group that is not listed. These are the Site Collection Administrators. These individuals are essentially the administrators of the entire site collection. To see who are the Site Collection Adminstrators or to add/remove users from the group, click on the gear > Site Settings > Site Collection Administrators