Basic Editing of a Classic Google Site
This article provides a simple overview of how to make basic edits to a classic Google Site. Whether you're updating text, adding images, or organizing pages, you'll learn the essential tools and steps needed to keep your site up to date and easy to navigate.
There are two types of editing in Google Sites: page specific and overall edits. That is, page-specific changes (adding text or an in-text image, inserting a Google Doc, etc.) and overall changes (modifying the header, footer, navigation, fonts, and other elements that appear on all pages) are done using different tools in Google Sites.
Edit a page or edit your entire site.
Edit a page of a Google Site
adding an in-text image or text, inserting a Google Doc, etc.
STEP 1
Access your Google Site by signing in to sites.google.com and clicking on the site you wish to edit.
STEP 2
Click on the edit page pencil icon in the top right corner to access the page-edit options:
The menus (Insert, Format, Table, Layout) will allow you to
- Insert: add images, links, lines, calendars, Google Docs, maps, gadgets, and more
- Format: format text as headings, strikethrough, super- or subscript, or code and change alignment
- Table: insert a table, add and remove columns and rows
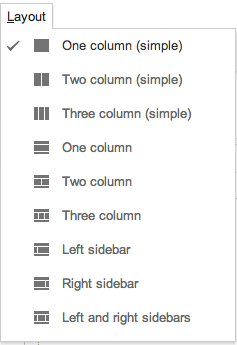
- Layout: change page layout to one of several options
Use the WYSIWYG (what you see is what you get) editor to
- change font type, size, bold/italics/underline, color, and text background color
- add links
- make numbered or bulleted points
- indent/unindent items
- remove formatting (Tx)
- modify <HTML>
STEP 3
Click Save to save and view changes.
STEP 4
Access more page options by clicking on the settings gear (top right); options include:
- Revision history: allows you to revert to a previous version of the page
- Page settings: show/hide page title and links to sub-pages, allow attachments and comments, add page description
- Print page
- Page template options: allow you to create, use, change templates for a page, which can help your website’s pages have a more consistent look
STEP 5
Add more pages by clicking on ; then name the page and, optionally, select a template and change the location of the page
Edit Overall Site Settings
header, header logo, footer, navigation, sidebar, overall colors/fonts, background image, etc.
STEP 1
Access your Google Site by signing in to sites.google.com and clicking on the site you wish to edit.
STEP 2
In the top-right corner, click on the settings gear and then Manage Site.
Manage Site is divided into topics on the left side of the screen, including
- Recent site activity: view recent site changes (especially helpful for sites with 2+ owners/editors)
- Pages: view existing pages and move pages
- Attachments: view, upload, rename, replace attachments
- Page templates: create and manage page templates
- Apps Script: Apps scripts used on site
- Delete items: Deleted content
Only site owners and editors have access to the following:
- General: to modify the Site name or description
- Sharing and Permissions: share your site and/or set who can edit, view, and comment on site/pages
Only site owners have access to the following:
- Themes, Colors, and Fonts: change colors, fonts, background color/images, for header, sidebar, navigation, content area, gadgets, and background and change site theme (e.g., color palette)
STEP 3
Click Preview (if applicable) to view changes and/or Save to save changes made in Manage Site.
STEP 4
To return to your site, click on your site’s name just below Manage Site.