Enabling Waiting Room in Zoom So Meeting Participants Can Only Join Once Admitted by a Host
Using the Waiting Room feature in Zoom adds an extra layer of control and security to your meetings by allowing hosts to admit participants individually. This article will show you how to enable the Waiting Room so attendees can only join once you’ve approved their entry.
You can enable a Waiting Room function so participants can only join a Zoom Meeting once admitted by a host. You can Enable Waiting Room for all your Meetings or your Personal Meeting Room. OR you can turn it on/off during a Zoom Meeting.
When Waiting Room is enabled, participants will be put in the waiting room; then, a host/co-host must admit them.
however, the host can turn the waiting room off in any specific meeting and allow everyone in directly by opening the participant window, clicking More, and unchecking Put Participants in Waiting Room on Entry.
Enable Waiting Room for Meetings
- Sign in to your Zoom web portal at stonybrook.zoom.us
- On the left, click Settings, and select Meeting at the top.
- Scroll down to the Waiting Room option under In-Meeting (Advanced) and then turn the setting on if it's not already
(optional: set who to place in the waiting room and/or customize the waiting room screen)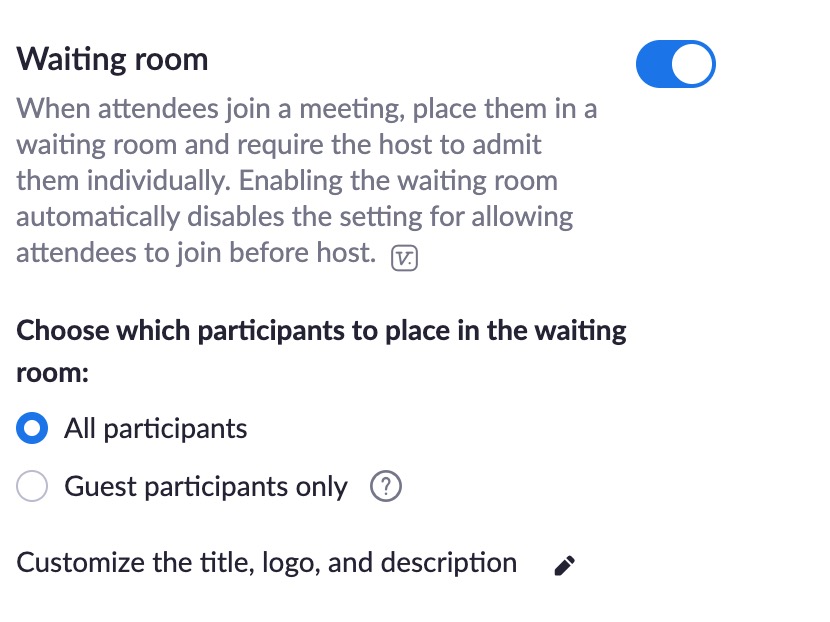
Enable Waiting Room for your Personal Meeting ID/Room (PMI)
- Sign in to your Zoom web portal at stonybrook.zoom.us
- On the left, click Meetings
- Click the Personal Meeting Room tab.
- Scroll down and click Edit this Meeting.
- Under Meeting Options, check Enable Waiting Room.
- Click Save.
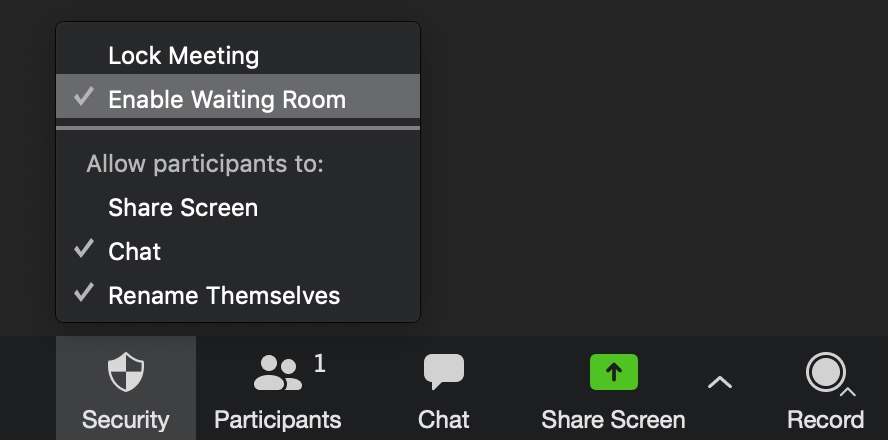
Enable Waiting Room During a Zoom Meeting
- Click Security and check Enable Waiting Room (or make sure it's already checked)
Link to learn more about setting up, using, and customizing Waiting Rooms