Copying on Toshiba Printers
Step-by-Step instructions to use the copying function of the Toshiba printers/scanners/copiers located throughout campus.
- Before you “copy”, make sure you have your original document in either of the following locations:
Top of the printer: The original document should be facing up, and the top of your document goes into the feed first. You will hear a “beep” sound, that sound will indicate that your document is ready for copying.

Inside the Printer: The original document should be facing down, and the top of your document should be lined up with the small white arrow on the top left. Once you have finished placing your documents, please close the lid.

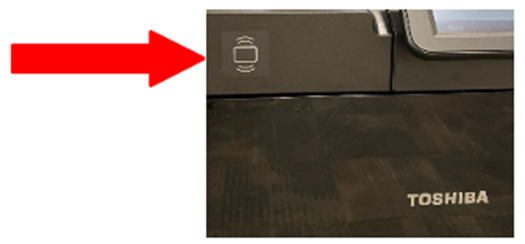
Please tap your student ID above the ID scanner
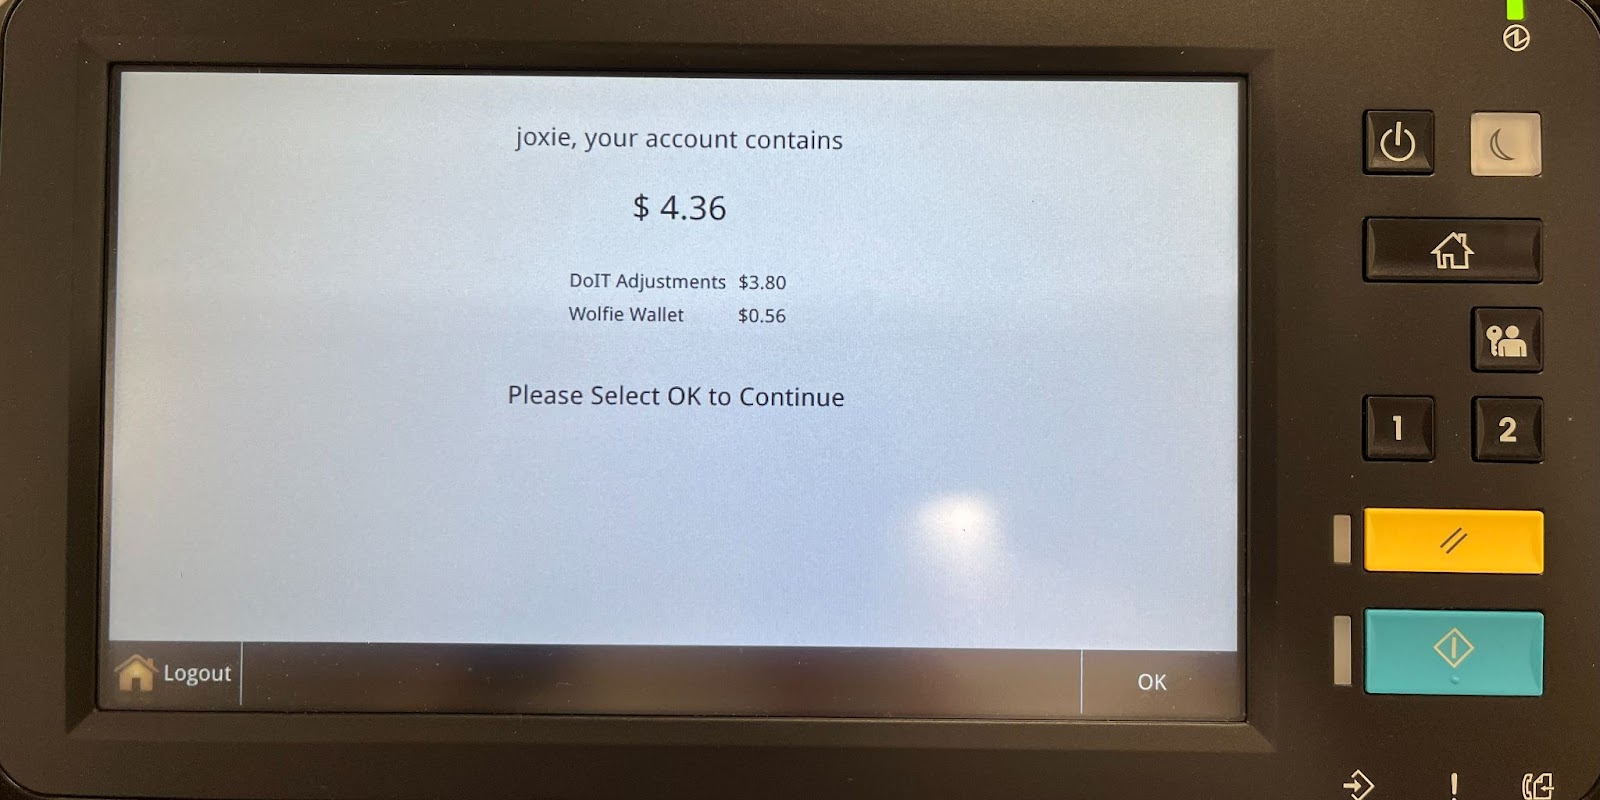
The display will inform you of the amount of quota you have left for the corresponding semester. Press “OK” to continue
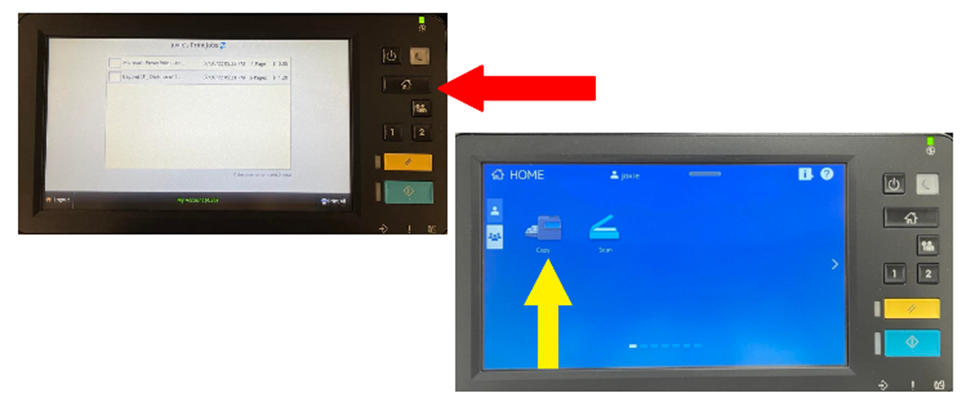
Click the “Home” button to reach the following screen, then click “Copy”.
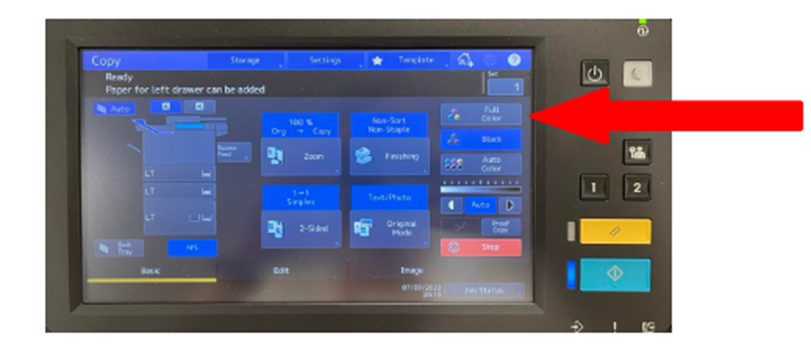
If you wish to copy in COLOR, please make your changes where the red arrow indicates “Full Color”.
- Once you are satisfied, you may press the blue button located on the bottom right corner to finish the copying process. Your printouts will be ready for you on the left side of the printer.
- Please remember to log out after each use!
Optional: Releasing Other Print Jobs
- Press the “Home” button to return to the Home screen.
- Press the number “1” to return to your job queue screen.
- Please remember to log out after each use!
