Changing the Theme of an SB You (WordPress) Site
You can change the theme of your SB You site, but before switching, be sure to preview how the theme will look and affect your existing content.
Before Switching: Preview a new Theme
Before changing your site's theme, preview it because changing a theme can affect your site content, menus, widgets, theme-specific content, etc., so be sure to preview your site like this:
- Go to you.stonybrook.edu and log in by clicking Log in near the top left
- Navigate to your site by clicking, near the top left, My Sites, selecting your site and then selecting Dashboard
- On the left, select Appearance and select Themes
- To preview a theme, hold your mouse over the theme card and click Live Preview
Tip: The recommended theme is CampusPress Flex; scroll down to find and preview it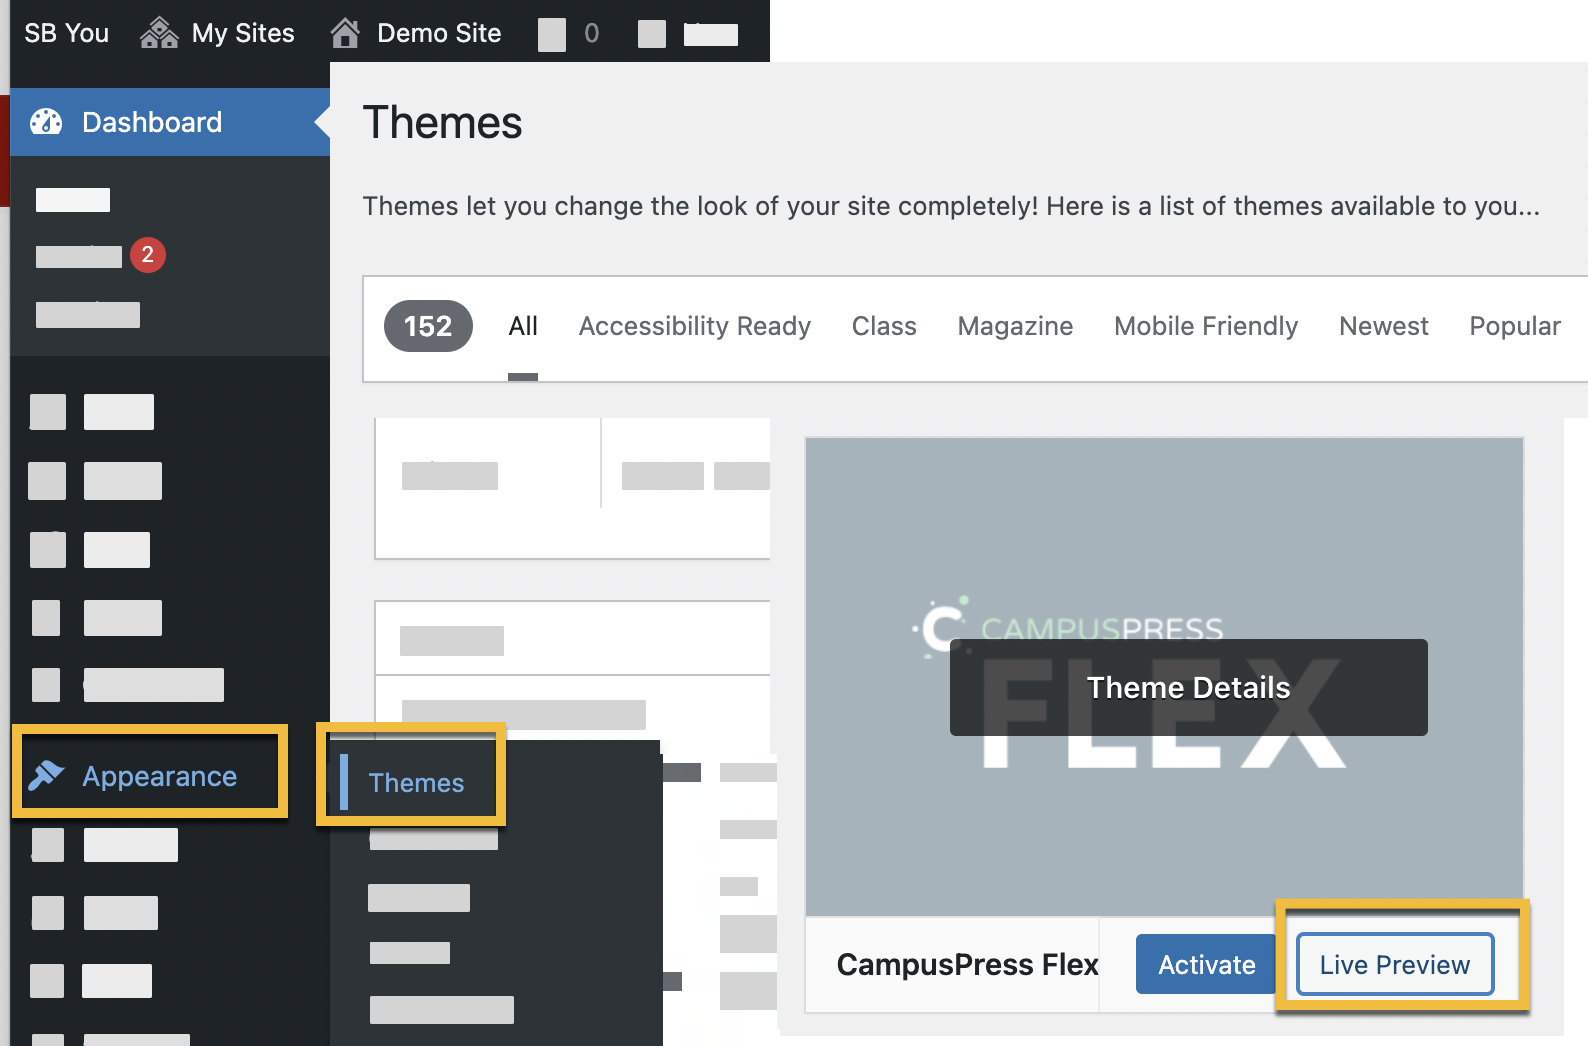
- In the live preview, click through you site's pages, posts, etc. to see how the theme works with your site. Before clicking to activate the theme, make a note of your current theme's widgets, menus, and customizations first as per below:
Change Your Theme
When changing your theme, first make a note of your current widgets, menus, and customizations. Then, change your theme.
- Go to you.stonybrook.edu and log in by clicking Log in near the top left.
- Navigate to your site by clicking, near the top left, My Sites, selecting your site and then selecting Dashboard.
![My Sites > [site name] > dashboard](/sites/default/files/styles/large/public/kb/35290/images/screen-shot-2022-12-05-at-12.25.41-pm.png?itok=ewwPW4Ch)
- Note Widgets' Settings:
- In your Dashboard, click Appearance, and then click Widgets. The active widgets are shown in the panel on the right side.
- Click the arrow to open each of the panels. Make a note of all the widgets and their settings (printing the page, paste a screenshot into a Google Doc, take a phone picture of the screen, etc.)
- Note Menus:
- Click Appearance, then Menus, and make a note of the menus (printing the page, paste a screenshot into a Google Doc, take a phone picture of the screen, etc.)
- Note Custom CSS:
- If your site uses Custom CSS, make a copy of the code for reference. Click Appearance, then Custom CSS. Select the code and then copy and paste it into a file you save on your computer. After the new theme is applied, paste the code back into the Custom CSS widget.
Note: Your custom CSS may not work properly with the new theme. (Themes may have different classes or names for objects.) If you're comfortable troubleshooting the CSS, make any changes necessary.
- If your site uses Custom CSS, make a copy of the code for reference. Click Appearance, then Custom CSS. Select the code and then copy and paste it into a file you save on your computer. After the new theme is applied, paste the code back into the Custom CSS widget.
- Change your theme as per CampusPress documentation for changing a theme.
- Adjust widgets, menus, etc.
- Using the notes you made above from widgets, menus, and other customizations, adjust/reset your widgets/menus/etc. as needed.
- Repeat for other blogs as needed.
Supported By
Customer Engagement and Support