This Information is Intended for: Faculty, Staff
Last Updated: April 05, 2022
Average Rating: Not Rated
Just like in-person classes or meetings, Zoom session have their own disruptions. Familiarize yourself with these Zoom settings in particular to help prevent and manage disruptions:
- Allow Only SBU Users - recommended for all classes
- Prevent users from Sharing Screen, Chatting, Unmuting themselves, or Starting their Video
- Restricting Chat (Rather than Turning it Off)
- Manage Disruptive Participants
- Lock Meeting/Enable Waiting Room (so no one else can join)
- Turn off Annotation
- Suspend Participant Activities
Allow Only SBU Users
To allow only Authenticate Users (to required SSO sign-on with NetID and NetID Password) so that only Stony Brook students, faculty, and staff can join:
- Sign into your Zoom account at stonybrook.zoom.us (once signed in, be sure to turn off any password managers like Lastpass, Dashlane)
- Select Meetings and under Upcoming Meetings select your scheduled course meeting (or the meeting you'd like to require authentication for)
- Scroll to the bottom and select Edit this Meeting
- Ensure that "Only authenticated users can join" is CHECKED (you should see Stony Brook Login and stonybrook.edu)

- Click Save
*if your audience is external to Stony Brook and do not have NetIDs, turn on the Waiting Room instead.
Prevent Participants from:
-
Sharing Screen
-
Chat (Note: All participants can screen share in Zoom Breakout Rooms regardless of main room settings)
-
Unmuting themselves
-
Start Video
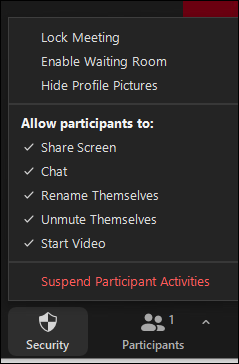
To change/check the setting, the host should click Security and then under Allow participants to uncheck the options to Share Screen, Chat, Rename themselves, or Unmute themselves.
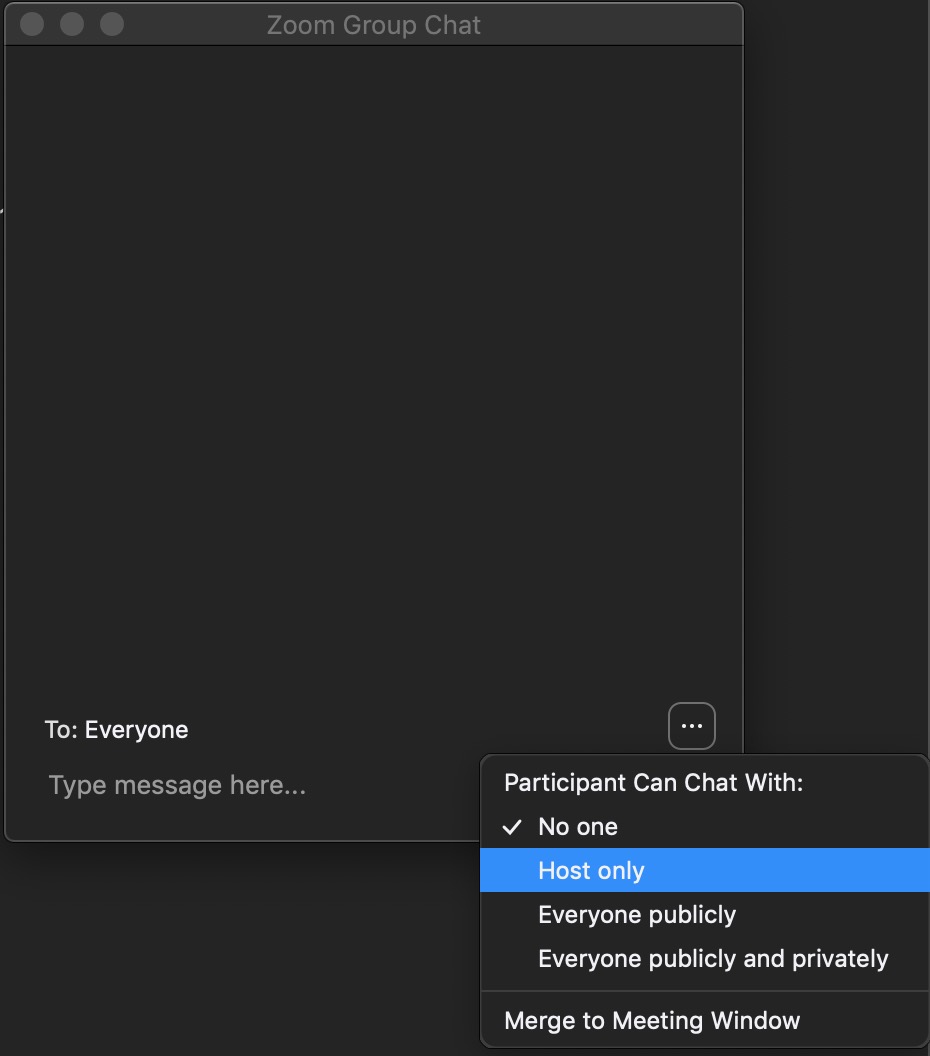
Restricting Chat (Rather than Turning it Off)
Hosts, Alternative Hosts and Co-Hosts may restrict the Chat to only allow Participants to chat:
- Host Only
- Everyone Publicly - this will prevent direct messages to individual participants.
- In the meeting controls at the bottom of the screen, click
 to open it
 - Click the ... on the right side of where you type chat messages and select who participants can chat with: No one, Host only, Everyone publicly, Everyone publicly and privately
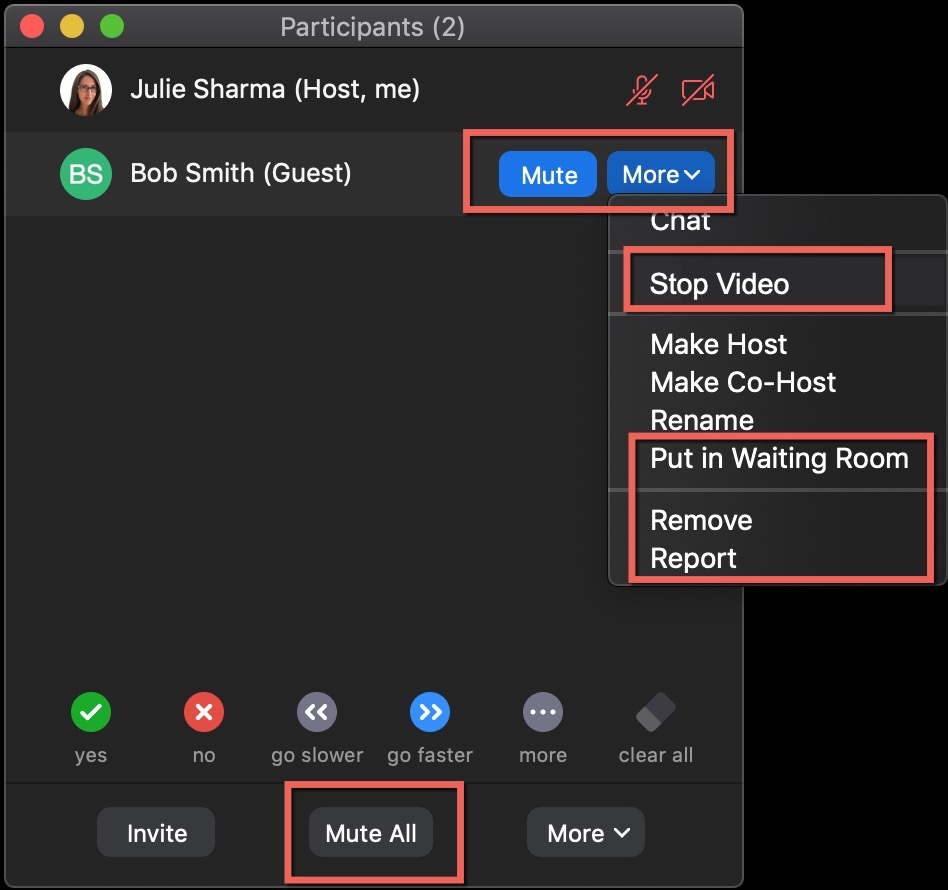
Remove or Manage Disruptive Participants
- Click Participants to open the Participants window, mouse over a participant’s name > click More, and several options will appear, including Stop Video, Attendee on Hold/in Waiting Room, Remove, Report a participant.
- You'll also see the option to Mute an individual participant (next to the participant's name on mouse over) or Mute All (near the bottom).
Note: all participants can unmute themselves in Zoom Breakout Rooms regardless of main room settings.
- Turn off participant Chat
Lock Meeting/Enable Waiting Room
Once everyone is in your Zoom, you can lock it so no one else can enter. Another option is enabling the waiting room so anyone trying to enter has to be manually admitted by a host/co-host:
- Click Security and then check one or both: Lock Meeting (so no one else can enter) or Enable Waiting Room (so a host/co-host has to admit anyone trying to enter)
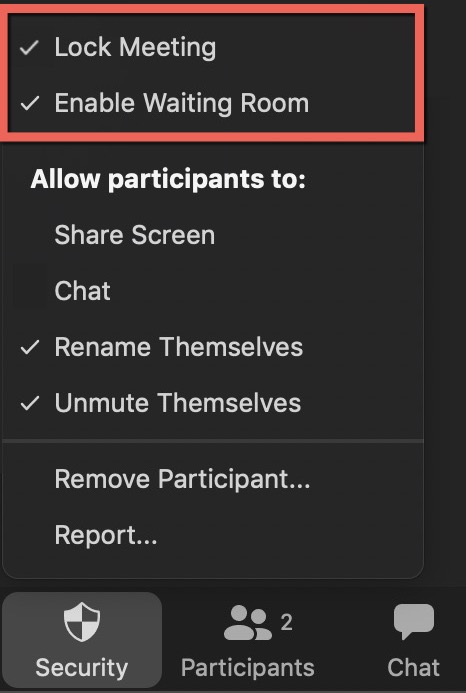
- Admit someone from the waiting room by clicking Participants. Then, people in the waiting room appear at the top of hte participants lists. In the list of people waiting, click Admit next to one participant or Admit All

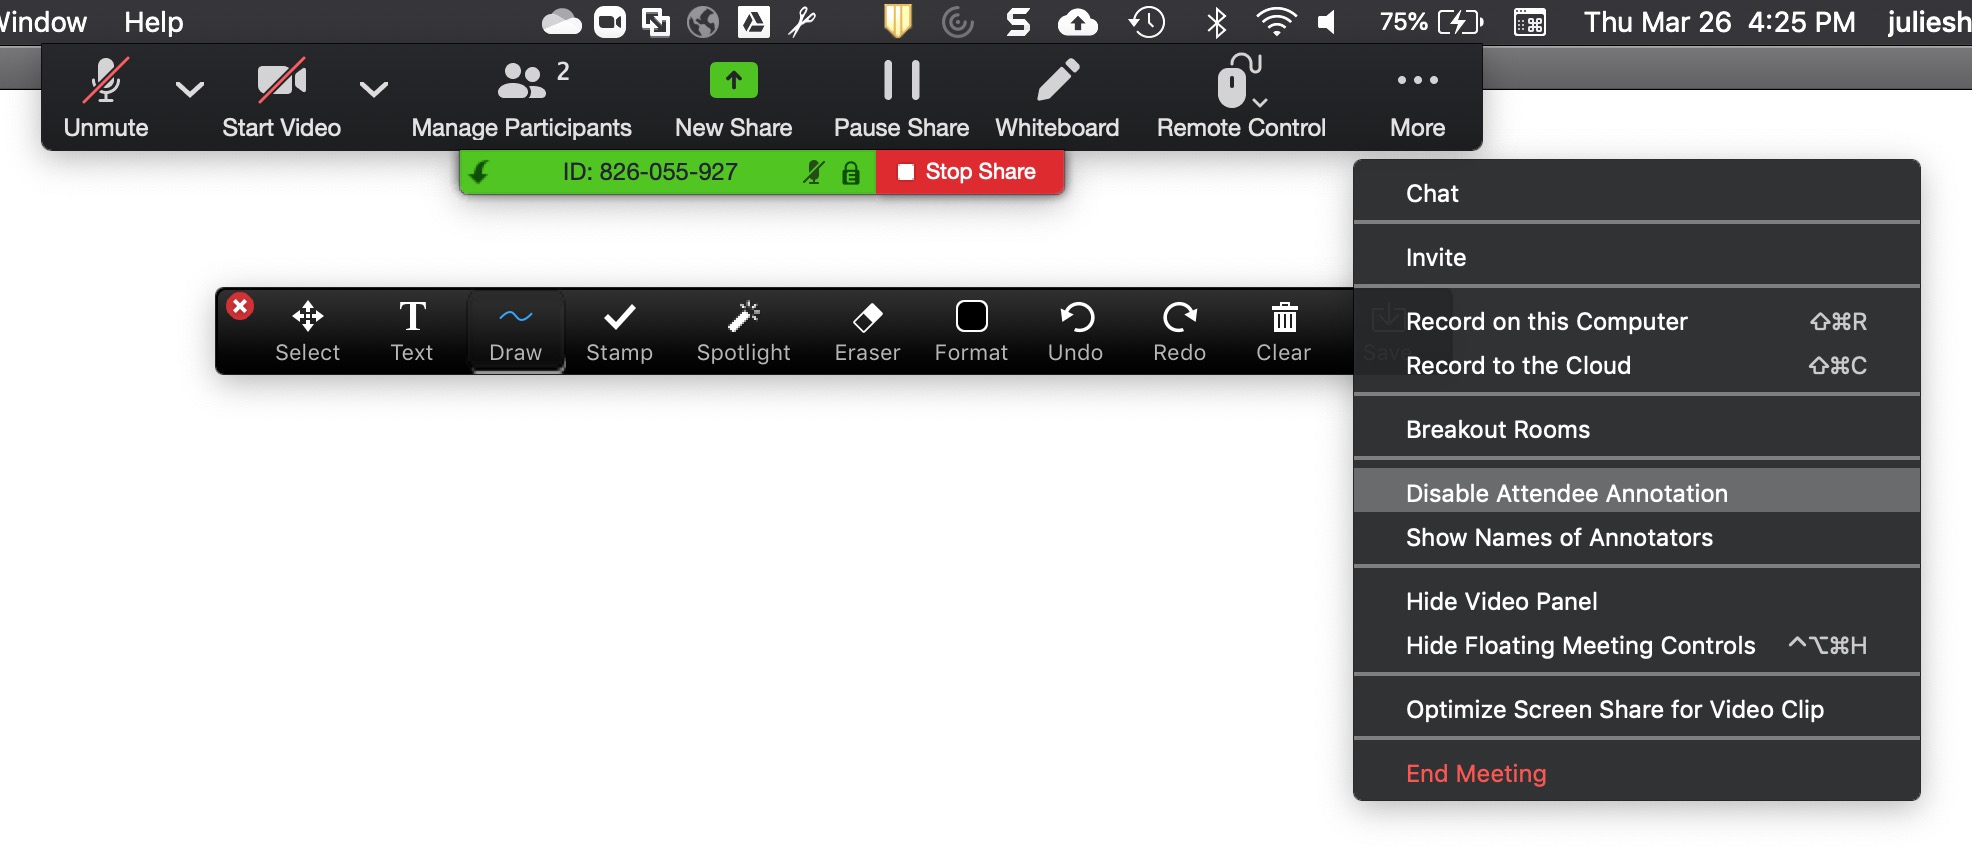
Turn off Annotation
When sharing your screen or whiteboard, host(s) and participants can use annotation to mark up the shared content. Enable or disable this while sharing screen/whiteboard while using annotation and clicking ...More > Disable Attendee Annotation (or Enable Attendee Annotation to turn it on).
IMPORTANT: Everyone who shares their screen must disable attendee annotation for him/herself. So if the host and two co-hosts will share their screen, each person needs to disable annotation while they are sharing their screen. Tip: before the meeting, have anyone who will share their screen start sharing their screen and disable annotation; then, when they actuyally share screen during the meeting, annotations will still be disabled.
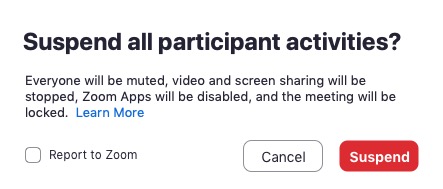
Suspend Participant Activities
If you need to immediately stop all activity, you can use Suspect Participant Activities to, with one click, Mute all participants, Stop videos and screen sharing, Hide profile pictures, Disable in-meeting chat and Zoom Apps, and Lock the Meeting.
- Click Security and then Suspend Participant Activities
- In the pop up, uncheck Report to Zoom if you don't need to report inappropriate activity to Zoom, and then click Suspend