This Information is Intended for: Clubs, Faculty, Guests, Researchers, Staff, Students, Teaching Assistants
Last Updated: December 12, 2023
Average Rating: Not Rated
You can work with files in your OneDrive account from Microsoft Office 2011 for Mac using Microsoft Document Connection. Note, though, that you may need to update your operating system (e.g., update to Mavericks) and/or Safari* for this to work.
You'll need to first set up Document Connection by adding any Office 365 location whose files you want to work with.
Set up Locations in Document Connection
- Open Microsoft Document Connection
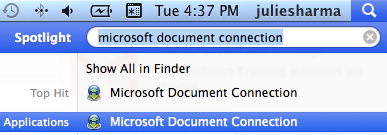
- In the top-right corner of your Mac, click on
 to open spotlight
 - In the search box, type Microsoft Document Connection, and then click on Microsoft Document Connection when it appears
- In the top-right corner of your Mac, click on
- From the Document Connection Menu, select Preferences
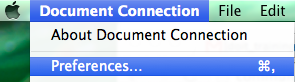
- In Preferences, be sure Enable basic authentication is checked and then close Preferences
- In Document Connection, click Add Location and select Connect a SharePoint Site...
- In the Address box, paste the URL of your document library; find a document library's URL like this:
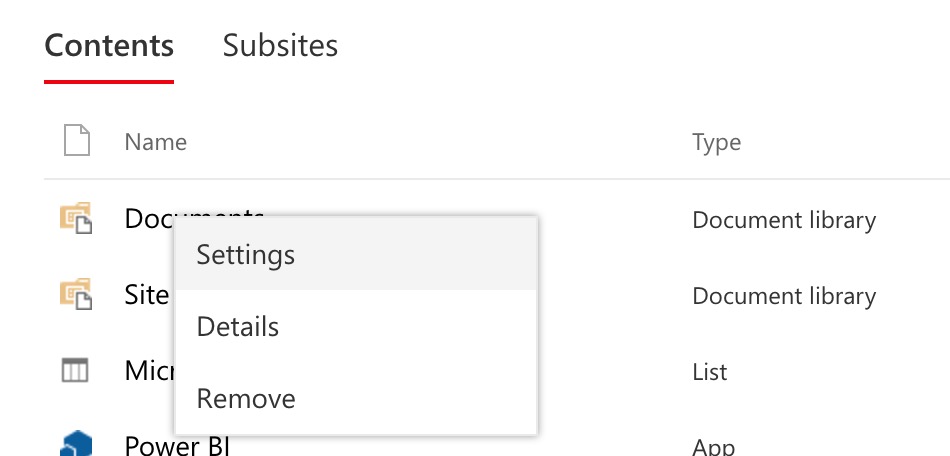
- From your Sharepoint Site, click the settings gear and then Site contents
- Right-click on the name of the document library and then click Settings
- Copy the Web Address (e.g., https://stonybrook365-my.sharepoint.com/personal/julie_sharma_stonybrook_edu/test/Shared Documents/Forms/AllItems.aspx)

- Click Connect
- If prompted to sign in with your organizational account, enter your @stonybrook.edu email address
- Click Sign in (no need to enter a password yet)
- This will redirect to another sign in; enter NetID and NetID password and click Log in
- Add any additional locations by repeating steps 4-6.
Once you've set up locations, you can now save files to these locations.
*Document Connection will prompt you to sign in with your NetID and NetID password; this is done through Safari. As of spring 2014, Stony Brook University NetID sign in requires an updated version of Safari, which may require updating the Mac operating system. The update to the Mavericks operating system (10.9) is free. Contact Customer Engagement & Support with update questions.