This Information is Intended for: Clubs, Faculty, Researchers, Staff, Students, Teaching Assistants
Last Updated: August 11, 2020
Average Rating: Not Rated
You can set up a webinar-style conference where up to 250 users can participate. This can be used for online presentations (your audience isn't limited to those within the SBU domain), online/hybrid courses, group/committe work, or in lieu of face to face meetings. Once you set up the meeting, you can send the link out to your attendees via email or make the link available on a website or Blackboard. Attendees who do not have Skype for Business downloaded onto their machines or devices will be prompted to download a plugin to participate.
Make sure you have Skype for Business (not Skype) installed on your computer.
Create a meeting room link to send to attendees
- Go to https://sched.lync.com. This is the Skype for Business Web Scheduler. From this site you can begin creating meeting room links to distribute to your attendees, log into the meetings you've created, and delete meetings. Note: Some browsers or internet connections may cause this site to be slow to load.
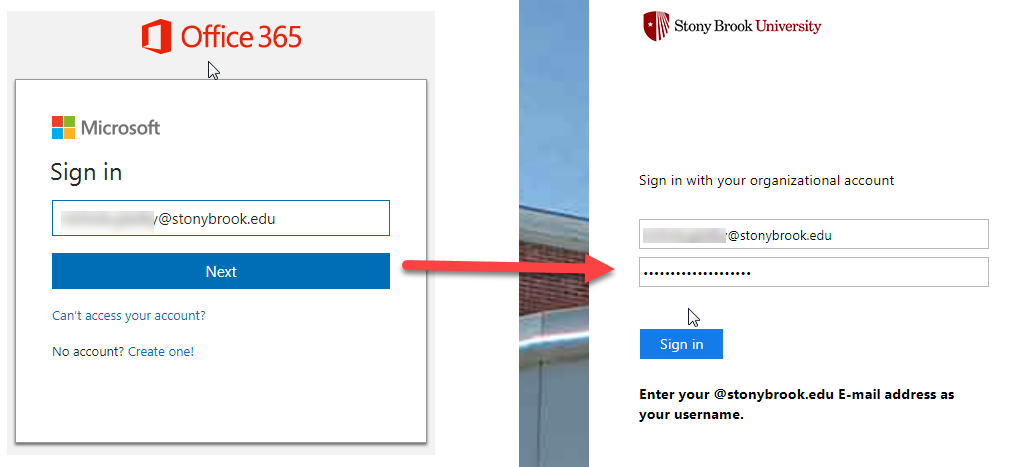
- Sign in with your Stony Brook email (first.last@stonybrook.edu), click Next and then enter your NetID password on the Stony Brook screen.
- Enter the Event Name, any other relevant details, and then click Save. (The default settings are the best options for typical online meetings and webinars, so entering the Event Name, checking time zone, date/time and clicking Save is all you need to get started. You can always come back to the Skype for Business Web Scheduler to edit or update any of this information later--see below for more information on settings.)
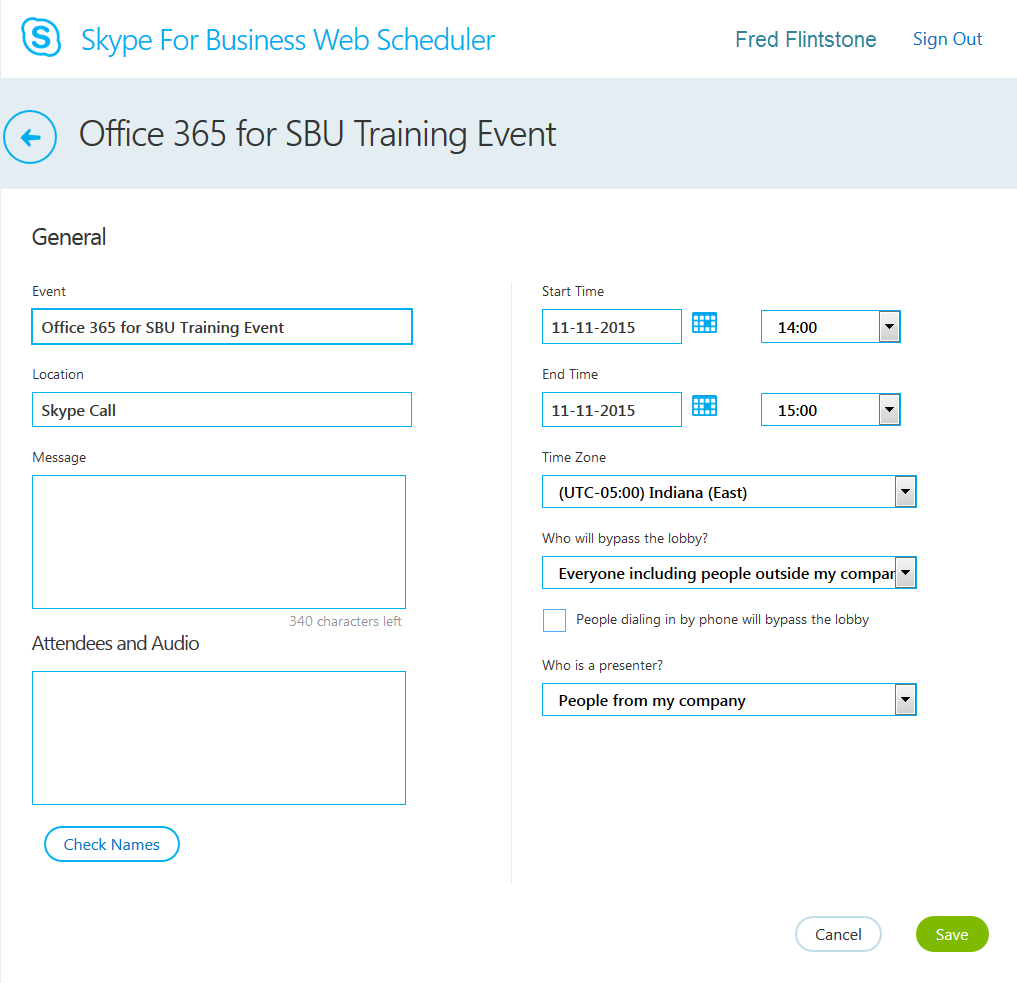
- By default, meeting room URLs expire 14 days after the End Date. To prevent this set End Date well into the future.
- Click Save
More Information on Settings
Attendees and Audio:
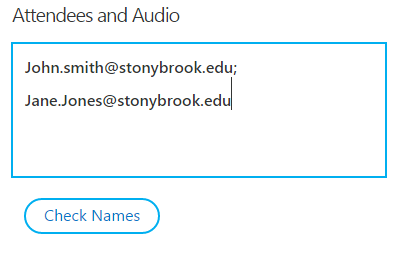
For a closed meeting, enter Attendee email addresses, or first and last names, separating each person by a semicolon. Click the Check Names button to make sure they are added correctly. *For those with common first and last names, use email addresses rather than first and last names.
The options underlined below are the recommended settings for most cases.
Who will bypass the lobby:
- Organizer only - You will be the only one who gets into the meeting directly. Everyone else must wait to be admitted (by the organizer). This is recommended for highly confidential meetings.
- People I invite from my company - Only people who were invited in the Attendees and Audio list may enter immediately, everyone else must wait to be admitted.
- People from my company - Only people who log in with Stony Brook credentials can get into the meeting directly without being admitted.
- Everyone including people outside my company (default setting) - Anyone who received the link to the meeting can enter immediately without being individually admitted.
Who is a Presenter:
- Organizer only - Only you will present but you can designate others to present during the meeting. This is suitable for online or hybrid courses and online presentations to large groups.
- People from my organization (default setting) - Anyone logging in with their SBU credentials will have the ability to present upon entering the meeting. This is appropriate for team meetings, group work or small committees.
- Everyone including people outside my organization - Anyone who enters the room will have the ability to present upon entering the meeting. This is appropriate for meetings and collaboration with people who do not have SBU credentials to participate.
- People I choose - Organizers can list who the presenters are prior to the meeting time as a time-saving option. When this option is chosen, a box will appear for you to enter the first and last names or email addresses of your presenters. Separate each person with a semicolon and click the Check Names button to make sure they are added correctly.
Sharing the Link and Starting Your Meeting
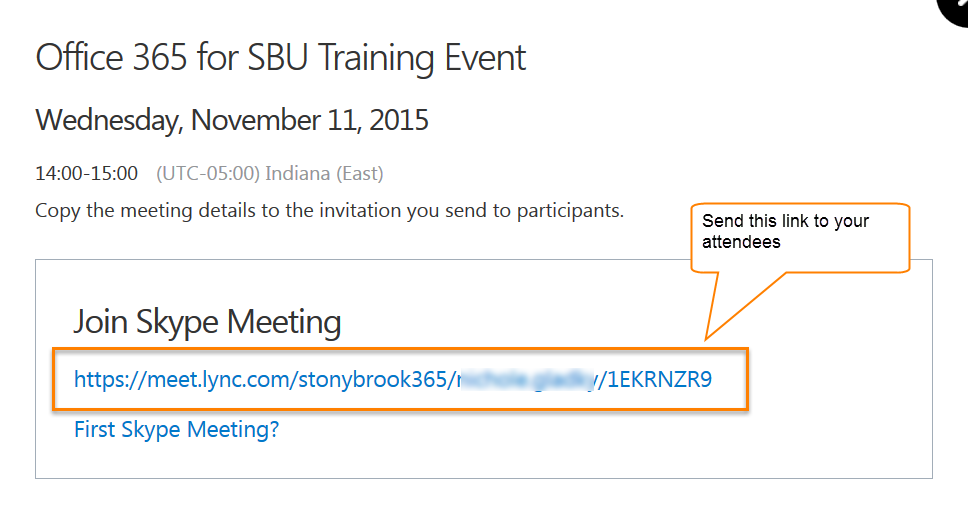
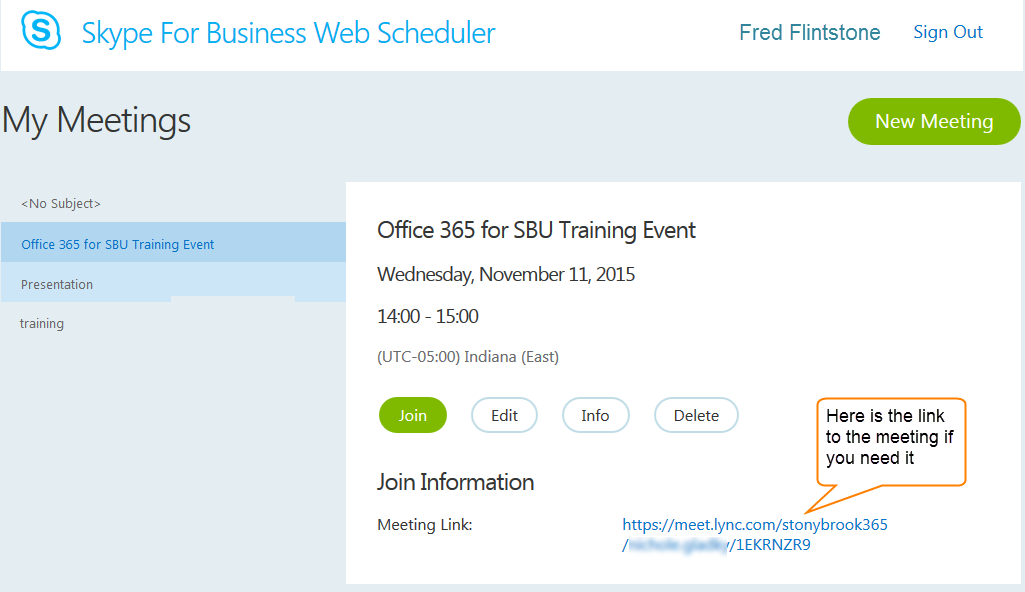
- Once you save the meeting, you'll see a screen with a link to it (e.g., https://meet.lync.com/stonybrook365/bob_smith/1NA4K4). Copy and paste the meeting link into an email and send this to your attendees with details about the meeting.
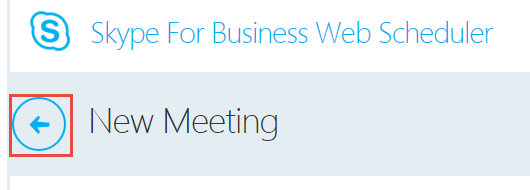
- When you are ready to start your webinar, go to https://sched.lync.com, click the back arrow button next to New Meeting to see your meetings list,
- Select your meeting under My Meetings and click Join.
- Clicking on the meeting room link will open the Skype for Business conversation window (the image below showcases the options you'll see using the Skype for Business application for a Windows computer). The Mac application, at the time of this document does not allow for recording sessions and may not have all the features listed below.
*The image below is a gif that changes to showcase all the features available. 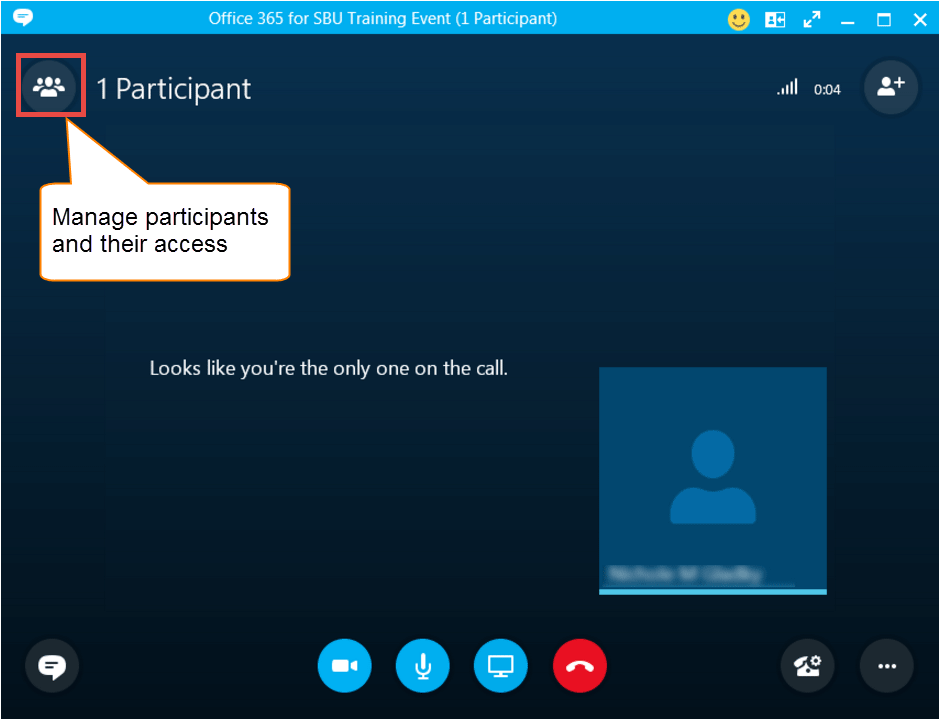
- Be sure to turn on and setup your Microphone and Camera and any Whiteboard materials, Polls or Q & A in advanced, prior to your session.