This KB Article References:
Brightspace
This Information is Intended for: Faculty, Staff, Teaching Assistants
Last Updated: September 13, 2023
Average Rating: Not Rated
This Information is Intended for: Faculty, Staff, Teaching Assistants
Last Updated: September 13, 2023
Average Rating: Not Rated
Your feedback is important to us, help us by logging in to rate this article and provide feedback.
This article will show you how to grade your student's exams/quizzes via the Exam/Quiz tab in the Navbar. If you would like to learn how to grade via the Quick Eval tool, check out these slides.
If you notice that your exam/quiz is not appearing in your Gradebook, you may have to link it to your Grades. To learn how to do this, check out this article. If you verified that your exam/quiz is linked to your Grades, but your student's results are still not showing there, you may have to enable the Synchronize to Grade Book setting. This article will describe how to complete this.
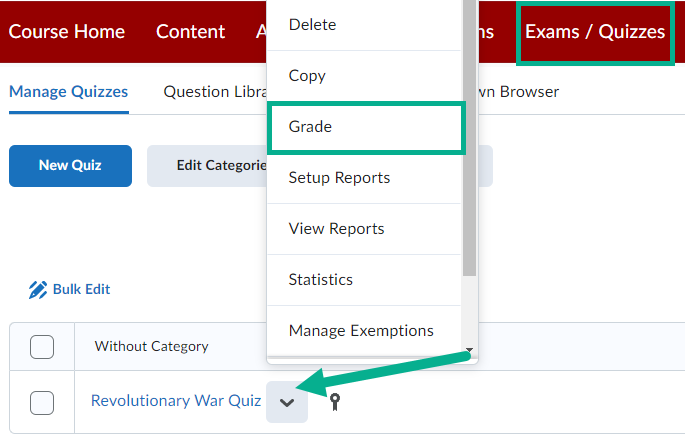
- Go to the Exams/Quizzes Tab of your course
- Click the downward facing arrow next to the exam/quiz you wish to evaluate and select Grade
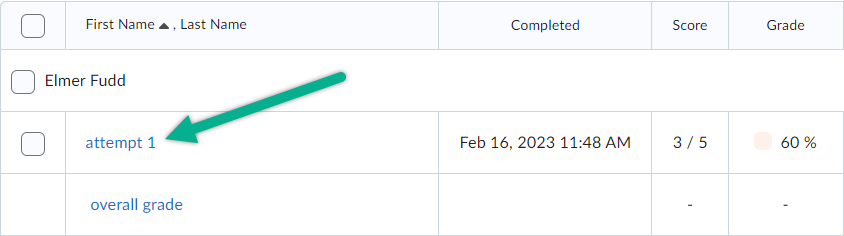
- Find the student you wish to begin evaluating, and click the attempt link under their name
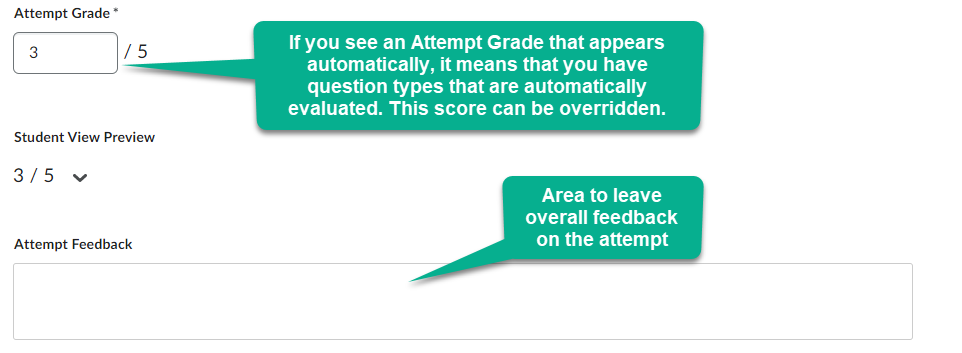
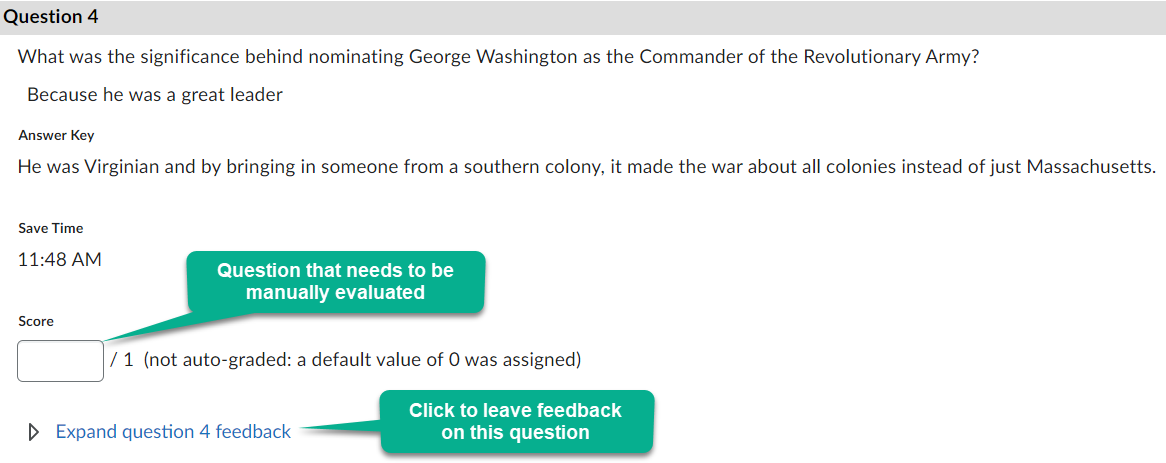
- If you have a quiz with questions that are automatically evaluated (multiple choice, true/false, etc) you will see an attempt grade for the student which can be overridden. Below this area, you have an area to leave overall feedback on the student's attempt.
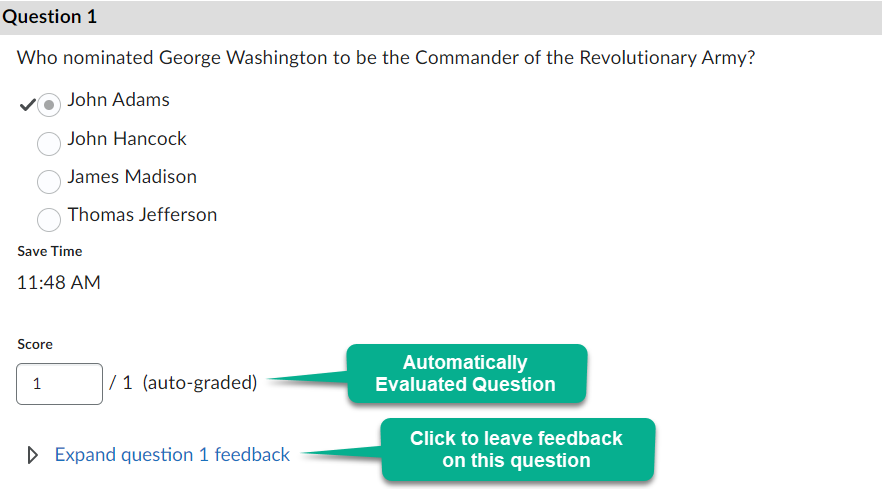
- Any question that was automatically evaluated will say (auto-graded) next to the score area, and any question that requires a manual evaluation will say (not auto-graded) next to it's score area. Scores for auto and non auto graded questions can be manually overridden. Any change to a score of a question will reflect in the attempt grade.
- For each question, you can click the Expand Question Feedback area to leave feedback on individual questions. Please note that individual question feedback will not appear unless you make questions available to students after their attempt. Click here to learn how to do this.
- Choose Publish to release the grade to the student or Save Draft to save your evaluation
- Once you have finished evaluating your student, you can move on to another student's attempt by clicking the arrows at the top right of the screen.