This Information is Intended for: Faculty, Researchers, Staff
Last Updated: September 12, 2023
Average Rating: Not Rated
Adding Users to Active Directory Groups
In easy to understand terms, the Active Directory helps us protect our computers, systems and other objects on our network from unauthorized use and applies group policies to help keep our computers and network safe and secure.
We can use the Active Directory to add employees to groups that are allowed access to certain applications like the OnBase Document Management System, your department's Shared Department Folders, and other applications that require strict security. Generally, the Access Controller is someone in your department charged with adding people to these groups.
- Employees are never granted access to Shared Department Folders and other applications directly; they are always added to groups.
- Contact support to have the Active Directory application installed on your machine.
To add an employee to a group, the Access Controller must:
-
Open the Active Directory Users and Computers application.

* If you do not see this application on your desktop, go to https://client.wvd.microsoft.com/arm/webclient/index.html and then click the Active Directory Users and Computers icon to work in the Active Directory. -
Click to select the campus.stonybrook.edu domain

and then click on the icon Find objects in Active Directory Domain Services.
 -
In the Find Users, Contacts, and Groups window, enter the group name that can access the shared department folder in the Name: field and then click Find Now. The Search results will be listed below.
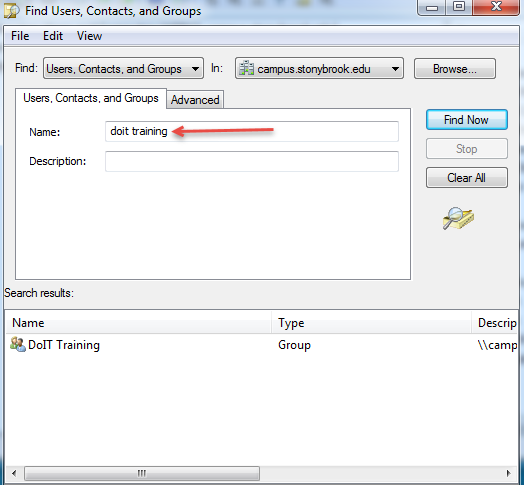
If you cannot find the group, you are typing in the wrong name. See further in the documentation for Tips for Searching to help you find your group. -
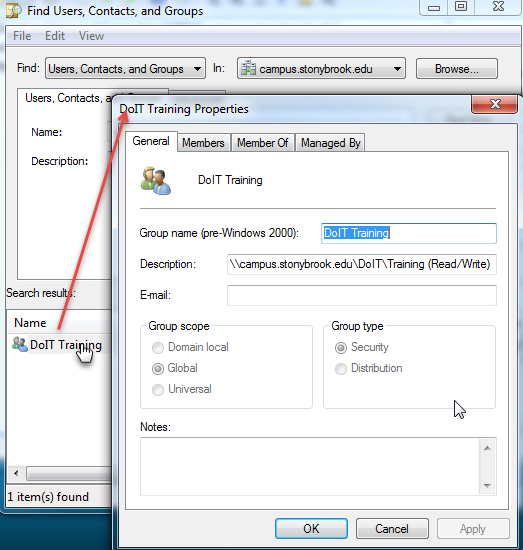
Double-click on the group in the Search Results to open the group’s properties:
-
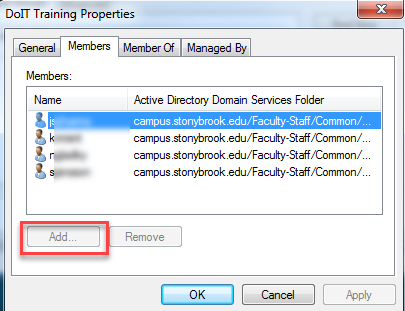
Click the Members tab. Here you can see who is a member of the group. Click the Add button:
-
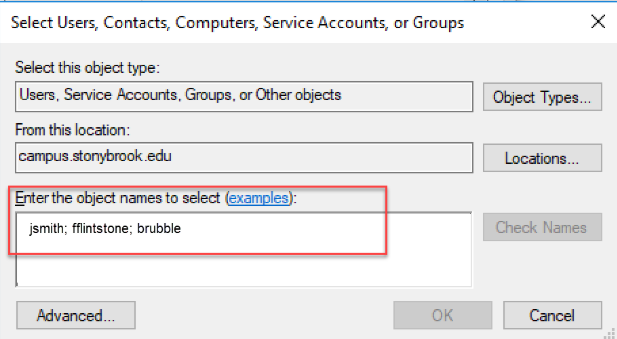
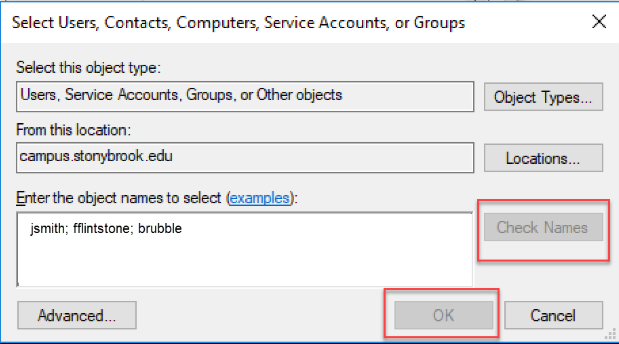
Enter the new member’s NetID in the Enter the object names to select field. You can add multiple users by separating their NetIDs with semicolons:
-
Click Check Names to ensure accuracy and then click OK.
Tips for searching
In step 3 (above), when looking for groups, searching for “training” yields no results. Searching “doit” yields too many results. You will need to know the name of the group you are searching for to add members to it.
If you do not know the name, you can find the group name in the properties of a Shared Department Folder you already have access to:
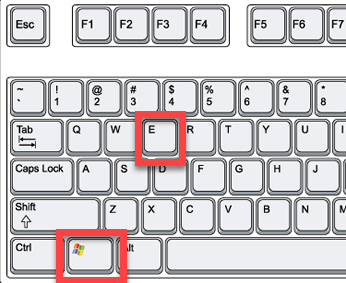
- Open This PC (Windows 10) or Computer (Windows 7) in File Explorer, by holding down the Windows button on your keyboard and tapping “E”:
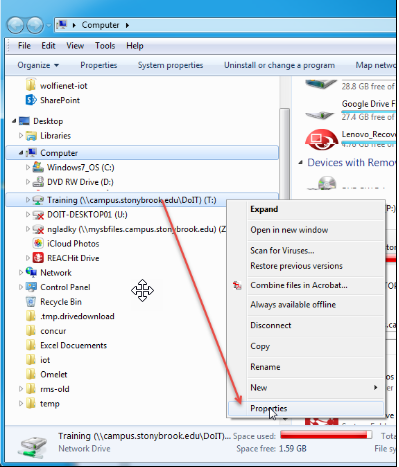
- Look for the Shared Department Folder, right-click on it and click Properties:
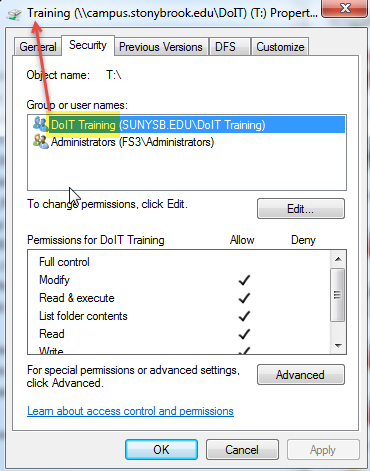
- Click the Security tab. Here you will see a list of Groups that have access to the folder. For example, the image below shows that the group DoIT Training and another group called Administrators have access to the “Training...” folder.
- Use the correct spelling you see listed under Groups or user names for step 3 (searching for groups) in the documentation above.