This KB Article References:
PeopleSoft
This Information is Intended for: Staff
Last Updated: August 11, 2020
Average Rating: Not Rated
This Information is Intended for: Staff
Last Updated: August 11, 2020
Average Rating: Not Rated
Your feedback is important to us, help us by logging in to rate this article and provide feedback.
Before adding someone to PeopleSoft (for pre-employment or non-employee), always begin with Search/Match. Using Search/Match checks existing PeopleSoft entries to determine whether the person you want to add already exists in the database, which may be true for the following reasons:
- They are/were an active employee at the university, UHMC or Long Island State Veterans Home
- They are/were a student of the university
- They are/were an “affiliate” of the university (i.e., volunteer, temporary worker, visitor, etc.)
Correctly using Search/Match will prevent creation of duplicate entries for a single person. It is also very helpful to ask the person you are entering whether he/she ever did anything at the university.
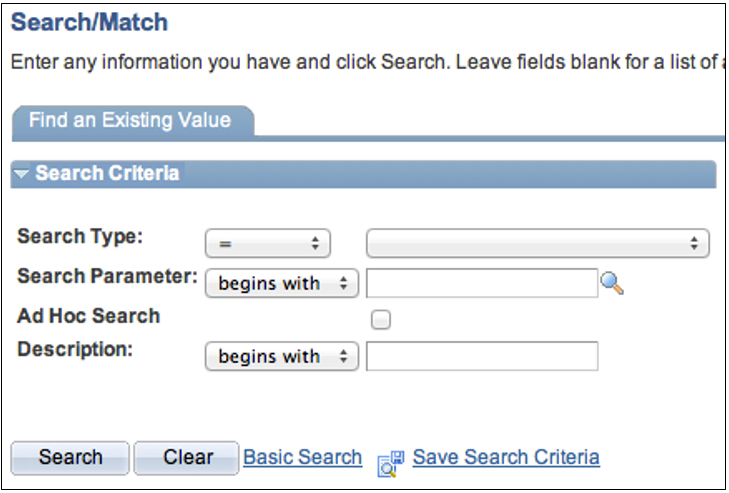
Finding the Search/Match Page in PeopleSoft
From within PeopleSoft, click on Main Menu > Campus Community > Personal Information > Search/Match
Using Search/Match
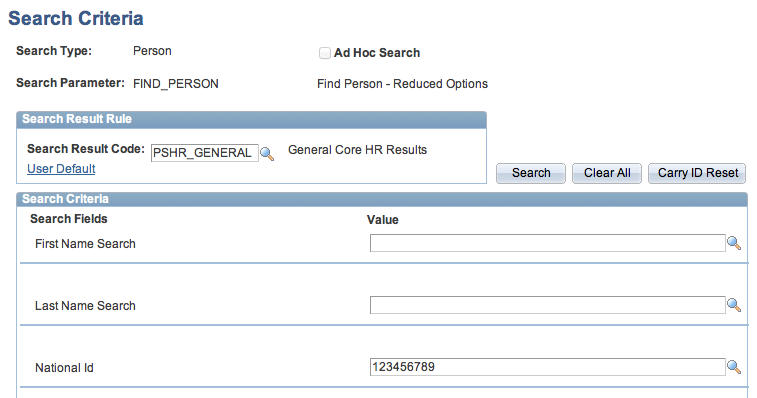
- In the initial Search/Match Search Criteria page, do not enter anything; just click Search
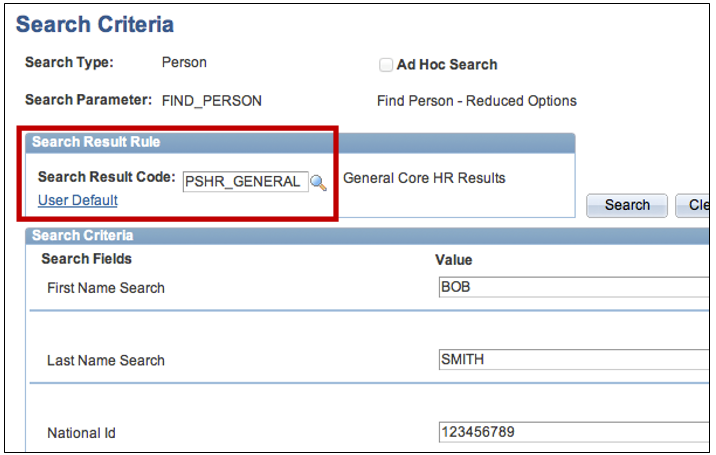
- If this is your first time using Search Match and the Search Result Code text box is empty
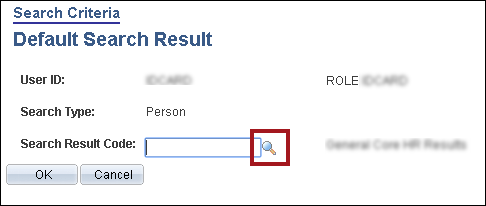
- Click the User Default link. (You only need to do this once. Next time you visit this page the Search Result Code will automatically be selected.)
- click the Magnifying glass
 Look up button
- And click on the Search Result Code (e.g., PSHR_GENERAL as in the image)
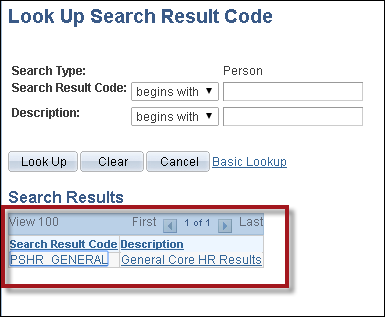
- Click OK when finished
- Click the User Default link. (You only need to do this once. Next time you visit this page the Search Result Code will automatically be selected.)
- On the Search Criteria, search in two steps:
- First, type in National ID (e.g., Social Security number but numbers only, no hyphens) in the National ID box (leave all other values empty), hit tab on the keyboard, and then click Search
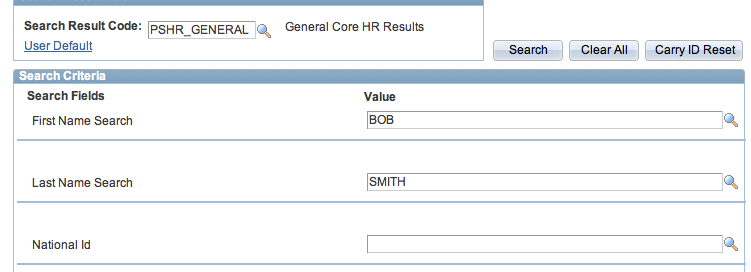
- If there are no results, enter First Name and Last Name (leaving National ID empty and hitting tab after each), and then click Search
- First, type in National ID (e.g., Social Security number but numbers only, no hyphens) in the National ID box (leave all other values empty), hit tab on the keyboard, and then click Search
- If you find a match(es), you may see the same person listed multiple times - once for each name type. Click the Results2 and Additional Information tabs to view more details (e.g., Date of Birth, Gender, Relations With Institution)

- If you find a matching value(s), click on the Results2 tab to verify that you have an exact match by comparing the date of birth of the person you are entering with the date of birth of the match.
- If there are no exact matches, you may add your new or non-employee.
- If there is a match, write down (or copy) the Empl ID to use in other areas of PeopleSoft (for example, to add the person for Pre Employment or update his/her personal information, you’ll need the existing EmplID to do so).
- Alternatively, click Return to Search Criteria to search for another person.
Learn More
Watch this video for more