This Information is Intended for: Clubs, Faculty, Guests
Last Updated: November 21, 2022
Average Rating: Not Rated
When your NetID is deactivated you will lose access to all of your Google accounts, including your YouTube account. You can download your YouTube account information before deactivation and reupload it to a personal account.
There are two methods to transfer your account information: You can download all of your account information and all your videos with Google Takeout , or you can pick and choose which videos you want to download through YouTube.
It is illegal to download/upload videos that contain copyrighted content. Only download videos from your own account.
Google Takeout
Your Takeout archive will be a ZIP file that will include your videos (in their original format), subscriptions, playlists, and favorites.
Note: Google has not yet implemented a way to easily transfer subscriptions, playlists, and favorites between accounts. Subscriptions are exported as .OPML files, playlists and favorites are exported as .JSON files. These files cannot be transferred to a new account. To move subscriptions, playlists, and favorites you will have to open the OPML/JSON file in an online editor, view the information, and manually add videos to playlists/resubscribe to channels.
- If you are currently signed into a personal Google account, sign out
- Go to Google Takeout
- Sign in with your @stonybrook.edu email address and NetID password
- Uncheck all of the archives except for YouTube
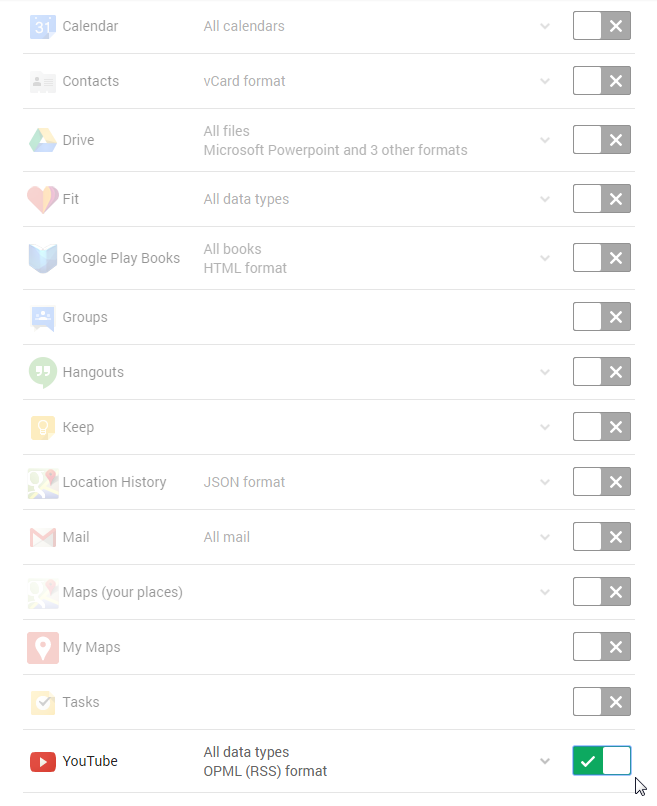
- If you are downloading all of your account information, leave the settings as is - otherwise click on YouTube, then "Select Specific Data" and check what information you want to archive

- Click "Next"
- Leave the settings as they are, click on "Create Archive"
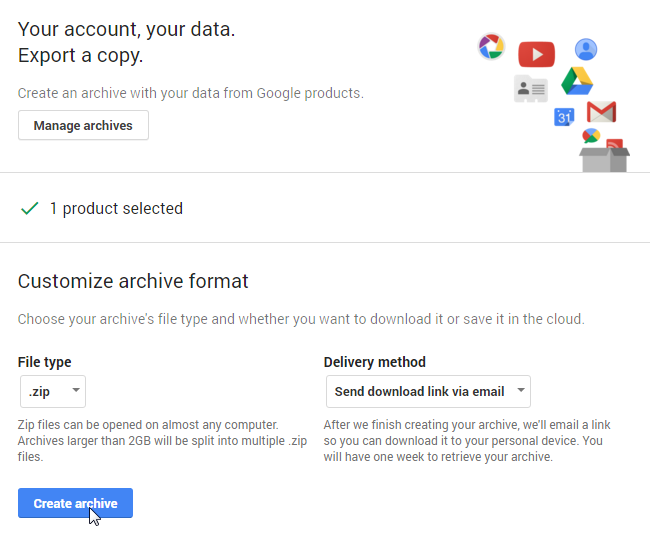
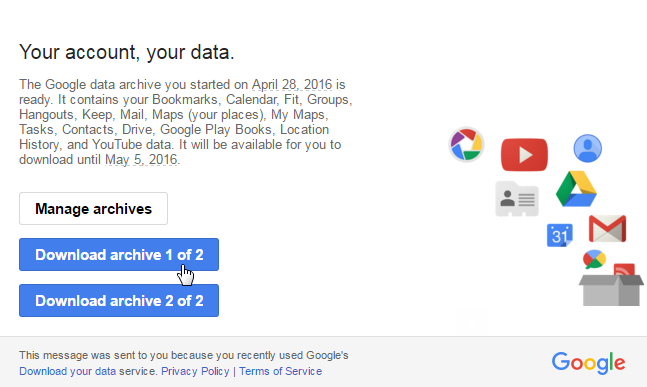
- A ZIP file will be emailed to you containing all of your information (Note: if your archive contains a large amount of data then it might take hours, even days to create)
- Click the links in the email and follow the instructions to download your archive, it's important to do this step soon after your receive the email, as Google will delete the archive after a week
- Extract the ZIP file
- Sign into YouTube under your personal account and reupload your videos
Through YouTube
This method is best for users who are only downloading a few videos - or for users who want to pick and choose which videos they download. Note: Videos will be downloaded as an MP4 regardless of their original format.
- Log into the YouTube account (you own) that contains the videos you want to move.
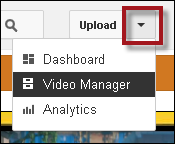
- Click the downpointing arrow ▼ next to the Upload button in the middle of your screen.
- Click Video Manager.
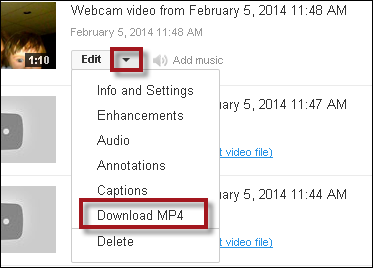
- Find the video you want to move and then click on the downpointing arrow ▼ next to the Edit button.
- Click Download MP4.
- By default anything you download from a browser should automatically go to a Downloads folder.
- Repeat steps 4 & 5 for all videos you want to move.
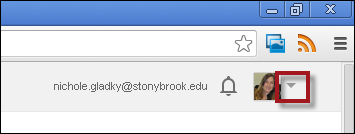
- Now switch accounts by going to the top right of the screen and clicking the downpointing arrow next to your email address.
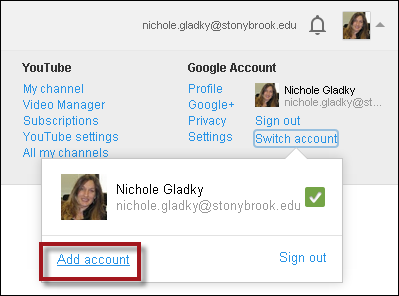
- Then click Switch Account:

- Click Add Account.
- Either Choose an Account listed or click on Add Account.
- If you need to add the account type in the user name and password of a personal gmail account.
- If the account you need to add is your Stony Brook Google Apps account, enter your Stony Brook email address and then click Sign in.
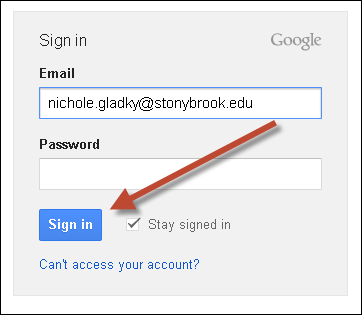
- Then enter your NetID and NetID password into the Single Sign on page. You will be redirected back to YouTube.
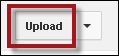
- Now upload the video to this account by clicking the Upload button (not the downpointing arrow):
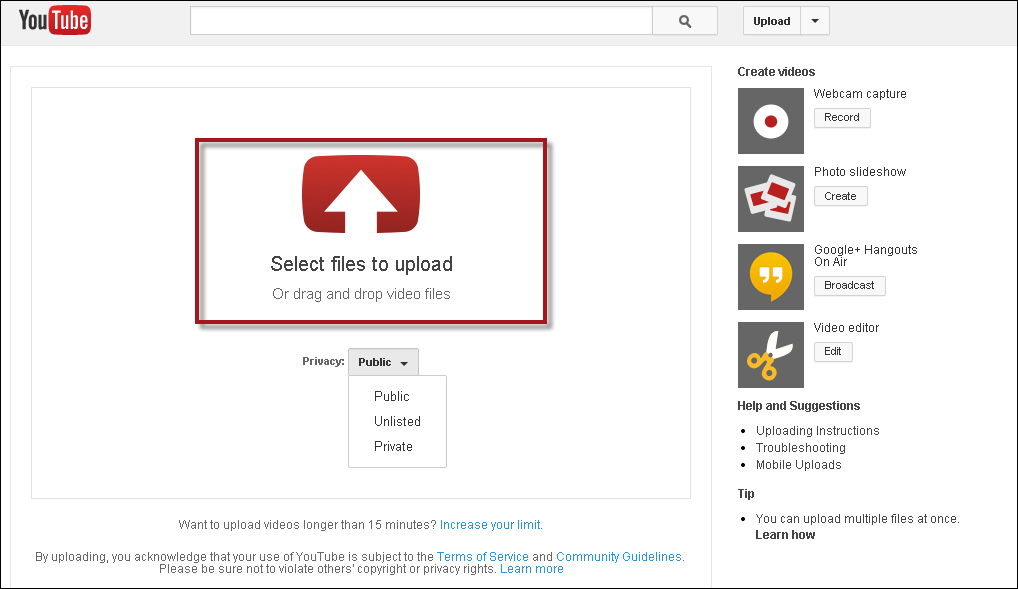
- Then click Select files to upload and choose your privacy options:
- Public - anyone can search for and view the video
- Unlisted - anyone who has the URL can view the video. Video cannot be searched for.
- Private - users need to log in and be given special permission to view the video.
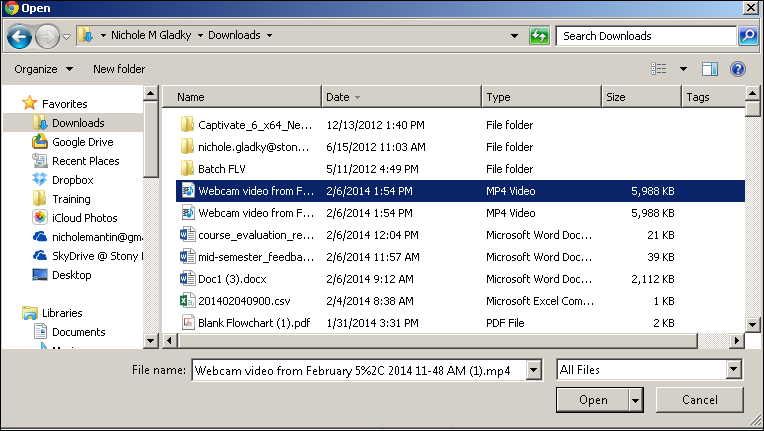
- *Navigate to the Downloads folder on your computer. Select the video to upload and then click Open:
- Then click Publish when Processing is Done:
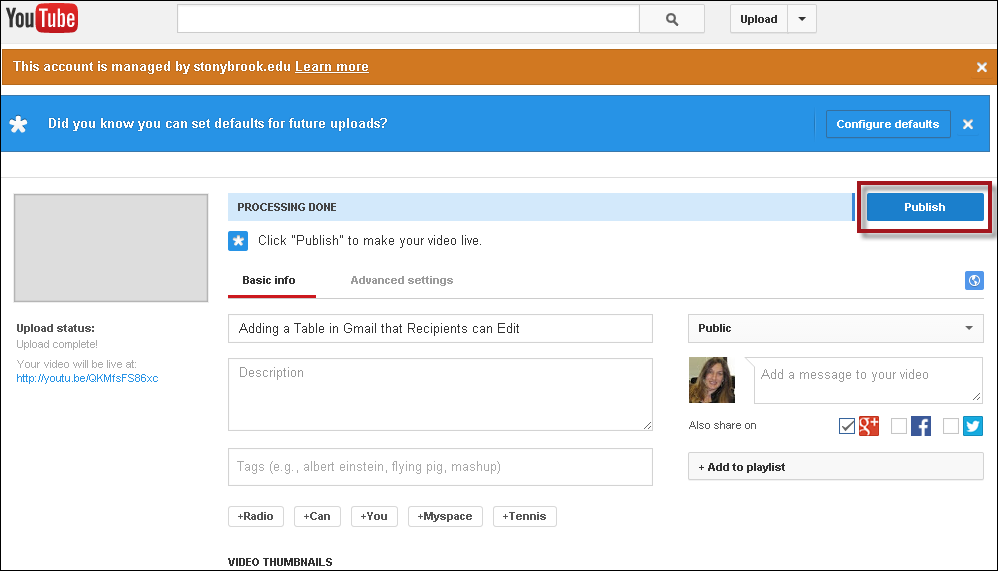
- You can then click on the link to your video to view as well as copy the link and paste on to a website, email, Blackboard, etc.
