This Information is Intended for: Clubs, Faculty, Staff, Students, Teaching Assistants
Last Updated: October 21, 2020
Average Rating: Not Rated
There are two types of editing in Google Sites: page specific and overall edits. That is, page-specific changes (adding text or an in-text image, inserting a Google Doc, etc.) and overall changes (modifying the header, footer, navigation, fonts, and other elements that appear on all pages) are done using different tools in Google Sites.
Edit a page or edit your entire site.
Edit a page of a Google Site
adding an in-text image or text, inserting a Google Doc, etc.
Step 1
Access your Google Site by signing in to sites.google.com and clicking on the site you wish to edit.
Step 2
Click on the edit page pencil icon in the top right corner to access the page-edit options:

The menus (Insert, Format, Table, Layout) will allow you to
- Insert: add images, links, lines, calendars, Google Docs, maps, gadgets, and more
- Format: format text as headings, strikethrough, super- or subscript, or code and change alignment
- Table: insert a table, add and remove columns and rows
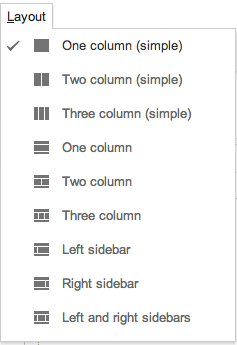
- Layout: change page layout to one of several options
Use the WYSIWYG (what you see is what you get) editor to
- change font type, size, bold/italics/underline, color, and text background color
- add links
- make numbered or bulleted points
- indent/unindent items
- remove formatting (Tx)
- modify <HTML>
Step 3
Click Save to save and view changes.
Step 4
Access more page options by clicking on the settings gear (top right); options include:
- Revision history: allows you to revert to a previous version of the page
- Page settings: show/hide page title and links to sub-pages, allow attachments and comments, add page description
- Print page
- Page template options: allow you to create, use, change templates for a page, which can help your website’s pages have a more consistent look
Step 5
Add more pages by clicking on 
Edit Overall Site Settings
header, header logo, footer, navigation, sidebar, overall colors/fonts, background image, etc.
Step 1
Access your Google Site by signing in to sites.google.com and clicking on the site you wish to edit.
Step 2
In the top-right corner, click on the settings gear and then Manage Site.
Manage Site is divided into topics on the left side of the screen, including
- Recent site activity: view recent site changes (especially helpful for sites with 2+ owners/editors)
- Pages: view existing pages and move pages
- Attachments: view, upload, rename, replace attachments
- Page templates: create and manage page templates
- Apps Script: Apps scripts used on site
- Delete items: Deleted content
Only site owners and editors have access to the following:
- General: to modify the Site name or description
- Sharing and Permissions: share your site and/or set who can edit, view, and comment on site/pages
Only site owners have access to the following:
- Themes, Colors, and Fonts: change colors, fonts, background color/images, for header, sidebar, navigation, content area, gadgets, and background and change site theme (e.g., color palette)
Step 3
Click Preview (if applicable) to view changes and/or Save to save changes made in Manage Site.
Step 4
To return to your site, click on your site’s name just below Manage Site.